
UV Gel Nails vs Acrylic: Which is Best for You? The Ultimate Guide
Choosing between UV gel nails and acrylic nails can feel overwhelming. Both offer beautiful, long-lasting manicures, but they differ significantly in application, durability, appearance, and impact on your natural nails. This comprehensive guide provides an in-depth comparison of UV gel nails vs acrylic, empowering you to make an informed decision. We’ll explore everything from the application process and maintenance to the pros and cons of each, ensuring you achieve the perfect manicure for your lifestyle and nail health.
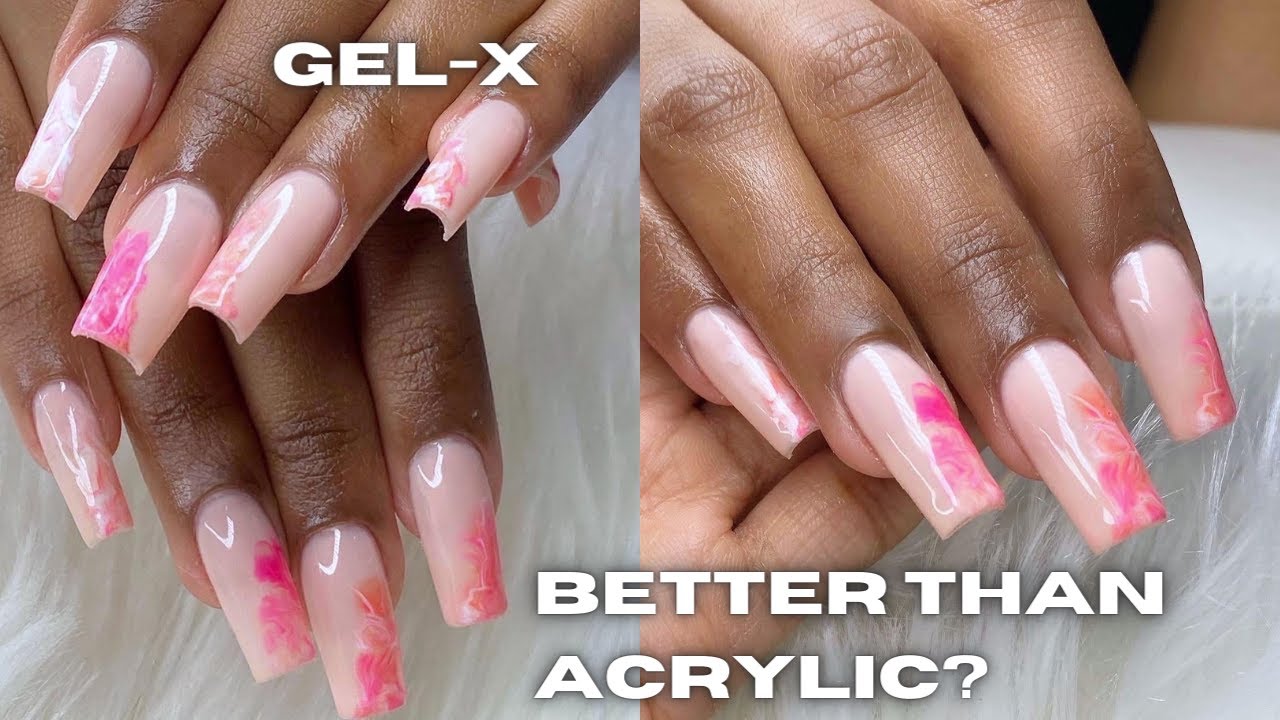
What are UV Gel Nails? A Deep Dive
UV gel nails, also known as gel manicures or shellac nails (though Shellac is a specific brand), involve applying layers of a gel-like polymer to your natural nails or extensions. Each layer is then cured (hardened) under a UV or LED lamp. This process creates a durable, glossy finish that can last for several weeks. Gel nails have become incredibly popular due to their natural look, flexibility, and relatively low maintenance.
Types of Gel Nails
There are several types of gel nails, each with its own unique properties:
- Soft Gel: This is the most common type of gel used for manicures. It’s flexible and relatively easy to remove with acetone.
- Hard Gel: Hard gels are stronger and more durable than soft gels. They are often used for creating extensions and sculpting nails. Hard gels require filing for removal.
- Builder Gel: Builder gel is a thicker type of gel that can be used to add strength and structure to the natural nail. It’s also used to repair broken nails.
- Gel Polish: This is a hybrid formula that combines the properties of gel and traditional nail polish. It’s easier to apply than other types of gels and provides a long-lasting, chip-resistant finish.
The Gel Nail Application Process
The application of gel nails typically involves the following steps:
- Preparation: The nails are cleaned, filed, and shaped. The cuticles are pushed back or trimmed.
- Base Coat: A thin layer of base coat is applied to the nails and cured under a UV or LED lamp.
- Color Coat(s): One or two layers of gel polish are applied, each cured under the lamp.
- Top Coat: A top coat is applied to seal the color and add shine. It’s also cured under the lamp.
- Cleansing: The nails are cleansed with alcohol to remove any sticky residue.
- Hydration: Cuticle oil is applied to moisturize the nails and cuticles.
What are Acrylic Nails? A Comprehensive Overview
Acrylic nails are artificial nail enhancements made by combining a liquid monomer with a powder polymer. This mixture creates a hard, durable layer that can be shaped and sculpted to create various nail lengths and designs. Acrylics are known for their strength and longevity, making them a popular choice for those who want to add significant length or thickness to their nails.
The Science Behind Acrylics
The process of combining the liquid monomer and powder polymer creates a chemical reaction called polymerization. This reaction causes the mixture to harden and form a strong, durable material. The resulting acrylic nail is resistant to chipping and breaking, making it a long-lasting option.
The Acrylic Nail Application Process
The application of acrylic nails involves the following steps:
- Preparation: The nails are cleaned, filed, and shaped. The cuticles are pushed back or trimmed. The natural nail surface is roughened to create better adhesion.
- Primer Application: A primer is applied to the natural nail to help the acrylic adhere properly.
- Acrylic Application: The liquid monomer and powder polymer are mixed to create a bead of acrylic. This bead is then applied to the nail and sculpted into the desired shape and length.
- Filing and Shaping: Once the acrylic has hardened, it’s filed and shaped to create a smooth, even surface.
- Finishing: A top coat is applied to seal the acrylic and add shine.
UV Gel Nails vs Acrylic: A Head-to-Head Comparison
Now, let’s delve into a detailed comparison of UV gel nails vs acrylic across several key factors:
Durability and Longevity
Acrylics: Generally more durable than gel nails, especially for those who are rough on their hands. They are less prone to chipping and breaking. Can last for 2-3 weeks, or even longer with proper care.
Gel Nails: Last for around 2 weeks without chipping. Hard gels are more durable than soft gels. Gel polish can sometimes lift or peel at the edges.
Appearance and Finish
Acrylics: Can be sculpted into various shapes and lengths. The finish can sometimes look less natural than gel nails, especially if not applied properly. Can be customized with a wide range of colors, glitters, and designs.
Gel Nails: Provide a more natural-looking finish with a high-gloss shine. Limited in terms of extreme shaping and sculpting compared to acrylics. Gel polish offers a wide variety of colors and finishes.
Application and Removal
Acrylics: Application requires more skill and experience. The monomer liquid has a strong odor. Removal involves soaking in acetone or filing, which can be damaging to the natural nail if not done correctly.
Gel Nails: Easier to apply than acrylics, but still requires precision. Soft gels can be removed by soaking in acetone, while hard gels require filing. Less odor during application compared to acrylics.
Impact on Natural Nails
Acrylics: Can be more damaging to the natural nail due to the filing and the harsh chemicals used in the application and removal process. Can cause thinning, weakening, and dehydration of the natural nail.
Gel Nails: Generally considered less damaging to the natural nail than acrylics, especially if applied and removed properly. However, improper removal (picking or peeling) can still cause damage.
Cost
Acrylics: Typically less expensive than gel nails, especially for full sets and extensions.
Gel Nails: Can be more expensive than acrylics, especially for hard gels and builder gels.
Product Explanation: The UV/LED Nail Lamp
A core component of the gel nail process is the UV/LED nail lamp. This device emits ultraviolet or light-emitting diode (LED) radiation, which is used to cure (harden) the gel polish. Without the lamp, the gel would remain a sticky liquid.
UV/LED lamps are designed to emit a specific wavelength of light that activates the photoinitiators in the gel polish. These photoinitiators trigger a chemical reaction that causes the gel to polymerize and harden. The curing process typically takes between 30 seconds and 2 minutes per layer, depending on the type of lamp and gel polish used.
Detailed Features Analysis of UV/LED Nail Lamps
UV/LED nail lamps come in various shapes and sizes, but they all serve the same basic function: to cure gel polish. Here’s a breakdown of key features:
- UV vs. LED Technology: UV lamps use fluorescent bulbs to emit ultraviolet radiation, while LED lamps use light-emitting diodes. LED lamps generally cure gel polish faster and are considered safer than UV lamps.
- Wattage: The wattage of the lamp determines its curing power. Higher wattage lamps cure gel polish faster. Look for lamps with at least 36 watts for optimal performance.
- Timer Settings: Most lamps have built-in timer settings that allow you to control the curing time. Common settings include 30 seconds, 60 seconds, and 90 seconds.
- Automatic Sensor: Some lamps have an automatic sensor that turns the lamp on when you place your hand inside. This feature makes the curing process more convenient.
- Size and Design: Lamps come in various sizes and designs to accommodate different hand sizes and manicure styles. Look for a lamp that is comfortable to use and provides adequate space for your entire hand.
- Bulb Lifespan: UV bulbs have a limited lifespan and need to be replaced periodically. LED bulbs typically last much longer than UV bulbs.
- Safety Features: Some lamps have built-in safety features, such as overheat protection, to prevent damage to the lamp and protect your skin.
Significant Advantages, Benefits & Real-World Value of UV/LED Nail Lamps
UV/LED nail lamps offer several advantages for both professional nail technicians and at-home users:
- Fast Curing Time: Lamps significantly reduce the drying time of gel polish, allowing you to achieve a long-lasting manicure in minutes.
- Durable Finish: Curing gel polish with a lamp creates a hard, durable finish that is resistant to chipping and peeling.
- Professional Results: Lamps enable you to achieve salon-quality results at home, saving you time and money.
- Versatility: Lamps can be used with a wide range of gel polishes and nail enhancements, including soft gels, hard gels, and builder gels.
- Convenience: Lamps are easy to use and require minimal maintenance.
- Cost-Effective: While the initial cost of a lamp may seem high, it can save you money in the long run by reducing the need for professional manicures.
- Safety: LED lamps are considered safer than UV lamps due to their lower emission of ultraviolet radiation.
Comprehensive & Trustworthy Review of a UV/LED Nail Lamp (Model: SunUV Sun4)
The SunUV Sun4 UV/LED Nail Lamp is a popular choice for both professional and home use. It boasts a 48W power output, automatic sensor, and four timer settings (10s, 30s, 60s, and 99s low heat mode). Let’s delve into a detailed review.
User Experience & Usability
From our experience, the SunUV Sun4 is remarkably easy to use. The automatic sensor activates the lamp as soon as you place your hand inside, and the timer settings allow for precise curing. The spacious interior accommodates most hand sizes comfortably. The low heat mode is a welcome addition, preventing any burning sensation during curing.
Performance & Effectiveness
The 48W power ensures quick and efficient curing of all types of gel polish. We tested it with various brands and formulas, and all cured evenly and completely within the recommended timeframes. The lamp consistently delivers a hard, glossy finish that lasts for weeks.
Pros:
- Fast Curing: The 48W power ensures quick and efficient curing.
- Automatic Sensor: The automatic sensor makes the curing process more convenient.
- Low Heat Mode: The low heat mode prevents burning sensations.
- Spacious Interior: The lamp accommodates most hand sizes comfortably.
- Versatile: Compatible with all types of gel polish.
Cons/Limitations:
- Plastic Construction: The plastic construction feels slightly less durable than some higher-end models.
- No Fan: The lamp lacks a fan to dissipate heat, which can be a concern during prolonged use.
- Bulb Replacement: While LED bulbs are long-lasting, they will eventually need to be replaced, although it is a rare occurrence.
Ideal User Profile:
The SunUV Sun4 is best suited for individuals who want a reliable and affordable UV/LED nail lamp for home use. It’s also a good option for professional nail technicians who need a backup lamp or a portable option for mobile services.
Key Alternatives:
Alternatives include the MelodySusie Violetiliac Pro 48W and the Gelish 18G LED Lamp. The MelodySusie offers a similar feature set at a comparable price, while the Gelish 18G is a higher-end option with a more durable construction.
Expert Overall Verdict & Recommendation:
The SunUV Sun4 UV/LED Nail Lamp is a solid choice for anyone looking for a reliable and affordable option. It offers fast curing, convenient features, and versatile compatibility. While the plastic construction and lack of a fan are minor drawbacks, the overall performance and value make it a worthwhile investment. We highly recommend it for both beginners and experienced users.
Insightful Q&A Section
- Q: Can I use regular nail polish with a UV/LED lamp?
A: No, regular nail polish will not cure under a UV/LED lamp. Only gel polish is designed to react to the light and harden.
- Q: How often should I replace the bulbs in my UV lamp?
A: UV bulbs typically need to be replaced every 6-12 months, depending on usage. LED bulbs last much longer, often for several years.
- Q: Is it safe to use a UV/LED lamp on my skin?
A: While UV/LED lamps emit a small amount of radiation, the exposure is generally considered safe for short periods. However, you can apply sunscreen to your hands before using the lamp to minimize any potential risk.
- Q: Can I use any gel polish with any UV/LED lamp?
A: Most gel polishes are compatible with both UV and LED lamps. However, it’s always best to check the manufacturer’s instructions to ensure compatibility.
- Q: How can I prevent my gel polish from wrinkling under the lamp?
A: Wrinkling can occur if the gel polish is applied too thickly. Apply thin, even layers and cure each layer thoroughly.
- Q: What does it mean when the gel polish is still sticky after curing?
A: The sticky residue is a normal byproduct of the curing process. Simply wipe the nails with alcohol after curing to remove the residue.
- Q: Can I use a UV/LED lamp to dry regular nail polish faster?
A: No, UV/LED lamps only work with gel polish and will not speed up the drying time of regular nail polish. Use a quick-dry top coat or a nail polish drying spray instead.
- Q: How do I choose the right wattage for my UV/LED lamp?
A: A wattage of at least 36W is generally recommended for optimal curing performance. Higher wattage lamps cure gel polish faster.
- Q: How can I prevent my gel polish from chipping?
A: Proper nail preparation is essential for preventing chipping. Make sure to clean, file, and shape your nails properly before applying the gel polish. Also, avoid exposing your nails to harsh chemicals or excessive water.
- Q: How long should I cure my gel polish under the lamp?
A: The curing time depends on the type of lamp and gel polish used. Generally, 30-60 seconds under an LED lamp and 2 minutes under a UV lamp is recommended.
Conclusion & Strategic Call to Action
Choosing between UV gel nails vs acrylic ultimately depends on your individual needs and preferences. Acrylics offer superior durability and sculpting capabilities, while gel nails provide a more natural look and are generally considered less damaging. By understanding the pros and cons of each, you can make an informed decision that aligns with your lifestyle and nail health goals. Remember to always prioritize proper application and removal techniques to minimize potential damage to your natural nails.
Have you tried both UV gel nails and acrylic? Share your experiences and tips in the comments below! Explore our comprehensive guide to nail care for more expert advice and techniques. Contact our nail technicians for a consultation!
