
Unlocking Creativity: A Comprehensive Guide on How to Paint Fabric with Acrylic Paint
Introduction: The Versatility of Acrylics on Fabric
Acrylic paint, celebrated for its vibrancy, durability, and ease of use, isn’t just for canvases and paper anymore. Its adaptability extends beautifully to fabric, opening up a world of possibilities for customizing clothing, home decor, and accessories. Whether you’re looking to breathe new life into an old t-shirt, create unique wall art, or personalize a tote bag, acrylic paint can be your go-to medium. However, painting on fabric is different from painting on other surfaces. It requires careful preparation, the right techniques, and proper sealing to ensure the design lasts and the fabric remains flexible and washable.
This comprehensive guide will walk you through every step of painting fabric with acrylics, from selecting the right materials to mastering essential techniques and ensuring your masterpiece withstands the test of time (and washing machines!). Let’s dive in and unleash your inner artist!
Choosing the Right Materials: Setting Yourself Up for Success
The success of your fabric painting project hinges on selecting the appropriate materials. Here’s a breakdown of what you’ll need:
1. Fabric Selection: The Foundation of Your Artwork
Not all fabrics are created equal when it comes to accepting acrylic paint. Natural fibers like cotton, linen, and hemp are generally the best choices. These fabrics have a more porous texture that allows the paint to adhere well. Avoid synthetic fabrics like polyester or nylon, as they are less absorbent and may cause the paint to crack or peel. If you must use a synthetic blend, pre-washing the fabric can help remove any sizing or finishes that might interfere with paint adhesion.
2. Acrylic Paint: Quality Matters
While any acrylic paint can technically be used on fabric, artist-grade acrylics are generally recommended for their higher pigment concentration and lightfastness. Student-grade acrylics can work in a pinch, but they may require more coats to achieve the desired vibrancy. Fabric-specific acrylic paints are also available, formulated to be more flexible and washable than standard acrylics. These are an excellent choice for garments or items that will be laundered frequently. Consider getting a fabric medium to mix with your acrylics if you don’t want to purchase fabric-specific acrylic paints.
3. Fabric Medium: Enhancing Paint Performance
Fabric medium is a crucial additive that transforms regular acrylic paint into a flexible and washable formula suitable for fabric. It thins the paint, allowing it to penetrate the fibers more easily, and improves its adhesion and durability. When mixed with acrylic paint according to the manufacturer’s instructions, fabric medium helps prevent cracking, peeling, and fading, ensuring your design remains vibrant and intact after washing.
4. Brushes: The Tools of Your Trade
The type of brushes you use will depend on the type of design you are going for. Synthetic brushes are generally preferred for acrylic paint as they are more durable and easier to clean than natural brushes. Choose a variety of brush sizes and shapes to accommodate different details and techniques. Flat brushes are great for covering large areas, while round brushes are ideal for fine lines and details. Consider using stencil brushes for applying paint through stencils.
5. Stencils (Optional): For Precision and Repetition
Stencils can be a lifesaver if you’re aiming for precise shapes, intricate patterns, or repetitive designs. They come in a wide variety of materials, from reusable plastic stencils to disposable paper stencils. Secure the stencil to the fabric with painter’s tape or stencil adhesive to prevent it from shifting during painting.
6. Painter’s Tape: Creating Clean Lines
Painter’s tape is your best friend for creating crisp, clean lines and preventing paint from bleeding onto unwanted areas. Use it to mask off sections of fabric, create geometric patterns, or define the edges of your design.
7. Palette: Organizing Your Colors
A palette is essential for mixing and organizing your paints. A plastic palette or a disposable paper palette are both good options. Keep a spray bottle of water nearby to prevent the paint from drying out on the palette.
8. Iron: Setting the Paint
An iron is crucial for heat-setting the paint and making it permanent. Use a dry iron on a medium setting to heat-set your design after it has completely dried.
9. Other Useful Supplies:
- Water container for rinsing brushes
- Paper towels for blotting paint and cleaning up spills
- Pencil or fabric marker for sketching your design
- Cutting mat or cardboard to protect your work surface
- Pins or clips to secure the fabric
Preparing Your Fabric: A Crucial First Step
Proper preparation is key to achieving a professional-looking result. Follow these steps to prepare your fabric before painting:
1. Pre-Washing: Removing Sizing and Finishes
Always pre-wash your fabric to remove any sizing, finishes, or oils that might interfere with paint adhesion. Wash the fabric in warm water with a mild detergent and dry it completely before painting. Avoid using fabric softener, as it can leave a residue that repels paint.
2. Ironing: Creating a Smooth Surface
Iron the fabric to create a smooth, wrinkle-free surface for painting. This will ensure that the paint applies evenly and prevent it from bleeding into creases or folds.
3. Stretching or Securing the Fabric: Preventing Movement
Stretch the fabric over a frame or secure it to a flat surface using pins or clips. This will prevent the fabric from shifting or wrinkling during painting, ensuring a clean and precise design. You can use an embroidery hoop for smaller projects or a large canvas stretcher for larger pieces of fabric.
4. Sketching Your Design (Optional): Guiding Your Brush
If you have a specific design in mind, sketch it lightly onto the fabric using a pencil or fabric marker. This will serve as a guide for your painting and help you achieve the desired result. Be sure to use a light touch, as heavy lines may be difficult to cover with paint.
Painting Techniques: Mastering the Art of Acrylic on Fabric
Now that you’ve gathered your materials and prepared your fabric, it’s time to start painting! Here are some essential techniques to help you create stunning designs:
1. Base Coating: Creating a Foundation
If you’re painting a light color onto a dark fabric, consider applying a base coat of white or light-colored paint first. This will help the colors pop and prevent the dark fabric from showing through. Allow the base coat to dry completely before applying subsequent layers.
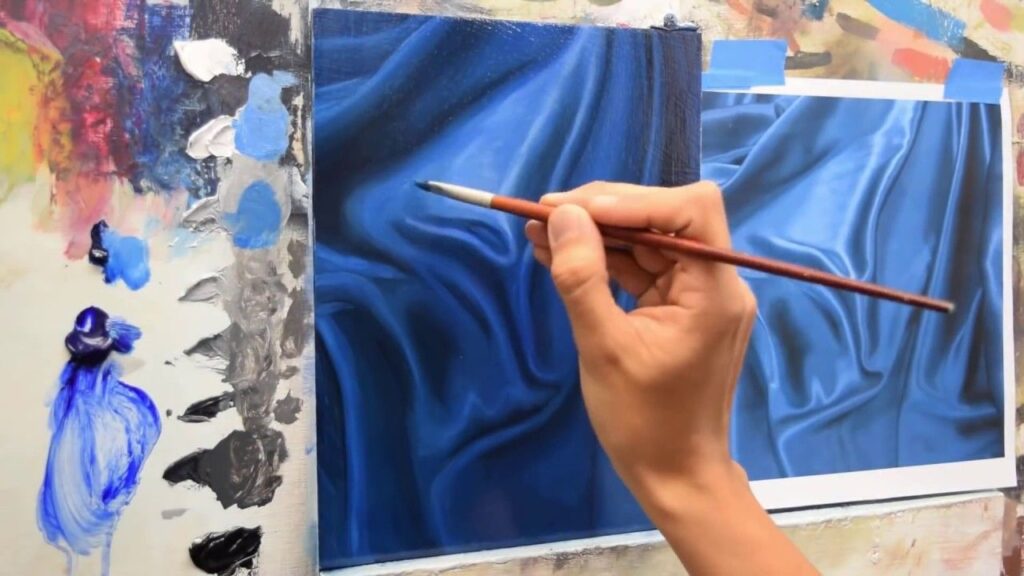
2. Layering: Building Depth and Dimension
Layering is a technique of applying thin, translucent layers of paint on top of each other to create depth, dimension, and subtle color variations. Allow each layer to dry completely before applying the next. This technique is particularly effective for creating realistic shading and highlights.
3. Dry Brushing: Creating Texture
Dry brushing involves using a brush with very little paint on it to create a textured effect. Dip the brush into the paint, then blot off most of the paint onto a paper towel. Lightly drag the brush across the fabric, allowing the bristles to skip and create a broken, textured appearance. This technique is great for adding highlights, creating a weathered look, or simulating the texture of fur or grass.
4. Stenciling: Achieving Precision
Secure the stencil to the fabric with painter’s tape or stencil adhesive. Use a stencil brush or a sponge to apply the paint through the stencil openings. Use a dabbing motion rather than a brushing motion to prevent the paint from bleeding under the stencil. Remove the stencil carefully while the paint is still wet.
5. Blending: Creating Smooth Transitions
Blending involves seamlessly merging two or more colors together to create a smooth transition. Apply the colors next to each other on the fabric, then use a clean, damp brush to blend the edges together. Work quickly while the paint is still wet.
6. Detailing: Adding the Finishing Touches
Use fine-tipped brushes to add intricate details, outlines, and embellishments to your design. Take your time and work carefully to achieve the desired level of precision.
Heat-Setting and Sealing: Ensuring Longevity
Heat-setting is a crucial step in making your acrylic paint design permanent and washable. Once the paint is completely dry (usually after 24-48 hours), turn the fabric inside out and iron it on a medium setting for 3-5 minutes. Use a pressing cloth between the iron and the fabric to protect the design. This process helps to bond the paint to the fabric fibers, making it more resistant to washing.
While heat-setting provides good protection, consider using a fabric sealant for added durability, especially for items that will be washed frequently. Apply the sealant according to the manufacturer’s instructions. Some sealants are sprayed on, while others are brushed on.
Caring for Your Painted Fabric: Keeping Your Art Alive
To keep your painted fabric looking its best, follow these care instructions:
- Wash the fabric inside out in cold water on a gentle cycle.
- Use a mild detergent.
- Avoid using bleach or fabric softener.
- Tumble dry on low or hang to dry.
- Iron inside out on a medium setting.
Troubleshooting: Addressing Common Issues
Even with careful preparation and execution, you may encounter some common issues when painting fabric with acrylics. Here are some solutions:
- Paint cracking or peeling: This is often caused by using too much paint, not using fabric medium, or using the wrong type of fabric. Try using thinner layers of paint, mixing in fabric medium, and choosing natural fiber fabrics.
- Paint fading: This can be caused by using student-grade acrylics or not heat-setting the paint properly. Use artist-grade acrylics and be sure to heat-set the paint according to the instructions.
- Paint bleeding: This can happen when painting on loosely woven fabrics or using too much water. Use painter’s tape to mask off areas and avoid over-wetting the fabric.
- Stiff fabric: This is often caused by using too much paint. Use thin layers of paint and mix in fabric medium to keep the fabric flexible.
Inspiration and Ideas: Fueling Your Creativity
Need some inspiration for your next fabric painting project? Here are a few ideas:
- Custom t-shirts: Design your own unique t-shirts with original artwork, favorite quotes, or band logos.
- Personalized tote bags: Create one-of-a-kind tote bags for shopping, school, or travel.
- Decorative pillows: Add a personal touch to your home decor with hand-painted pillows.
- Wall art: Create stunning fabric wall hangings with abstract designs, landscapes, or portraits.
- Upcycled clothing: Breathe new life into old jeans, jackets, or dresses with creative paint designs.
Conclusion: Unleash Your Creative Potential
Painting fabric with acrylic paint is a rewarding and versatile art form that allows you to express your creativity and personalize your belongings. By following the tips and techniques outlined in this guide, you can create stunning designs that are both beautiful and durable. So gather your materials, unleash your imagination, and start painting!
