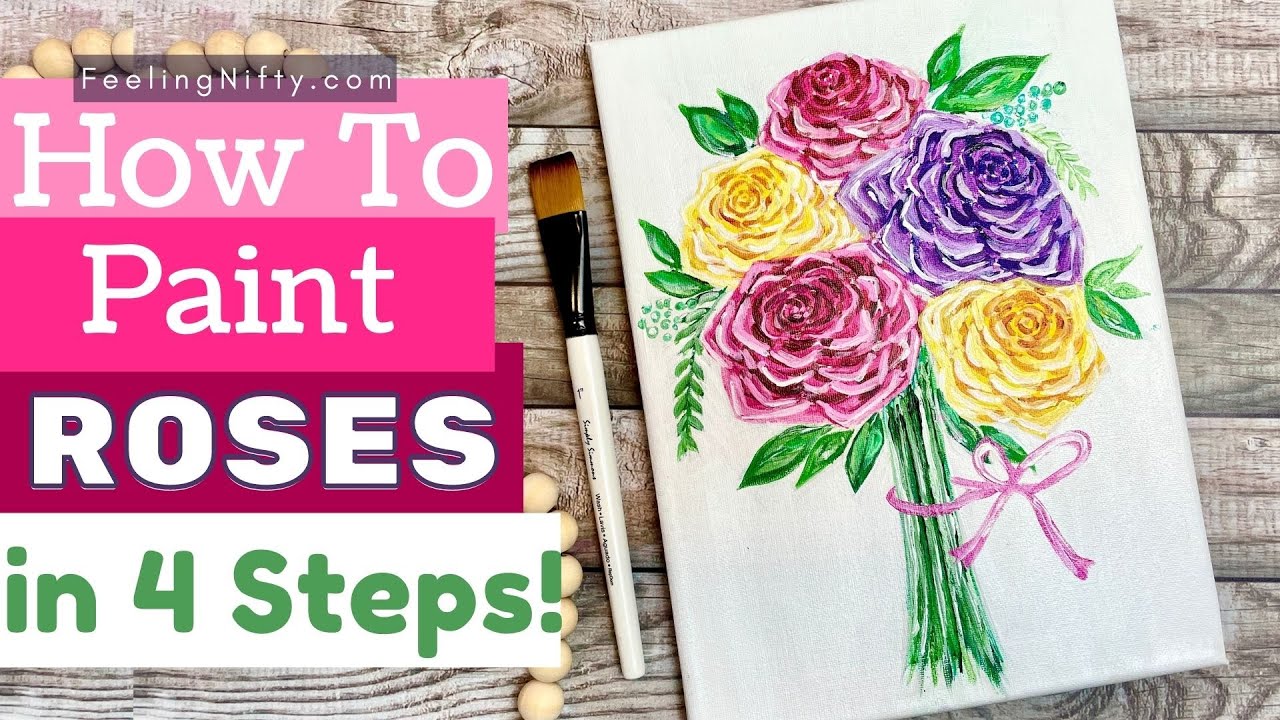

# How to Paint Roses in Acrylic Easy: A Beginner’s Guide to Stunning Blooms
Are you captivated by the beauty of roses and eager to capture their essence on canvas? Do you dream of creating stunning floral artwork but feel intimidated by the complexity of rose petals? This comprehensive guide will demystify the process of how to paint roses in acrylic easy, breaking it down into manageable steps that even beginners can master. We’ll equip you with the knowledge and techniques to confidently create beautiful rose paintings you’ll be proud to display. Unlike other tutorials, we focus on simplified methods without sacrificing the beauty and realism of your roses, drawing from years of artistic experience to offer insights that truly make a difference. By the end of this article, you’ll have a solid foundation in acrylic rose painting, empowering you to explore your artistic potential and create breathtaking floral masterpieces.
## 1. Understanding the Fundamentals of Acrylic Rose Painting
Before diving into the practical steps, let’s explore the core concepts that underpin successful acrylic rose painting. This isn’t just about following instructions; it’s about understanding the ‘why’ behind each technique, enabling you to adapt and innovate.
### 1.1. Acrylic Paint Properties and Benefits
Acrylic paints are water-based, fast-drying, and incredibly versatile, making them ideal for beginners and experienced artists alike. They offer excellent color vibrancy, durability, and the ability to be layered and blended seamlessly. The rapid drying time allows for quick progress, while their water-based nature simplifies cleanup. Acrylics are also more forgiving than oils, allowing for easy corrections and adjustments. Recent advancements in acrylic polymer technology have led to paints with even smoother consistency and enhanced blending capabilities, further simplifying the process of how to paint roses in acrylic easy.
### 1.2. Essential Materials: Gathering Your Artist’s Toolkit
To embark on your rose-painting journey, you’ll need a few essential materials:
* **Acrylic Paints:** A basic set of colors including reds (Crimson, Cadmium Red), pinks (Rose Madder), whites (Titanium White), greens (Sap Green, Viridian), yellows (Cadmium Yellow), and browns (Burnt Umber). Purchasing a starter set of acrylics is a great way to begin.
* **Brushes:** A selection of round, flat, and filbert brushes in varying sizes. Round brushes are ideal for details, flat brushes for broad strokes, and filbert brushes for blending and creating soft edges. Synthetic brushes are a good choice for acrylics, as they are durable and easy to clean.
* **Canvas or Painting Surface:** Stretched canvas, canvas boards, or even heavy-weight watercolor paper can be used. Priming the surface with gesso will create a smooth, receptive base for your paint.
* **Palette:** A palette for mixing your paints. A disposable palette pad or a ceramic plate works well.
* **Water Container:** For cleaning your brushes.
* **Palette Knife (Optional):** Useful for mixing paints and creating textured effects.
* **Easel (Optional):** To hold your canvas at a comfortable angle.
### 1.3. Color Mixing for Realistic Roses
Achieving realistic rose colors requires a basic understanding of color mixing. Start with a limited palette of primary colors (red, yellow, blue) and white. Experiment with mixing different proportions to create a range of rose hues. For example, mixing red and white will produce various shades of pink. Adding a touch of yellow to red will create warmer, more vibrant reds. Understanding color temperature (warm vs. cool) is also crucial. Using cooler reds and pinks for shadows and warmer tones for highlights will add depth and dimension to your roses. Many find that starting with a color wheel helps them to better understand how to mix paints.
## 2. Step-by-Step Guide: How to Paint Roses in Acrylic Easy
Now, let’s dive into the practical steps of painting a simple yet elegant rose in acrylics. This method focuses on building the rose form gradually, layer by layer.
### 2.1. Sketching the Rose Outline
Begin by lightly sketching the basic shape of the rose onto your canvas. Don’t worry about perfection at this stage; focus on capturing the overall form and proportions. A simple spiral or a series of overlapping circles can serve as a starting point. Consider the angle and perspective of the rose. Is it facing forward, sideways, or tilted? The sketch should be a light underdrawing that will be covered by the paint layers.
### 2.2. Blocking in the Base Colors
Next, block in the base colors of the rose petals. Use a diluted wash of your chosen rose color (e.g., a mix of red and white) to lightly fill in the petals. This layer establishes the overall tone and provides a foundation for subsequent layers. Pay attention to the light source and indicate areas of shadow and highlight with slightly darker or lighter washes. For example, if the light source is coming from the left, the right side of the rose will be darker. Use a large brush for this step to cover the canvas quickly and efficiently. Remember, this is just the base, so don’t worry about details yet.
### 2.3. Building Up Layers of Color and Value
Once the base layer is dry, begin building up layers of color and value to create depth and dimension. Use smaller brushes to add details to the petals, such as folds, creases, and variations in color. Gradually darken the shadows and lighten the highlights, paying attention to the form of the petals. Layering is key to achieving a realistic effect. Allow each layer to dry slightly before applying the next to prevent the colors from muddying. Experiment with dry brushing techniques to create texture and subtle variations in tone. This process might take several layers to achieve the desired depth and realism.
### 2.4. Adding Highlights and Shadows
Highlights and shadows are crucial for creating a sense of volume and realism. Use a light color (e.g., white mixed with a touch of your rose color) to add highlights to the areas where the light is hitting the rose. Use a darker color (e.g., your rose color mixed with a touch of brown or black) to deepen the shadows in the areas where the light is blocked. Pay attention to the direction of the light source and ensure that the highlights and shadows are consistent throughout the painting. Soften the edges of the highlights and shadows with a blending brush to create a smooth transition. This is where the rose will really start to take shape.
### 2.5. Refining the Details and Adding Finishing Touches
The final step involves refining the details and adding finishing touches to your rose painting. Use a fine-tipped brush to add delicate details such as veins, edges, and subtle color variations. Step back from your painting periodically to assess your progress and identify areas that need further attention. Consider adding a background to your painting to enhance the overall composition. Once you are satisfied with the details, allow the painting to dry completely and then varnish it to protect the colors and add a glossy finish. This final layer will also bring out the richness of the colors.
## 3. Mastering Rose Petal Techniques
Rose petals are the defining feature of a rose, and capturing their delicate form requires specific techniques.
### 3.1. Understanding Petal Structure and Anatomy
Before you can paint realistic rose petals, it’s essential to understand their structure. Rose petals are not simply flat shapes; they have complex curves, folds, and textures. Observe real roses closely, paying attention to how the petals overlap, curl, and reflect light. Notice the subtle variations in color and tone within each petal. Understanding the anatomy of a rose petal will greatly improve your ability to paint them accurately. Look for references online to help you better understand the structure of a rose.
### 3.2. Simplified Techniques for Painting Overlapping Petals
Painting overlapping petals can seem daunting, but it can be simplified by breaking it down into smaller steps. Start by painting the petals that are in the background, then gradually layer the petals that are in the foreground. Use darker values for the background petals to create a sense of depth. Pay attention to the edges of the petals, softening them where they overlap to create a smooth transition. Use a small brush to add details such as folds and creases to the petals, further enhancing the sense of depth and realism. Remember, patience is key. Take your time and focus on each petal individually.
### 3.3. Creating Realistic Folds and Creases
Folds and creases are essential for creating a sense of volume and texture in rose petals. Use a small brush to add dark shadows to the areas where the petals fold or crease. Use a light color to add highlights to the areas where the petals catch the light. Blend the shadows and highlights with a blending brush to create a smooth transition. Experiment with different techniques to create different types of folds and creases. For example, a sharp, angular crease will create a more dramatic effect than a soft, rounded crease. Practice creating different types of folds and creases on a separate piece of paper before applying them to your painting.
## 4. Choosing the Right Acrylic Paints and Brushes
The quality of your materials can significantly impact the outcome of your rose painting. Choosing the right acrylic paints and brushes is crucial for achieving the desired results.
### 4.1. Exploring Different Acrylic Paint Brands and Qualities
Numerous acrylic paint brands are available, each with its own unique characteristics. Student-grade acrylics are more affordable but may have lower pigment concentration and less vibrant colors. Artist-grade acrylics offer higher pigment concentration, richer colors, and better lightfastness. Experiment with different brands to find the ones that you prefer. Some popular brands include Golden, Liquitex, and Winsor & Newton. Consider the viscosity of the paint as well. Some acrylics are thick and buttery, while others are thin and fluid. Choose the viscosity that best suits your painting style.
### 4.2. Selecting the Appropriate Brush Types and Sizes
Choosing the right brush for each task is essential for achieving the desired effects. Round brushes are ideal for details, flat brushes for broad strokes, and filbert brushes for blending and creating soft edges. Choose brushes in varying sizes to accommodate different areas of your painting. Synthetic brushes are a good choice for acrylics, as they are durable and easy to clean. Natural hair brushes can also be used, but they may require more care. Consider the shape of the brush as well. Pointed brushes are ideal for fine details, while angled brushes are useful for creating sharp edges. Invest in a good set of brushes and take care of them properly to ensure that they last for a long time.
### 4.3. Brush Care and Maintenance Tips
Proper brush care is essential for extending the life of your brushes and maintaining their performance. Clean your brushes thoroughly after each use with soap and water. Use a brush cleaner to remove stubborn paint residue. Reshape the bristles of your brushes after cleaning to help them maintain their shape. Store your brushes horizontally or with the bristles pointing upwards to prevent them from bending. Avoid leaving your brushes in water for extended periods of time, as this can damage the bristles. With proper care, your brushes will last for many years and continue to perform at their best.
## 5. Advanced Techniques for Painting Roses in Acrylic
Once you’ve mastered the basic techniques, you can explore more advanced methods to elevate your rose paintings.
### 5.1. Glazing Techniques for Depth and Luminosity
Glazing involves applying thin, transparent layers of paint over a dried underpainting. This technique can be used to create depth, luminosity, and subtle color variations. Use a glazing medium to dilute your acrylic paints and make them more transparent. Apply the glazes in thin, even layers, allowing each layer to dry completely before applying the next. Experiment with different colors and values to create different effects. For example, a glaze of blue over a warm red can create a sense of depth and atmosphere. Glazing is a time-consuming process, but the results are well worth the effort.
### 5.2. Impasto Techniques for Texture and Dimension
Impasto involves applying thick layers of paint to the canvas to create texture and dimension. This technique can be used to create a sense of energy and movement in your rose paintings. Use a palette knife or a stiff brush to apply the paint in thick, bold strokes. Experiment with different textures and patterns to create different effects. For example, you can create a rough, textured surface by dabbing the paint onto the canvas with a sponge. Impasto can be used to create highlights, shadows, or simply to add visual interest to your painting. Be careful not to overdo it, as too much impasto can make your painting look cluttered.
### 5.3. Dry Brushing Techniques for Subtle Textures and Edges
Dry brushing involves using a dry brush with a small amount of paint to create subtle textures and edges. This technique can be used to create a sense of softness and atmosphere in your rose paintings. Load a dry brush with a small amount of paint, then wipe off the excess paint onto a paper towel. Lightly drag the brush across the canvas, allowing the bristles to skip across the surface. This will create a textured effect with soft, blurred edges. Dry brushing is particularly useful for creating highlights, shadows, and subtle color variations. Experiment with different brush types and pressures to create different effects.
## 6. Overcoming Common Challenges in Acrylic Rose Painting
Even experienced artists encounter challenges when painting roses in acrylic. Here are some common problems and their solutions.
### 6.1. Preventing Acrylic Paint from Drying Too Quickly
Acrylic paint dries quickly, which can make blending difficult. To prevent this, use a slow-drying medium or a wet palette. A slow-drying medium will extend the drying time of your acrylic paints, giving you more time to blend them. A wet palette is a palette that is kept moist with water, which will help to prevent your paints from drying out. You can also spritz your paints with water periodically to keep them moist. Another technique is to work in small sections, focusing on one area at a time. This will allow you to blend the paints before they dry.
### 6.2. Achieving Smooth Blending and Transitions
Smooth blending is essential for creating realistic rose petals. Use a soft blending brush to blend the edges of your colors. Work in thin layers, allowing each layer to dry slightly before applying the next. Use a glazing medium to make your paints more transparent and easier to blend. Experiment with different blending techniques, such as feathering, stippling, and scumbling. Feathering involves using light, feathery strokes to blend the colors together. Stippling involves using small dots of paint to create a textured effect. Scumbling involves using a dry brush to lightly scrub the colors together. Practice blending techniques on a separate piece of paper before applying them to your painting.
### 6.3. Correcting Mistakes and Making Adjustments
Mistakes are inevitable in painting. Don’t be afraid to make mistakes and learn from them. Acrylic paint is relatively easy to correct. If you make a mistake, simply wait for the paint to dry and then paint over it. You can also use a wet brush to lift off the wet paint. If you are unhappy with a particular area of your painting, you can always repaint it. Don’t be afraid to experiment and try new things. The most important thing is to have fun and enjoy the process.
## 7. Finding Inspiration and Developing Your Own Style
Finding inspiration is crucial for developing your own unique style as an artist.
### 7.1. Studying Master Rose Painters and Their Techniques
One of the best ways to learn how to paint roses is to study the work of master rose painters. Look at the paintings of artists such as Pierre-Joseph Redouté, Henri Fantin-Latour, and Georgia O’Keeffe. Pay attention to their techniques, their use of color, and their overall style. Try to emulate their techniques in your own paintings. Don’t be afraid to experiment and try new things. The more you study the work of master rose painters, the better you will become at painting roses yourself.
### 7.2. Observing Real Roses and Capturing Their Essence
The best source of inspiration for painting roses is real roses. Observe real roses closely, paying attention to their shape, color, and texture. Take photographs of roses from different angles and in different lighting conditions. Sketch roses in your sketchbook. The more you observe real roses, the better you will understand their essence and the better you will be able to capture their beauty in your paintings.
### 7.3. Experimenting with Different Styles and Approaches
Don’t be afraid to experiment with different styles and approaches. Try painting roses in a realistic style, an impressionistic style, or an abstract style. Use different colors, different brushes, and different techniques. The more you experiment, the more you will discover your own unique style as an artist. Don’t be afraid to break the rules and try new things. The most important thing is to have fun and enjoy the process.
## 8. Q&A: Expert Answers to Your Rose Painting Questions
Here are some frequently asked questions about painting roses in acrylics, answered by experienced artists:
**Q1: What’s the best way to create a smooth gradient on a rose petal?**
A1: Use a soft blending brush and work in thin layers. A glazing medium can also help to create smooth transitions.
**Q2: How do I prevent my acrylic paints from cracking?**
A2: Avoid applying thick layers of paint. Use a flexible modeling paste to add texture instead. Also, ensure your canvas is properly primed.
**Q3: What are some good color combinations for painting roses?**
A3: Experiment with complementary colors such as red and green, or analogous colors such as red, orange, and yellow. Consider the overall mood you want to create.
**Q4: How can I create a sense of depth in my rose painting?**
A4: Use layering techniques, varying values, and atmospheric perspective. Darker colors tend to recede, while lighter colors tend to advance.
**Q5: What’s the best way to paint thorns on a rose stem?**
A5: Use a fine-tipped brush and a dark green or brown color. Add highlights to create a sense of dimension.
**Q6: How can I achieve a realistic velvety texture on my rose petals?**
A6: Use a dry brushing technique with a soft brush. Apply the paint in light, feathery strokes.
**Q7: What’s the secret to painting a convincing rose bud?**
A7: Focus on the tightly curled petals and the interplay of light and shadow. Use a limited palette and subtle color variations.
**Q8: How do I avoid muddy colors when mixing acrylics?**
A8: Mix your colors on the palette rather than on the canvas. Use a limited palette and avoid overmixing.
**Q9: Can I use water to thin acrylic paints for glazing?**
A9: Yes, but be careful not to dilute the paint too much, as this can weaken the paint film. A glazing medium is a better option.
**Q10: What kind of varnish should I use on my finished acrylic rose painting?**
A10: Use a water-based acrylic varnish. Choose a gloss, satin, or matte finish depending on your preference.
## Conclusion: Unleash Your Inner Artist and Paint Beautiful Roses
Congratulations! You’ve now journeyed through the essential techniques and considerations for how to paint roses in acrylic easy. From understanding the fundamentals of color mixing and petal structure to mastering advanced techniques like glazing and impasto, you’re well-equipped to create stunning floral artwork. Remember that practice is key, so don’t be discouraged by initial challenges. Embrace experimentation, find inspiration in the beauty of real roses, and develop your own unique artistic style. The world of acrylic rose painting is vast and rewarding, offering endless opportunities for creative expression. We’ve shared our expert insights and experience to guide you on this path. Now, pick up your brushes, unleash your inner artist, and start painting beautiful roses today! Share your rose paintings with us in the comments below. We’d love to see your creations!
