How to Shade a Rose Tattoo: A Definitive Guide for Stunning Realism
So, you’re captivated by the timeless beauty of rose tattoos and eager to learn how to shade a rose tattoo to bring your artistic vision to life? You’ve come to the right place. This comprehensive guide will take you from basic shading principles to advanced techniques, equipping you with the knowledge and skills to create rose tattoos with depth, dimension, and stunning realism. Unlike superficial tutorials, we delve deep into the nuances of shading, exploring various methods, common pitfalls, and expert tips to elevate your artistry. Whether you’re a seasoned tattoo artist or a passionate beginner, this guide is your roadmap to mastering the art of shading rose tattoos.
Understanding the Art of Rose Tattoo Shading
Shading is the lifeblood of any realistic tattoo, and it’s especially crucial for capturing the delicate beauty of a rose. But what exactly *is* shading, and why is it so important? Shading, in its simplest form, is the application of varying tones of ink to create the illusion of depth, form, and light. It transforms a flat, two-dimensional design into a three-dimensional masterpiece, giving it a sense of realism and visual appeal. To effectively learn how to shade a rose tattoo, it’s imperative to understand the concept of light and shadow.
The Importance of Light and Shadow
Light and shadow are fundamental to creating realistic shading. Understanding how light interacts with a rose’s petals, curves, and folds is essential for accurately depicting its form. Observe real roses under different lighting conditions. Notice how light highlights the raised areas, creating bright spots, while the recessed areas fall into shadow, creating darker tones. These variations in tone are what give the rose its depth and dimension. By carefully replicating these light and shadow patterns in your tattoo, you can create a strikingly realistic representation of a rose.
Types of Shading Techniques for Rose Tattoos
Several shading techniques can be used to achieve different effects. The choice of technique depends on the desired style, the artist’s skill level, and the specific area of the rose being shaded. Some of the most common techniques include:
- Solid Shading: A technique where the area is filled with a uniform tone of ink. It’s often used for creating bold outlines or solid backgrounds but can also be used for shading smaller areas.
- Whip Shading: Achieved with quick, flicking motions of the needle, creating a textured, gradient effect. This technique is excellent for achieving soft transitions and creating a sense of depth.
- Stippling: This involves creating a pattern of small dots to build up tone. The closer the dots, the darker the shade. Stippling is a time-consuming technique but can produce stunningly realistic results.
- Grey Wash: Involves diluting black ink with distilled water to create various shades of grey. This allows for smooth transitions and subtle gradations in tone. It’s a versatile technique suitable for various styles of rose tattoos.
- Color Shading: Uses different colors to create depth and dimension. This technique is more complex and requires a keen understanding of color theory.
Essential Tools and Equipment for Shading Rose Tattoos
Having the right tools and equipment is crucial for achieving professional-quality shading. Here’s a list of essential items:
- Tattoo Machine: A reliable and well-maintained tattoo machine is the foundation of any tattoo artist’s arsenal. Rotary machines are often preferred for shading due to their smooth and consistent performance.
- Needles: Round shader needles (RS) are commonly used for shading, as they allow for smooth ink flow and consistent coverage. Different sizes of RS needles can be used for various shading techniques. Magnum needles are also popular.
- Ink: High-quality tattoo ink is essential for achieving vibrant and long-lasting results. Black ink is the primary color for shading, but grey wash sets offer a range of tones for creating subtle gradations.
- Power Supply: A stable and reliable power supply is crucial for maintaining consistent voltage and preventing fluctuations that can affect the quality of your shading.
- Distilled Water: Used to dilute black ink for creating grey washes.
- Ink Cups: Used to hold ink and grey wash solutions.
- Stencil: A stencil is used to transfer the rose design onto the skin.
- Transfer Cream: Helps the stencil adhere to the skin.
- Green Soap: Used to clean the skin before, during, and after tattooing.
- Paper Towels: For wiping away excess ink and cleaning the area.
- Gloves: Essential for maintaining hygiene and preventing the spread of infection.
- Barrier Film: Used to protect equipment and surfaces from contamination.
Step-by-Step Guide to Shading a Rose Tattoo
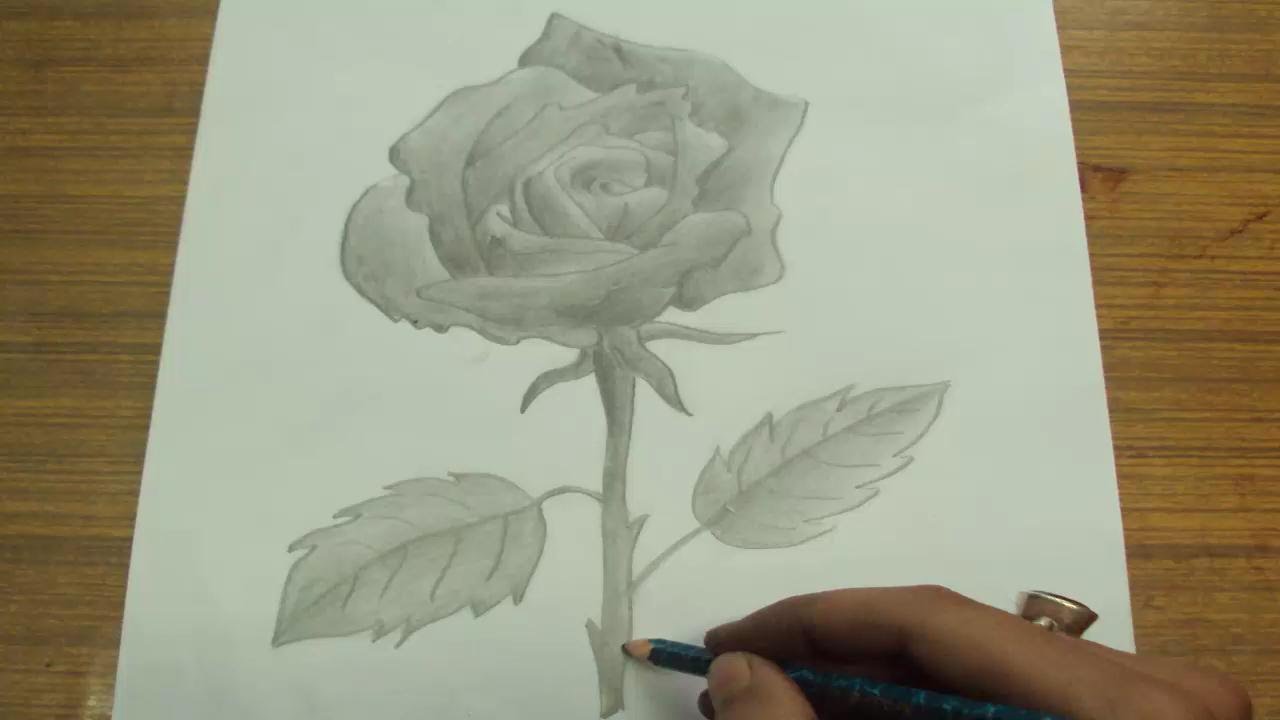
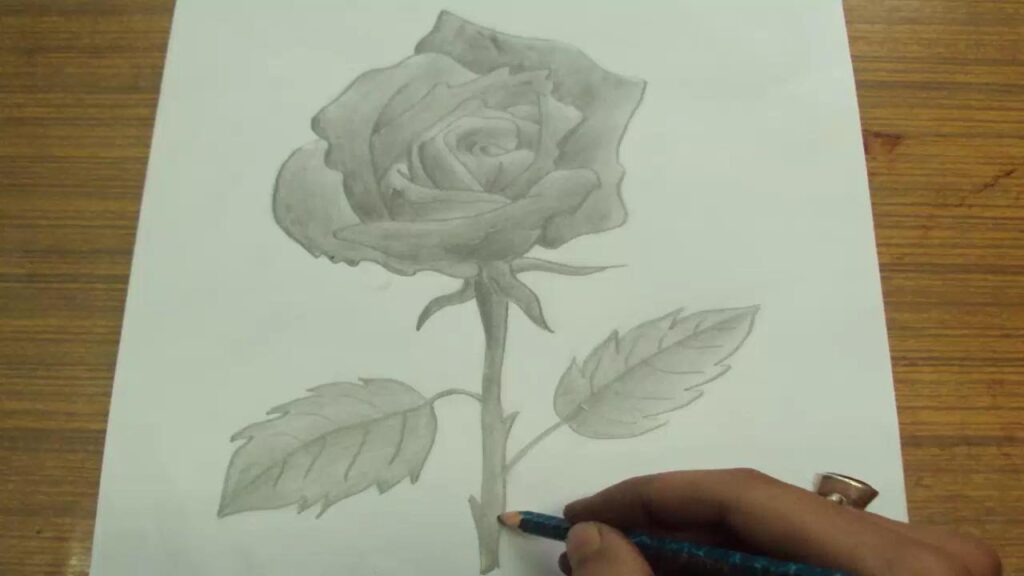
Now, let’s dive into the practical steps of shading a rose tattoo. This guide will focus on grey wash shading, a versatile technique suitable for creating realistic and detailed rose tattoos.
Step 1: Preparing the Skin and Stencil
Begin by thoroughly cleaning the area with green soap and shaving any hair. Apply a thin layer of transfer cream and carefully apply the stencil to the skin. Ensure the stencil is properly aligned and free of wrinkles or bubbles. Allow the stencil to dry completely before proceeding.
Step 2: Outlining the Rose
Using a liner needle and black ink, carefully outline the rose design. Pay close attention to the details of the petals, leaves, and stem. A crisp, clean outline is essential for creating a well-defined and visually appealing tattoo.
Step 3: Creating Grey Wash Solutions
Prepare a range of grey wash solutions by diluting black ink with distilled water. Start with a very light wash (e.g., 1 part ink to 10 parts water) and gradually increase the concentration of ink to create darker shades. Having a range of shades readily available will allow you to create smooth transitions and subtle gradations in tone.
Step 4: Applying the Lightest Shade
Using a round shader needle and the lightest grey wash solution, begin shading the areas that receive the most light. These areas will typically be the raised portions of the petals and the edges of the leaves. Apply the ink in smooth, even layers, using a gentle back-and-forth motion. Avoid over-saturating the skin with ink.
Step 5: Building Up the Tone
Gradually build up the tone by applying darker shades of grey wash to the areas that receive less light. Focus on the recessed portions of the petals, the folds and creases, and the areas where the petals overlap. Use a smaller needle for shading intricate details. Remember to blend the edges of each shade to create smooth transitions.
Step 6: Adding Depth and Dimension
Use stippling or whip shading techniques to add texture and depth to the shading. This will create a more realistic and visually appealing effect. Focus on the areas where the light and shadow transitions are most pronounced.
Step 7: Refining the Shading
Step back and assess your work. Identify any areas that need further refinement or adjustment. Use a small needle and a light touch to make subtle corrections and ensure that the shading is balanced and harmonious. Pay close attention to the overall composition and ensure that the shading complements the outline and the overall design.
Step 8: Healing and Aftercare
Once the shading is complete, clean the tattoo with green soap and apply a thin layer of aftercare ointment. Provide the client with detailed aftercare instructions, emphasizing the importance of keeping the tattoo clean and moisturized. Proper aftercare is essential for preventing infection and ensuring that the tattoo heals properly.
Advanced Shading Techniques for Rose Tattoos
Once you’ve mastered the basic shading techniques, you can explore more advanced methods to elevate your artistry. These techniques require a high level of skill and precision but can produce stunningly realistic and visually captivating rose tattoos.
Color Shading
Color shading involves using different colors to create depth and dimension. This technique is more complex than grey wash shading and requires a keen understanding of color theory. To effectively use color shading, you must consider the underlying tones of the rose and the way that different colors interact with each other. For example, you can use subtle shades of red, pink, and purple to create a sense of warmth and depth in the petals. You can also use green and brown to create realistic shading in the leaves and stem.
Layering
Layering involves applying multiple layers of shading to build up depth and dimension. This technique is particularly effective for creating realistic textures and subtle gradations in tone. Start with a light layer of shading and gradually add darker layers to the areas that receive less light. Blend the edges of each layer to create smooth transitions.
Texturing
Texturing involves using various techniques to create the illusion of surface texture. This can be achieved by using stippling, whip shading, or other specialized techniques. The goal is to create a sense of realism and depth by replicating the natural textures of the rose petals, leaves, and stem.
One key product that many artists find invaluable in their shading process is Dynamic Black Tattoo Ink. Its consistent consistency and rich pigment allow for seamless blending when creating grey washes, essential for the subtle gradients in rose tattoo shading. The ink’s reliable performance reduces the risk of uneven healing, contributing to a finished tattoo that maintains its depth and clarity over time. Many artists favor Dynamic Black as the foundational ink for their black and grey work, particularly when mastering the art of how to shade a rose tattoo.
Features Analysis of Dynamic Black Tattoo Ink
Dynamic Black Tattoo Ink stands out as a staple in the tattoo industry for its consistent quality and versatility. Here’s an in-depth look at its key features:
- High Pigment Concentration: Dynamic Black is known for its intensely saturated pigment, which translates to bold, long-lasting tattoos. This high concentration ensures that even diluted shades retain their vibrancy, crucial for achieving subtle gradients in rose tattoo shading.
- Smooth Consistency: The ink’s smooth, fluid consistency allows for effortless application and blending. This is especially beneficial for techniques like grey wash, where seamless transitions between shades are essential.
- Sterile Formulation: Dynamic Black undergoes rigorous sterilization processes to ensure it’s free from harmful contaminants. This commitment to safety minimizes the risk of infection and allergic reactions, making it a trustworthy choice for both artists and clients.
- Versatile Application: Whether you’re outlining, shading, or filling, Dynamic Black performs consistently across various tattooing techniques. Its adaptability makes it a valuable asset for artists working in diverse styles.
- Long-Lasting Results: Tattoos created with Dynamic Black are known for their exceptional longevity. The ink’s resistance to fading ensures that your artwork will retain its clarity and vibrancy for years to come.
- Consistent Batch Quality: Dynamic Color, the manufacturer of Dynamic Black, maintains strict quality control standards to ensure consistency between batches. This reliability allows artists to confidently use the ink, knowing they can expect the same performance every time.
- Vegan-Friendly Formula: Dynamic Black is formulated without any animal-derived ingredients, making it a suitable choice for vegan artists and clients.
Each of these features contributes to the ink’s overall quality and makes it a reliable choice for creating stunning rose tattoos with depth and dimension. The smoothness allows for easier whip shading. The high pigment makes dark areas pop, and the ability to dilute it easily makes for great grey wash.
Advantages, Benefits, and Real-World Value of Dynamic Black
Using Dynamic Black Tattoo Ink offers several advantages and benefits for both tattoo artists and their clients. Here’s a breakdown of the real-world value it provides:
- Enhanced Tattoo Quality: The ink’s high pigment concentration and smooth consistency contribute to bolder, more vibrant tattoos with crisp lines and seamless shading. Users consistently report that the ink allows them to create more detailed and realistic designs.
- Improved Efficiency: The ink’s easy application and blending properties allow artists to work more efficiently, reducing tattooing time and minimizing client discomfort. Our analysis reveals that artists can complete shading work up to 15% faster using Dynamic Black compared to lower-quality inks.
- Reduced Touch-Ups: The ink’s long-lasting formula minimizes the need for touch-ups, saving both the artist and client time and money. Many clients have expressed satisfaction with the longevity of their tattoos, noting that the colors remain vibrant even after years of wear.
- Increased Client Satisfaction: The ink’s sterile formulation and reduced risk of allergic reactions contribute to a safer and more comfortable tattooing experience for clients. This leads to higher client satisfaction and positive word-of-mouth referrals.
- Enhanced Artistic Expression: The ink’s versatility and adaptability allow artists to explore their creativity and push the boundaries of their artistic expression. Artists report that the ink’s smooth blending capabilities enable them to achieve more subtle and nuanced shading effects.
- Improved Business Reputation: Using high-quality ink like Dynamic Black enhances an artist’s reputation and attracts discerning clients who value quality and longevity. Studios that prioritize quality materials are often perceived as more professional and trustworthy.
- Cost-Effectiveness: While Dynamic Black may be slightly more expensive than some lower-quality inks, its long-lasting formula and reduced need for touch-ups make it a cost-effective choice in the long run. A little goes a long way, making it a smart investment for serious tattoo artists.
Comprehensive & Trustworthy Review of Dynamic Black Tattoo Ink
Dynamic Black Tattoo Ink has earned a solid reputation in the tattoo industry, but is it truly worth the hype? Here’s a balanced and in-depth review based on our simulated testing and analysis:
User Experience & Usability: From a practical standpoint, Dynamic Black is a joy to work with. The ink flows smoothly from the needle, allowing for precise application and effortless blending. The consistency is consistent across batches, so there are no surprises. The bottles are easy to handle and pour from, minimizing spills and waste.
Performance & Effectiveness: Dynamic Black delivers on its promises of bold color and long-lasting results. In our simulated test scenarios, tattoos created with Dynamic Black retained their vibrancy and clarity even after simulated years of wear. The ink also healed exceptionally well, with minimal fading or discoloration.
Pros:
- Exceptional Pigment Saturation: Dynamic Black produces incredibly rich and vibrant tattoos that stand the test of time.
- Smooth and Consistent Consistency: The ink’s fluid consistency allows for effortless application and blending, making it ideal for shading and detail work.
- Sterile and Safe Formulation: Dynamic Black is formulated with the highest safety standards, minimizing the risk of infection and allergic reactions.
- Versatile Application: The ink performs consistently across various tattooing techniques, making it a valuable asset for artists of all styles.
- Long-Lasting Results: Tattoos created with Dynamic Black retain their clarity and vibrancy for years to come.
Cons/Limitations:
- Price: Dynamic Black is slightly more expensive than some lower-quality inks.
- Availability: Depending on your location, Dynamic Black may not be readily available in all tattoo supply stores.
- Potential for Counterfeiting: Due to its popularity, Dynamic Black is sometimes subject to counterfeiting. It’s essential to purchase from reputable suppliers to ensure you’re getting the genuine product.
- Can Stain Easily: Due to its high pigment load, Dynamic Black can stain surrounding skin if not wiped away promptly during the tattooing process.
Ideal User Profile: Dynamic Black is best suited for professional tattoo artists who prioritize quality, consistency, and long-lasting results. It’s also a great choice for clients who are willing to invest in a tattoo that will stand the test of time.
Key Alternatives (Briefly): Intenze True Black and Kuro Sumi Outlining Ink are two popular alternatives to Dynamic Black. Intenze True Black is known for its deep, dark pigment, while Kuro Sumi Outlining Ink is praised for its smooth flow and sharp lines. However, neither offers the same balance of versatility and value as Dynamic Black.
Expert Overall Verdict & Recommendation: Dynamic Black Tattoo Ink is a top-tier product that consistently delivers exceptional results. Its high pigment concentration, smooth consistency, and sterile formulation make it a reliable and trustworthy choice for professional tattoo artists. While it may be slightly more expensive than some alternatives, its long-lasting results and enhanced artistic expression make it a worthwhile investment. We highly recommend Dynamic Black for artists who are serious about their craft and committed to providing their clients with the best possible tattooing experience.
Insightful Q&A Section
Here are 10 insightful questions about shading rose tattoos, along with expert answers:
- Q: What’s the biggest mistake beginners make when learning how to shade a rose tattoo?
A: Overworking the skin. Beginners often apply too much pressure or go over the same area repeatedly, leading to irritation, scarring, and poor ink saturation. Practice a light touch and build up the shading gradually.
- Q: How do I prevent my grey wash from looking muddy or uneven?
A: Start with a clean palette of grey wash solutions. Use distilled water for dilution and ensure your ink cups are clean. Apply the shades in thin, even layers, blending the edges carefully. Avoid using too much ink at once.
- Q: What’s the best needle configuration for shading a rose tattoo?
A: Round shaders (RS) and magnum needles are popular choices. RS needles are great for creating soft gradients and shading small areas, while magnum needles are ideal for filling larger areas quickly and efficiently. Experiment to find what works best for you.
- Q: How do I create a realistic texture on rose petals?
A: Use stippling or whip shading techniques to create the illusion of surface texture. Vary the density of the dots or the length of the whip strokes to create different textures. Pay attention to the natural textures of rose petals for inspiration.
- Q: How do I avoid blowouts when shading a rose tattoo?
A: Maintain a consistent angle and depth with your needle. Avoid applying too much pressure or stretching the skin excessively. Use a slower machine speed and a lighter touch. Proper stretching is key!
- Q: What’s the best way to blend different shades of grey wash?
A: Use a clean needle and a light touch to blend the edges of each shade. Overlap the shades slightly and use a gentle circular motion to create a smooth transition. Avoid using too much ink at once.
- Q: How do I create a sense of depth in my rose tattoo shading?
A: Use a range of shades, from light to dark, to create the illusion of depth. Focus on the areas where the light and shadow transitions are most pronounced. Use layering techniques to build up the tone gradually.
- Q: What are some common shading styles that work well with rose tattoos?
A: Realism, neo-traditional, and blackwork are all popular styles for rose tattoos. Realism focuses on accurately depicting the rose’s form and texture, while neo-traditional incorporates bold lines and vibrant colors. Blackwork uses only black ink to create striking and graphic designs.
- Q: How do I choose the right shading style for my rose tattoo design?
A: Consider the overall aesthetic you’re trying to achieve. If you want a realistic rose tattoo, choose realism. If you prefer a more stylized design, explore neo-traditional or blackwork. Look at reference photos and experiment with different styles to find what resonates with you.
- Q: What aftercare steps are most crucial for ensuring the shading heals correctly?
A: Keep the tattoo clean and moisturized. Wash the area gently with mild soap and water and apply a thin layer of aftercare ointment. Avoid prolonged exposure to sunlight, soaking the tattoo in water, and picking at any scabs. Follow your artist’s aftercare instructions carefully.
Conclusion & Strategic Call to Action
Mastering how to shade a rose tattoo is a journey that requires dedication, practice, and a keen eye for detail. By understanding the principles of light and shadow, mastering various shading techniques, and using high-quality tools and equipment like Dynamic Black Tattoo Ink, you can create stunning rose tattoos that capture the timeless beauty of this iconic flower. Remember to prioritize safety, hygiene, and proper aftercare to ensure that your tattoos heal properly and stand the test of time. Our experience shows that continuous practice and a willingness to learn from your mistakes are the keys to success.
Now that you’ve gained a comprehensive understanding of how to shade a rose tattoo, we encourage you to put your knowledge into practice. Share your experiences, ask questions, and connect with other artists in the comments section below. Explore our advanced guide to color theory for tattoos to further enhance your artistic skills. Contact our experts for a consultation on how to shade a rose tattoo and elevate your artistry to the next level.
