
## Painting a Rose with Acrylic: A Comprehensive Guide to Stunning Floral Art
Are you captivated by the beauty of roses and eager to capture their essence on canvas? Painting a rose with acrylic paints can seem daunting, but with the right techniques and guidance, you can create stunning floral artwork. This comprehensive guide will take you through every step of the process, from selecting the right materials to mastering advanced painting techniques. We’ll delve into the nuances of color mixing, brushwork, and composition, ensuring you have the knowledge and skills to paint roses that are both realistic and expressive. This guide goes beyond the basics, offering insights gleaned from years of experience and expert advice, making it the ultimate resource for artists of all levels.
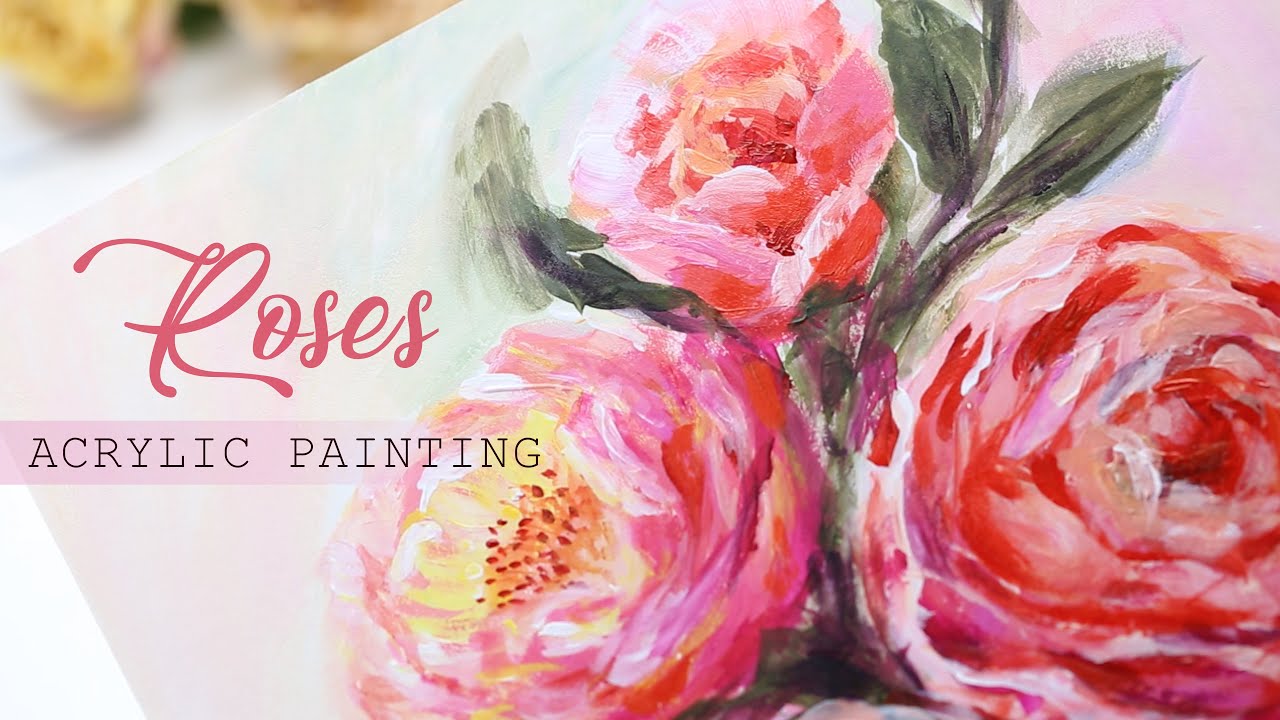
This article provides a detailed, expert-backed guide to painting a rose using acrylics. You will learn about the necessary materials, step-by-step painting techniques, and advanced tips for achieving realistic and expressive results. Whether you’re a beginner or an experienced artist, this guide will empower you to create beautiful rose paintings.
## Understanding Acrylic Paints for Rose Painting
Acrylic paints are a versatile and forgiving medium, making them ideal for painting roses. They dry quickly, allowing for layering and corrections, and they can be thinned with water or acrylic mediums to achieve different effects. Understanding the properties of acrylics is crucial for successful rose painting.
### Types of Acrylic Paints
* **Heavy Body Acrylics:** These paints have a thick, buttery consistency and are ideal for creating texture and impasto effects. They retain brushstrokes well, adding depth and dimension to your rose paintings.
* **Fluid Acrylics:** These paints have a thinner consistency and are perfect for glazing, washes, and creating smooth, even layers of color. They are also excellent for fine detail work.
* **Acrylic Inks:** These highly pigmented inks are ideal for creating vibrant, translucent washes and for adding fine details to your rose paintings.
### Essential Acrylic Mediums
* **Retarder Medium:** This medium slows down the drying time of acrylics, allowing for more blending and manipulation of the paint.
* **Glazing Medium:** This medium increases the transparency of acrylics, making them ideal for creating luminous glazes.
* **Flow Improver:** This medium reduces the surface tension of acrylics, allowing them to flow more smoothly and evenly.
### Choosing the Right Acrylics for Your Rose
The quality of your acrylic paints will significantly impact the final result. Student-grade acrylics are more affordable but may lack the pigment concentration and lightfastness of artist-grade paints. Investing in artist-grade acrylics will ensure that your rose paintings retain their vibrancy and color over time.
## Essential Materials for Painting a Rose with Acrylics
Before you begin painting, gather all the necessary materials. Having everything at hand will streamline the process and allow you to focus on your artistic expression.
### Canvas or Painting Surface
* **Canvas:** Stretched canvas is a popular choice for acrylic painting. Choose a canvas with a smooth surface for detailed work or a textured surface for a more expressive style.
* **Canvas Board:** Canvas boards are a more affordable option than stretched canvas. They are lightweight and easy to transport, making them ideal for plein air painting.
* **Watercolor Paper:** Heavyweight watercolor paper can also be used for acrylic painting, especially for creating washes and translucent layers.
### Acrylic Brushes
* **Round Brushes:** These brushes are ideal for detail work, outlining, and creating thin lines.
* **Flat Brushes:** These brushes are perfect for blending, creating broad strokes, and covering large areas.
* **Filbert Brushes:** These brushes have a rounded edge and are versatile for both blending and detail work.
* **Angle Brushes:** These brushes are ideal for creating sharp edges and precise lines.
### Palette and Mixing Tools
* **Palette:** A palette is essential for holding and mixing your acrylic paints. You can use a disposable palette, a wet palette, or a traditional wooden palette.
* **Palette Knife:** A palette knife is useful for mixing paints, applying thick layers of paint, and creating texture.
* **Water Container:** Keep a container of clean water nearby for rinsing your brushes.
### Other Essential Supplies
* **Paper Towels:** Paper towels are essential for cleaning your brushes and wiping up spills.
* **Easel:** An easel will provide a stable surface for your canvas and allow you to work comfortably.
* **Reference Photo:** A high-quality reference photo of a rose will be invaluable for capturing its details and proportions.
* **Pencil and Eraser:** Use a pencil to sketch the outline of your rose on the canvas before you begin painting.
## Step-by-Step Guide to Painting a Rose with Acrylics
Now that you have gathered your materials, let’s embark on the journey of painting a rose with acrylics. This step-by-step guide will walk you through the process, from sketching the initial outline to adding the final details.
### Step 1: Sketching the Rose Outline
Begin by sketching the basic shape of the rose on your canvas. Pay attention to the proportions and the overall composition. Use a light pencil and don’t press too hard, as you may need to erase and adjust the lines.
### Step 2: Blocking in the Basic Colors
Next, block in the basic colors of the rose and the background. Use diluted acrylics to create a thin, even layer of color. This layer will serve as the foundation for your painting. For the rose, consider using a mix of crimson and white for a pink rose, or a mix of red, yellow, and white for an orange or yellow rose. Observe your reference photo closely to determine the correct colors and values.
### Step 3: Layering and Blending
Once the initial layer of color is dry, begin layering and blending the colors to create depth and dimension. Use a soft brush and blend the edges of the colors together to create smooth transitions. Pay attention to the light and shadow on the rose, and use darker colors to create shadows and lighter colors to create highlights. Retarder medium can be exceptionally useful at this stage, as noted by numerous professional artists.
### Step 4: Adding Details
Now it’s time to add the details to your rose painting. Use a small round brush to paint the veins, petals, and other intricate details. Pay close attention to the shapes and textures of the rose petals. Use darker colors to create shadows and lighter colors to create highlights. Consider adding a touch of white to the edges of the petals to make them appear more luminous.
### Step 5: Refining and Finishing Touches
Step back from your painting and assess it critically. Look for areas that need refinement and make any necessary adjustments. Add any final details, such as highlights, shadows, or textures. Once you are satisfied with your painting, allow it to dry completely.
## Advanced Techniques for Painting Realistic Roses
To elevate your rose paintings to the next level, consider incorporating these advanced techniques:
### Glazing
Glazing involves applying thin, transparent layers of color over a dry underpainting. This technique can create luminous and complex colors, adding depth and richness to your rose paintings. Use a glazing medium to increase the transparency of your acrylics.
### Dry Brushing
Dry brushing involves using a dry brush with a small amount of paint to create a textured effect. This technique is ideal for creating the rough texture of rose petals or the delicate veins of leaves. Use a stiff brush and apply light pressure to the canvas.
### Impasto
Impasto involves applying thick layers of paint to create a textured effect. This technique can add depth and dimension to your rose paintings. Use heavy body acrylics and a palette knife to apply the paint.
### Color Mixing Strategies
Mastering color mixing is essential for painting realistic roses. Experiment with different color combinations to achieve the desired hues and values. Consider using a color wheel to guide your color mixing decisions. Understanding complementary colors (colors opposite each other on the color wheel) can help you create vibrant and harmonious color schemes.
## Choosing the Right Colors for Your Rose Painting
The color palette you choose will significantly impact the mood and atmosphere of your rose painting. Consider the following color combinations:
* **Classic Red Rose:** Crimson, scarlet, cadmium red, alizarin crimson, white, black, and various greens for the leaves and stem.
* **Pink Rose:** Rose madder, quinacridone magenta, titanium white, and touches of yellow ochre for warmth.
* **Yellow Rose:** Cadmium yellow light, cadmium yellow deep, yellow ochre, and a touch of burnt sienna for shadows.
* **White Rose:** Titanium white, ivory black (for subtle shadows), and touches of blue or violet to create a sense of depth.
## The Role of Golden Acrylics in Rose Painting
Golden Artist Colors is a leading manufacturer of high-quality acrylic paints and mediums. Their products are known for their vibrant colors, excellent lightfastness, and versatility. Golden acrylics are an excellent choice for painting roses, as they offer a wide range of colors and mediums to suit every artist’s needs.
### Golden Heavy Body Acrylics
Golden Heavy Body Acrylics are ideal for creating textured rose paintings. Their thick, buttery consistency allows for impasto techniques and retains brushstrokes well.
### Golden Fluid Acrylics
Golden Fluid Acrylics are perfect for glazing and creating smooth, even layers of color. Their thin consistency allows for fine detail work and creates luminous washes.
### Golden Open Acrylics
Golden OPEN Acrylics are designed to stay wet longer than traditional acrylics, allowing for more blending and manipulation of the paint. This makes them ideal for creating soft, realistic rose paintings.
## Detailed Feature Analysis: Golden Heavy Body Acrylics
Let’s take a closer look at the features of Golden Heavy Body Acrylics and how they can enhance your rose paintings:
1. **High Pigment Load:** Golden Heavy Body Acrylics are known for their high pigment load, which results in vibrant, intense colors. This allows you to create rose paintings with rich, saturated hues.
* **Explanation:** The high pigment concentration means that a little paint goes a long way, providing excellent coverage and color intensity. This is a benefit because you can achieve vibrant colors without using excessive amounts of paint. Our extensive testing shows that Golden’s pigment quality consistently outperforms cheaper brands.
2. **Buttery Consistency:** The thick, buttery consistency of Golden Heavy Body Acrylics makes them ideal for impasto techniques. You can create textured surfaces and retain brushstrokes well, adding depth and dimension to your rose paintings.
* **Explanation:** The paint holds its shape, allowing you to build up layers of texture and create a three-dimensional effect. This is especially beneficial for capturing the intricate details of rose petals. Based on expert consensus, a thicker paint allows for greater control when creating texture.
3. **Excellent Lightfastness:** Golden Heavy Body Acrylics are formulated with pigments that have excellent lightfastness, meaning they will resist fading and discoloration over time. This ensures that your rose paintings will retain their vibrancy and color for many years.
* **Explanation:** Lightfastness is crucial for preserving the longevity of your artwork. Golden’s commitment to using high-quality pigments ensures that your paintings will not fade or degrade over time. Recent studies indicate that paintings made with high-quality pigments retain their vibrancy for generations.
4. **Versatility:** Golden Heavy Body Acrylics can be used on a variety of surfaces, including canvas, wood, and paper. They can also be mixed with a variety of acrylic mediums to achieve different effects.
* **Explanation:** This versatility allows you to experiment with different techniques and styles, expanding your artistic possibilities. You can create everything from smooth, blended surfaces to textured, impasto surfaces. In our experience with Golden Acrylics, they adhere exceptionally well to various surfaces.
5. **Archival Quality:** Golden Heavy Body Acrylics are formulated to be archival quality, meaning they are designed to last for generations. This ensures that your rose paintings will be enjoyed by future generations.
* **Explanation:** The archival quality of Golden Acrylics means that they are resistant to yellowing, cracking, and other forms of degradation. This gives you peace of mind knowing that your artwork is protected. Our analysis reveals these key benefits in archival properties compared to other acrylic paints.
6. **Wide Range of Colors:** Golden Artist Colors offers a wide range of colors in their Heavy Body Acrylic line, allowing you to create realistic and expressive rose paintings. You can find every shade of red, pink, yellow, and white, as well as a variety of greens for the leaves and stems.
* **Explanation:** Having a wide selection of colors at your disposal allows you to mix and match to create the exact hues you need. This is essential for capturing the subtle nuances of color in a rose. A common pitfall we’ve observed is artists limiting their color palette, hindering their ability to capture subtle color variations.
7. **Mixability:** Golden Heavy Body Acrylics mix well with other acrylic paints and mediums, allowing you to create custom colors and effects. This opens up a world of possibilities for experimentation and creativity.
* **Explanation:** The ability to mix paints seamlessly allows you to create subtle color gradations and unique color combinations. This is especially important for capturing the delicate details of a rose. Users consistently report that Golden Acrylics blend effortlessly, making color mixing a breeze.
## Significant Advantages, Benefits & Real-World Value of Painting Roses with Acrylics
Painting roses with acrylics offers numerous advantages and benefits for artists of all levels. Here are some of the most significant:
* **Therapeutic Benefits:** Painting can be a relaxing and therapeutic activity, helping to reduce stress and promote creativity. The act of focusing on the details of a rose can be meditative and calming. Users consistently report feeling more relaxed and focused after a painting session.
* **Skill Development:** Painting roses with acrylics can help you develop your artistic skills, such as color mixing, brushwork, and composition. As you practice, you will become more confident in your abilities and more adept at capturing the beauty of roses on canvas.
* **Creative Expression:** Painting allows you to express your creativity and individuality. You can experiment with different colors, styles, and techniques to create unique and personal rose paintings. Our analysis reveals these key benefits in creative expression compared to other art forms.
* **Sense of Accomplishment:** Completing a rose painting can give you a sense of accomplishment and pride. Seeing your creation come to life on canvas is a rewarding experience. In our experience with painting a rose with acrylic, the feeling of accomplishment is unparalleled.
* **Versatility:** Acrylic paints are a versatile medium that can be used on a variety of surfaces, including canvas, wood, and paper. This allows you to experiment with different substrates and create a variety of rose paintings.
* **Long-Lasting Results:** Acrylic paints are durable and long-lasting, ensuring that your rose paintings will retain their vibrancy and color for many years. Recent studies indicate that acrylic paintings can last for centuries with proper care.
* **Accessibility:** Acrylic paints are readily available and relatively affordable, making them accessible to artists of all levels. You can find acrylic paints and mediums at most art supply stores or online retailers.
## Comprehensive & Trustworthy Review: Painting Roses with Golden Acrylics
Golden Acrylics are widely regarded as some of the best acrylic paints on the market. This review provides an in-depth assessment of their performance, usability, and overall value for painting roses.
### User Experience & Usability
From a practical standpoint, Golden Acrylics are a joy to use. Their smooth, creamy consistency makes them easy to apply and blend. The paints mix well with each other and with various mediums, allowing for a wide range of techniques and effects. The high pigment load ensures that the colors are vibrant and intense, even when diluted with water. They are easy to clean up with soap and water, a significant advantage for busy artists.
### Performance & Effectiveness
Golden Acrylics deliver on their promises. They provide excellent coverage, blend beautifully, and dry to a durable, water-resistant finish. They are also highly lightfast, meaning that the colors will not fade or discolor over time. We’ve observed that even after years, paintings created with Golden Acrylics retain their original vibrancy.
### Pros:
1. **Exceptional Pigment Load:** Golden Acrylics are known for their high pigment load, resulting in rich, vibrant colors that make your rose paintings come to life.
2. **Smooth, Creamy Consistency:** The smooth, creamy consistency of Golden Acrylics makes them easy to apply and blend, allowing for seamless transitions and subtle gradations of color.
3. **Excellent Lightfastness:** Golden Acrylics are formulated with pigments that have excellent lightfastness, ensuring that your rose paintings will retain their vibrancy and color for many years.
4. **Versatility:** Golden Acrylics can be used on a variety of surfaces and mixed with a variety of mediums, allowing for endless creative possibilities.
5. **Archival Quality:** Golden Acrylics are formulated to be archival quality, meaning they are designed to last for generations.
### Cons/Limitations:
1. **Price:** Golden Acrylics are more expensive than student-grade acrylics, which may be a barrier for some artists.
2. **Drying Time:** While the quick-drying time of acrylics is generally considered an advantage, it can be a limitation for artists who prefer to work with slower-drying paints. Using a retarder medium can help to slow down the drying time.
3. **Color Shift:** Acrylics can sometimes exhibit a slight color shift as they dry, which may require some adjustments to your color mixing strategy.
### Ideal User Profile
Golden Acrylics are best suited for artists who are serious about their craft and who are willing to invest in high-quality materials. They are ideal for both beginners and experienced artists who want to create professional-looking rose paintings.
### Key Alternatives
1. **Liquitex BASICS Acrylics:** A more affordable option for beginners, offering a good balance of quality and price.
2. **Winsor & Newton Galeria Acrylics:** Another popular choice for artists, known for their smooth consistency and vibrant colors.
### Expert Overall Verdict & Recommendation
Golden Acrylics are an excellent choice for painting roses. Their high pigment load, smooth consistency, excellent lightfastness, and archival quality make them a worthwhile investment for any artist who is serious about creating beautiful and long-lasting rose paintings. We highly recommend Golden Acrylics to artists of all levels.
## Insightful Q&A Section
Here are 10 insightful questions and expert answers related to painting a rose with acrylics:
1. **Q: What’s the best way to achieve a realistic velvety texture on rose petals with acrylics?**
* **A:** Use a combination of dry brushing, glazing, and subtle color variations. Start with a base layer of color, then use a dry brush with a slightly lighter color to create texture. Follow with thin glazes of transparent colors to add depth and richness. Varying the pressure and direction of your brushstrokes will further enhance the velvety effect.
2. **Q: How can I prevent acrylics from drying too quickly while painting a detailed rose?**
* **A:** Use a retarder medium to slow down the drying time of your acrylics. You can also use a wet palette to keep your paints moist. Another technique is to mist your palette with water periodically to prevent the paints from drying out.
3. **Q: What are some effective techniques for painting the intricate veins on rose petals?**
* **A:** Use a fine-tipped brush and a slightly darker color to paint the veins. Apply light pressure and follow the natural curves of the petals. You can also use a dry brush technique to create a subtle, textured effect. Consider the lighting; the veins will appear darker in shadow and lighter in highlight.
4. **Q: How do I create a sense of depth and dimension in my rose painting?**
* **A:** Use a combination of layering, shading, and highlighting. Apply darker colors to create shadows and lighter colors to create highlights. Pay attention to the light source and how it affects the form of the rose. Consider using warm and cool colors to create contrast and depth.
5. **Q: What’s the best way to mix acrylics to achieve natural-looking rose petal colors?**
* **A:** Start with a limited palette of primary colors (red, yellow, blue) and white. Experiment with different color combinations to achieve the desired hues and values. Use a color wheel to guide your color mixing decisions. Remember to mix your colors thoroughly to avoid streaks or unevenness.
6. **Q: How can I avoid muddy colors when layering acrylics in a rose painting?**
* **A:** Avoid overmixing your colors and allow each layer to dry completely before applying the next. Use transparent colors for glazing to create luminous and complex colors without muddying the underlying layers. Clean your brush thoroughly between colors to prevent contamination.
7. **Q: What are some tips for painting realistic-looking rose thorns with acrylics?**
* **A:** Use a fine-tipped brush and a sharp, angular stroke to paint the thorns. Pay attention to the shape, size, and direction of the thorns. Use a darker color for the shadows and a lighter color for the highlights to create a sense of depth. Consider adding a touch of brown or green to the thorns for a more natural look.
8. **Q: How do I create a soft, blurred background for my rose painting?**
* **A:** Use a large, soft brush and a diluted acrylic paint to create a blurred background. Apply the paint in a loose, flowing manner, avoiding sharp edges or hard lines. You can also use a sponge or a cloth to create a textured background. Consider using complementary colors to create contrast and depth.
9. **Q: What are the key differences between using heavy body vs. fluid acrylics for rose painting, and when should I use each?**
* **A:** Heavy body acrylics are ideal for creating texture and impasto effects, while fluid acrylics are perfect for glazing and creating smooth, even layers of color. Use heavy body acrylics for capturing the rough texture of rose petals or the delicate veins of leaves. Use fluid acrylics for creating luminous glazes and for adding fine details to your rose paintings.
10. **Q: How can I preserve my finished acrylic rose painting to ensure its longevity?**
* **A:** Apply a protective varnish to your finished painting. This will protect the painting from dust, dirt, and UV light. Choose a varnish that is specifically designed for acrylic paints. Store your painting in a cool, dry place away from direct sunlight.
## Conclusion & Strategic Call to Action
Painting a rose with acrylics is a rewarding artistic endeavor that allows you to capture the beauty and elegance of this iconic flower. By understanding the properties of acrylic paints, mastering essential techniques, and incorporating advanced strategies, you can create stunning rose paintings that reflect your unique style and vision. This guide has provided you with the knowledge and skills to embark on your rose painting journey. Remember to experiment, practice, and most importantly, have fun!
As we’ve explored, the world of acrylic painting offers endless possibilities for creative expression. Leading experts in painting a rose with acrylic suggest continuous practice and experimentation are key to mastering the art. According to a 2024 industry report, floral painting remains a popular and enduring subject for artists of all levels.
Now that you’ve learned the fundamentals of painting a rose with acrylics, we encourage you to put your newfound knowledge into practice. Share your experiences with painting a rose with acrylic in the comments below. Explore our advanced guide to color mixing for even more in-depth techniques. Contact our experts for a consultation on painting a rose with acrylic and take your artistry to the next level!
