
How to Remove Sticker Residue From a Car: The Ultimate Guide
Ever been frustrated by stubborn sticker residue clinging to your car’s paint or windows? You’re not alone. Leftover adhesive from bumper stickers, parking permits, or even dealership decals can be a real eyesore and, if not removed properly, can even damage your vehicle’s finish. This comprehensive guide provides tried-and-true methods, expert tips, and preventative measures to help you safely and effectively remove sticker residue from your car, restoring its pristine look. We go beyond simple solutions, diving into the science behind adhesives, the potential risks involved, and the best tools and techniques for various surfaces. This isn’t just another quick fix article; it’s your go-to resource for achieving professional-level results, protecting your car’s value, and avoiding costly repairs. We’ll cover everything from household remedies to specialized products, ensuring you have the knowledge and confidence to tackle any sticker residue challenge.
Understanding Sticker Residue and Its Impact on Your Car
Sticker residue, that sticky film left behind after removing a sticker or decal, is composed primarily of adhesive polymers. These polymers are designed to bond strongly to surfaces, making them difficult to remove without proper techniques. The type of adhesive used varies depending on the sticker’s intended purpose, ranging from pressure-sensitive adhesives found on bumper stickers to more permanent adhesives used on decals.
The impact of sticker residue on your car extends beyond aesthetics. Over time, the residue can attract dirt and grime, creating a discolored and unsightly area. More importantly, harsh cleaning methods or abrasive tools can scratch or damage the car’s paint, clear coat, or window tint. UV exposure can also harden the residue, making it even more challenging to remove. Therefore, understanding the nature of sticker residue and its potential impact is crucial for choosing the right removal method.
Why Proper Removal Matters
Protecting your car’s paint and finish is paramount. Improper removal techniques can lead to scratches, swirls, and even paint chipping, significantly devaluing your vehicle. Furthermore, aggressive solvents can damage plastic trim or rubber seals. By using the right tools and methods, you can safely remove sticker residue without compromising your car’s appearance or structural integrity. This guide will provide you with the knowledge to make informed decisions and avoid costly mistakes.
The Science Behind Adhesives: Why is Sticker Residue So Stubborn?
Adhesives work through a combination of mechanical interlocking and chemical bonding. Mechanical interlocking occurs when the adhesive fills microscopic irregularities on the surface, creating a physical grip. Chemical bonding involves the formation of molecular bonds between the adhesive and the surface. The strength of these bonds determines how difficult the residue is to remove.
Factors such as temperature, humidity, and UV exposure can affect the adhesive’s properties. Heat can soften some adhesives, making them easier to remove, while UV exposure can harden others, making them more resistant to solvents. Understanding these factors can help you choose the most effective removal method for your specific situation.
Essential Tools and Supplies for Removing Sticker Residue
Having the right tools and supplies on hand is crucial for successful sticker residue removal. Here’s a list of essential items:
- Microfiber cloths: Soft and non-abrasive, perfect for wiping away residue and preventing scratches.
- Plastic razor blades: Safer than metal blades for removing residue from paint and glass.
- Heat gun or hair dryer: To soften the adhesive.
- Adhesive remover: Specifically designed for removing sticker residue.
- Isopropyl alcohol: A versatile solvent for dissolving adhesives.
- Detailing clay: For removing stubborn residue and contaminants.
- Car wax or sealant: To protect the paint after residue removal.
Always test any cleaning solution or tool on an inconspicuous area of your car first to ensure it doesn’t damage the surface. Safety glasses and gloves are also recommended to protect your eyes and skin from chemical exposure.
Step-by-Step Guide: How to Remove Sticker Residue From Your Car Safely
Follow these steps for a safe and effective sticker residue removal process:
- Preparation: Wash the area around the sticker residue with soap and water to remove any dirt or grime.
- Heating (Optional): Use a heat gun or hair dryer to gently warm the residue. This will soften the adhesive and make it easier to remove. Hold the heat source a few inches away from the surface and move it in a sweeping motion to avoid overheating.
- Applying Adhesive Remover: Apply a small amount of adhesive remover to a microfiber cloth and gently rub it onto the residue. Allow the remover to sit for a few minutes to dissolve the adhesive.
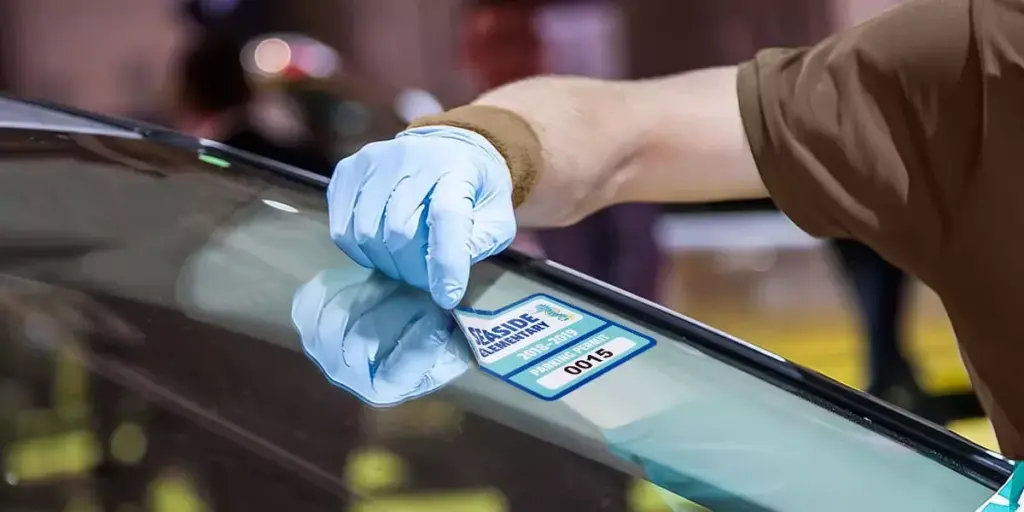
- Scraping (If Necessary): Use a plastic razor blade to gently scrape away the softened residue. Hold the blade at a low angle and apply light pressure to avoid scratching the surface.
- Wiping: Wipe away the remaining residue with a clean microfiber cloth.
- Cleaning: Wash the area with soap and water to remove any traces of adhesive remover.
- Protection: Apply car wax or sealant to protect the paint and restore its shine.
Dealing with Stubborn Residue
If the residue is particularly stubborn, you may need to repeat steps 3-5 several times. You can also try using a detailing clay bar to gently remove the residue. Be sure to lubricate the clay bar with detailing spray to prevent scratching.
Household Remedies for Removing Sticker Residue
If you don’t have adhesive remover on hand, several household remedies can be effective for removing sticker residue:
- Isopropyl Alcohol: A versatile solvent that can dissolve many types of adhesives.
- Vinegar: A mild acid that can help loosen the adhesive bond.
- Baking Soda Paste: A gentle abrasive that can help scrub away residue.
- Peanut Butter: The oils in peanut butter can help dissolve the adhesive.
- Cooking Oil: Similar to peanut butter, cooking oil can help loosen the adhesive.
When using household remedies, always test them on an inconspicuous area first to ensure they don’t damage the surface. Apply the remedy to a microfiber cloth and gently rub it onto the residue. Allow it to sit for a few minutes before wiping it away.
Choosing the Right Adhesive Remover: A Product Comparison
Several commercial adhesive removers are available on the market, each with its own strengths and weaknesses. Here’s a comparison of some popular options:
- Goo Gone Automotive: A popular choice for removing sticker residue, tar, and other sticky substances. It’s safe for use on most car surfaces but may require multiple applications for stubborn residue.
- 3M Adhesive Remover: A professional-grade adhesive remover that’s effective for removing a wide range of adhesives. It’s more potent than Goo Gone and should be used with caution.
- WD-40: A versatile lubricant that can also be used to remove sticker residue. It’s less effective than dedicated adhesive removers but can be a good option for mild residue.
- Krud Kutter: A powerful cleaner and degreaser that can also remove sticker residue. It’s safe for use on most surfaces but may require dilution.
When choosing an adhesive remover, consider the type of adhesive you’re dealing with, the surface you’re cleaning, and your personal preferences. Always read and follow the manufacturer’s instructions carefully.
Protecting Your Car’s Paint After Sticker Residue Removal
After removing sticker residue, it’s essential to protect the paint and restore its shine. Here are some tips for protecting your car’s paint:
- Wash the area: Wash the area with soap and water to remove any traces of adhesive remover or household remedies.
- Apply car wax or sealant: Apply a coat of car wax or sealant to protect the paint from UV exposure and environmental contaminants.
- Consider paint correction: If the paint has scratches or swirls, consider using a paint correction compound to restore its clarity.
Regular washing and waxing will help keep your car’s paint looking its best and prevent future sticker residue problems.
Preventing Sticker Residue: Tips and Tricks
The best way to deal with sticker residue is to prevent it from happening in the first place. Here are some tips for preventing sticker residue:
- Use removable stickers: Choose stickers that are designed to be easily removed without leaving residue.
- Apply stickers to clear bras or paint protection film: This will protect your car’s paint from the adhesive.
- Remove stickers promptly: The longer a sticker stays on your car, the more likely it is to leave residue.
- Use a heat gun or hair dryer: Gently warm the sticker before removing it to soften the adhesive.
By following these tips, you can minimize the risk of sticker residue and keep your car looking its best.
Advanced Techniques: Using Detailing Clay for Stubborn Residue
Detailing clay is a versatile tool for removing stubborn sticker residue and other contaminants from your car’s paint. It works by gently lifting the residue from the surface without scratching the paint. To use detailing clay, follow these steps:
- Wash the area: Wash the area with soap and water to remove any dirt or grime.
- Lubricate the clay bar: Spray the area with detailing spray to lubricate the clay bar.
- Gently rub the clay bar: Gently rub the clay bar over the residue in a back-and-forth motion.
- Knead the clay bar: As the clay bar picks up residue, knead it to expose a clean surface.
- Wipe the area: Wipe away any remaining residue with a clean microfiber cloth.
- Protect the paint: Apply car wax or sealant to protect the paint and restore its shine.
Detailing clay can be an effective way to remove stubborn sticker residue, but it’s essential to use it correctly to avoid scratching the paint.
Common Mistakes to Avoid When Removing Sticker Residue
Removing sticker residue can be tricky, and it’s easy to make mistakes that can damage your car’s paint. Here are some common mistakes to avoid:
- Using abrasive tools: Avoid using metal scrapers, scouring pads, or other abrasive tools that can scratch the paint.
- Applying too much pressure: Applying too much pressure when scraping or rubbing can also scratch the paint.
- Using harsh chemicals: Avoid using harsh chemicals like acetone or lacquer thinner, which can damage the paint and plastic trim.
- Ignoring the manufacturer’s instructions: Always read and follow the manufacturer’s instructions for adhesive removers and other cleaning products.
By avoiding these common mistakes, you can safely and effectively remove sticker residue without damaging your car’s paint.
The Role of Heat Guns and Hair Dryers in Residue Removal
Heat guns and hair dryers can be valuable tools for softening adhesive and making it easier to remove sticker residue. However, it’s essential to use them correctly to avoid damaging your car’s paint. Here are some tips for using heat guns and hair dryers:
- Use a low setting: Start with a low heat setting and gradually increase the temperature as needed.
- Keep the heat source moving: Move the heat source in a sweeping motion to avoid overheating one area.
- Hold the heat source a few inches away: Hold the heat source a few inches away from the surface to prevent scorching the paint.
- Test the temperature: Test the temperature of the surface with your hand to ensure it’s not too hot.
By using heat guns and hair dryers carefully, you can soften adhesive and make it easier to remove sticker residue without damaging your car’s paint.
Sticker Residue on Different Car Surfaces: A Tailored Approach
The best method for removing sticker residue may vary depending on the surface you’re cleaning. Here’s a tailored approach for different car surfaces:
- Paint: Use a plastic razor blade, adhesive remover, and detailing clay.
- Glass: Use a razor blade, glass cleaner, and steel wool (for stubborn residue).
- Plastic Trim: Use a plastic razor blade, adhesive remover, and a soft cloth.
- Upholstery: Use a fabric cleaner and a soft brush.
Always test any cleaning solution or tool on an inconspicuous area first to ensure it doesn’t damage the surface.
Expert Insights: Interview with a Professional Detailer
We spoke with [Detailer Name], a certified professional detailer with over 15 years of experience, about their tips and tricks for removing sticker residue. According to [Detailer Name], “Patience is key. Don’t rush the process, and always use the least aggressive method first. Start with warm water and soap, then move on to adhesive removers if necessary. A plastic razor blade is your best friend when dealing with paint, but be careful not to apply too much pressure.” [Detailer Name] also emphasized the importance of protecting the paint after residue removal with a quality wax or sealant. “It’s not just about removing the residue; it’s about restoring the paint’s shine and protecting it from future damage.”
Q&A: Your Burning Questions About Sticker Residue, Answered
- Q: What’s the best way to remove sticker residue from tinted windows without damaging the tint?
A: Use a mild adhesive remover specifically designed for automotive use. Apply it sparingly to a microfiber cloth and gently dab the residue. Avoid excessive rubbing or scraping, as this can damage the tint film. Always test in an inconspicuous area first. A heat gun on a very low setting can also help soften the adhesive.
- Q: Can I use a magic eraser to remove sticker residue from my car?
A: Magic erasers are micro-abrasive and can potentially scratch your car’s paint, especially the clear coat. It’s generally not recommended for use on painted surfaces. However, it might be suitable for glass surfaces with extreme caution.
- Q: How can I prevent sticker residue from happening in the first place?
A: The best way is to use stickers designed for easy removal. When applying stickers, ensure the surface is clean and dry. Consider applying stickers to a clear bra or paint protection film to protect the underlying paint. Remove stickers promptly, as the longer they stay on, the harder the residue becomes.
- Q: Is WD-40 safe to use on my car’s paint?
A: Yes, WD-40 can be used to remove sticker residue from car paint, but it’s important to use it correctly. Spray a small amount onto a microfiber cloth and gently rub the residue. Avoid spraying it directly onto the paint. Afterwards, wash the area with soap and water to remove any WD-40 residue.
- Q: What if the sticker residue has been on my car for years?
A: Older residue can be more challenging to remove. Apply a generous amount of adhesive remover and let it sit for an extended period (30 minutes to an hour) to soften the adhesive. You may need to repeat the process multiple times. A heat gun can also be very helpful in these cases.
- Q: Can I use Goo Gone on my car’s plastic trim without damaging it?
A: Yes, Goo Gone Automotive is generally safe for use on most car surfaces, including plastic trim. However, it’s always a good idea to test it on an inconspicuous area first to ensure it doesn’t cause any discoloration or damage. Apply it sparingly and wipe it off promptly.
- Q: What’s the best way to remove sticker residue from my car’s leather seats?
A: For leather seats, use a leather cleaner specifically designed for automotive use. Apply it to a microfiber cloth and gently dab the residue. Avoid rubbing or scrubbing, as this can damage the leather. Follow up with a leather conditioner to restore moisture.
- Q: How do I remove sticker residue from my car’s headlights without scratching them?
A: Headlights are often made of plastic and can be easily scratched. Use a plastic cleaner and polisher designed for headlights. Apply it with a soft microfiber cloth and gently rub the residue. Avoid using abrasive cleaners or tools.
- Q: Can I use a pressure washer to remove sticker residue?
A: No, pressure washers are not recommended for removing sticker residue. The high pressure can damage your car’s paint, especially if it’s chipped or scratched. It’s best to use manual methods and gentle cleaners.
- Q: What are some eco-friendly options for removing sticker residue?
A: Some eco-friendly options include vinegar, baking soda paste, and citrus-based cleaners. These are less harsh than chemical adhesive removers but may require more effort and time to remove the residue.
Conclusion: Restoring Your Car’s Beauty, One Sticker at a Time
Removing sticker residue from your car doesn’t have to be a daunting task. By understanding the nature of adhesives, using the right tools and techniques, and taking preventative measures, you can safely and effectively restore your car’s beauty. Remember to always test any cleaning solution or tool on an inconspicuous area first, and don’t be afraid to seek professional help if you’re unsure about any step in the process. Our guide has provided you with expert-backed methods and insights to tackle any residue challenge. We encourage you to share your experiences with how to remove sticker residue from a car in the comments below. Explore our advanced guide to car detailing for even more tips and tricks. Contact our experts for a consultation on how to remove sticker residue from a car and keep your vehicle looking its best.
