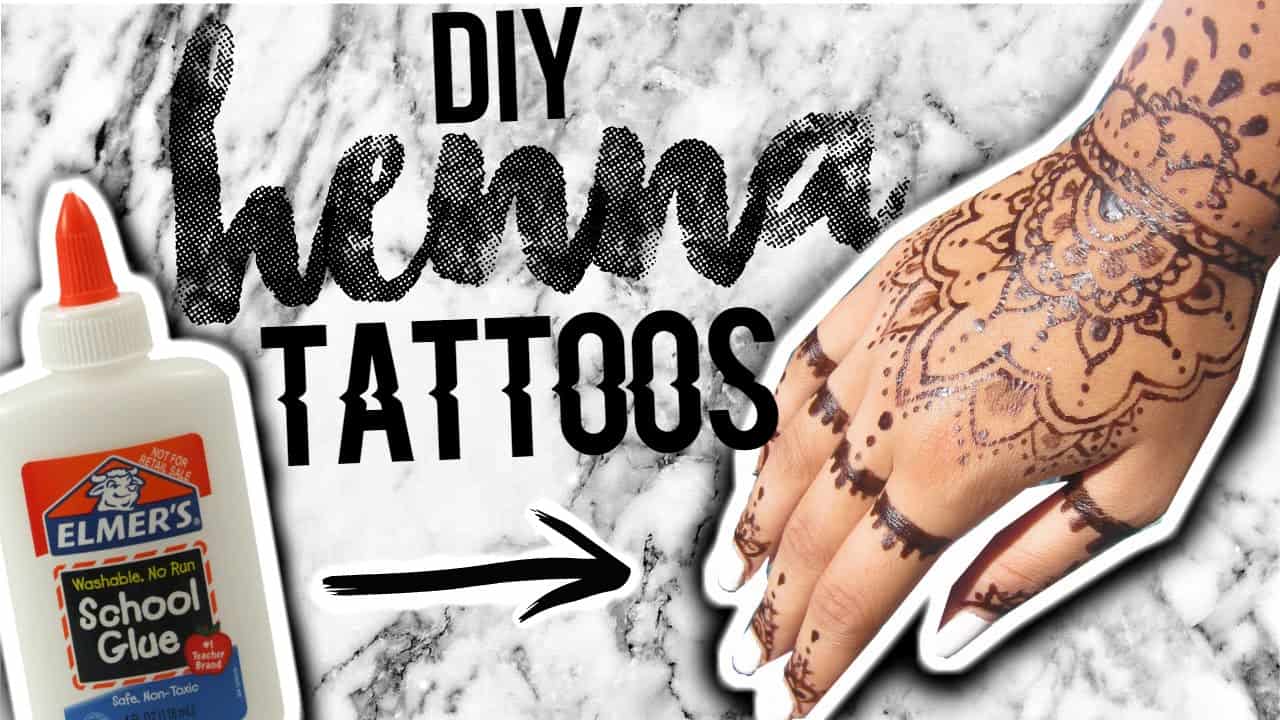
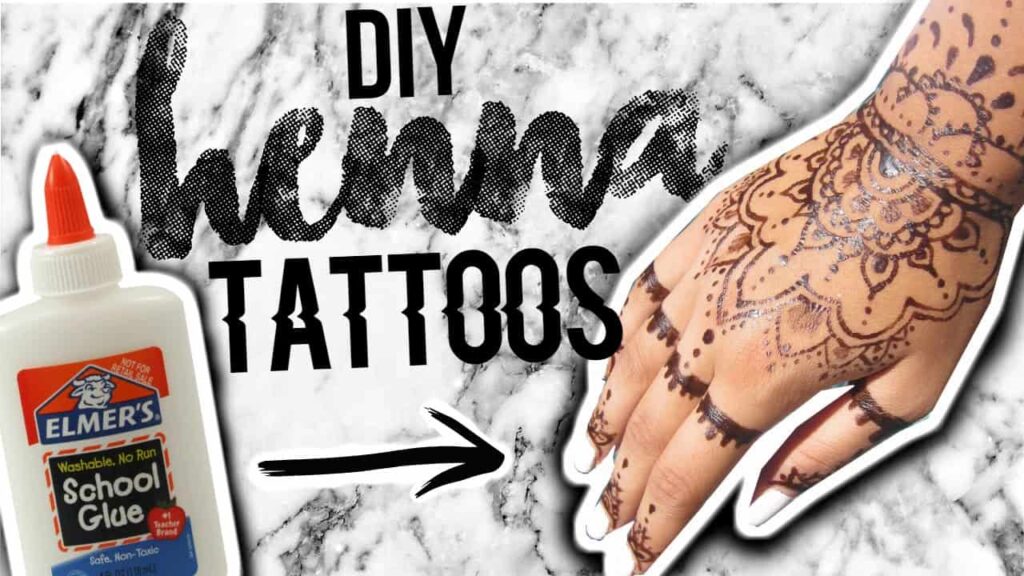
How to Do Henna Tattoos Yourself: A Comprehensive Guide
Want to adorn your skin with beautiful, temporary artwork? Learning how to do henna tattoos yourself is a rewarding skill that allows you to express your creativity and celebrate cultural traditions. This comprehensive guide will walk you through every step, from understanding henna paste to creating stunning designs, ensuring a safe and satisfying experience. Whether you’re a beginner or have some experience, we’ll provide expert tips and techniques to help you achieve professional-looking results. We believe that with the right knowledge and a little practice, anyone can master the art of henna application.
Understanding Henna and Its Origins
Henna, also known as Mehndi, is a natural dye derived from the *Lawsonia inermis* plant. For centuries, it has been used in various cultures across the Middle East, Africa, and South Asia for body art, hair dyeing, and textile decoration. Understanding the history and cultural significance of henna is crucial before embarking on your henna journey. The application of henna is often associated with celebrations, rituals, and rites of passage, such as weddings, festivals, and religious ceremonies. Different cultures have unique styles and patterns, reflecting their traditions and beliefs. For example, intricate floral designs are common in Indian Mehndi, while geometric patterns are prevalent in Arabic henna art.
Authentic henna powder is greenish-brown and should be mixed with liquid to create a paste. This paste is then applied to the skin, staining it a reddish-brown color that can last for one to three weeks, depending on skin type, aftercare, and the quality of the henna. It’s important to note that “black henna,” which contains a chemical dye called paraphenylenediamine (PPD), is dangerous and can cause severe allergic reactions, permanent scarring, and skin damage. Always insist on natural henna to ensure your safety.
The Difference Between Natural Henna and “Black Henna”
Natural henna produces a reddish-brown stain. “Black henna” is often marketed as a quicker and more intense alternative, but it contains PPD, a chemical dye that is illegal to use on skin in many countries. PPD can cause severe allergic reactions, blisters, permanent scarring, and lifelong sensitivity to chemicals. The dangers of black henna cannot be overstated. Always ask for proof of natural henna ingredients and avoid any product advertised as “black henna.”
Identifying High-Quality Henna Powder
Choosing high-quality henna powder is essential for achieving a rich, long-lasting stain and avoiding skin irritation. Look for henna powder that is finely sifted, greenish-brown in color, and has a fresh, earthy scent. Avoid henna powder that is old, lumpy, or has a musty odor, as it may have lost its potency or been contaminated. Reputable suppliers will provide information about the origin and purity of their henna powder. Consider purchasing organic henna powder to minimize the risk of exposure to pesticides and other chemicals.
Gathering Your Supplies: What You’ll Need
Before you start, gather all the necessary supplies to ensure a smooth and enjoyable henna application process. Here’s a comprehensive list:
* **Henna Powder:** Opt for high-quality, finely sifted, natural henna powder.
* **Lemon Juice or Other Acidic Liquid:** Lemon juice is commonly used to activate the henna dye, but other acidic liquids like lime juice, orange juice, or strong tea can also be used. The acidity helps release the lawsone molecules from the henna powder, resulting in a darker stain.
* **Essential Oils:** Certain essential oils, such as lavender, tea tree, or cajeput, can enhance the henna stain and provide a pleasant aroma. These oils contain terpenes, which help the lawsone molecules bind to the skin more effectively. Use only skin-safe, therapeutic-grade essential oils.
* **Sugar:** Adding sugar to the henna paste helps it stick to the skin and stay moist, allowing for a better stain. Any type of sugar can be used, such as granulated sugar, brown sugar, or honey.
* **Mixing Bowl and Spoon:** Use a non-reactive bowl (glass, ceramic, or plastic) and a spoon to mix the henna paste. Avoid using metal bowls or utensils, as they can react with the henna and affect the stain.
* **Applicator:** Choose an applicator that suits your design preferences and skill level. Options include:
* **Cone:** Pre-rolled cones or cellophane sheets to make your own cones.
* **Syringe:** For precise lines and intricate details.
* **Applicator Bottles:** For larger areas and simpler designs.
* **Transfer Paper or Stencils (Optional):** If you’re new to henna or want to create complex designs, transfer paper or stencils can be helpful.
* **Cotton Balls or Swabs:** For cleaning up mistakes and applying lemon-sugar sealant.
* **Paper Towels:** For general cleanup.
* **Gloves:** To protect your hands from staining.
* **Lemon-Sugar Sealant:** Mix equal parts lemon juice and sugar to create a sealant that helps keep the henna paste moist and adhered to the skin.
Step-by-Step Guide: Mixing the Perfect Henna Paste
Mixing the henna paste is a crucial step in achieving a successful henna tattoo. The consistency of the paste should be smooth, creamy, and free of lumps. Here’s a detailed guide:
1. **Sift the Henna Powder:** Sift the henna powder through a fine-mesh sieve to remove any lumps or impurities. This will ensure a smooth paste.
2. **Add Acidic Liquid:** Gradually add lemon juice (or your chosen acidic liquid) to the henna powder, mixing with a spoon until you achieve a thick, mashed-potato-like consistency. Start with a small amount of liquid and add more as needed, being careful not to add too much at once.
3. **Add Essential Oils:** Add a few drops of your chosen essential oil to the mixture. Stir well to incorporate the oil evenly.
4. **Add Sugar:** Add a teaspoon of sugar to the mixture. Stir well to dissolve the sugar completely.
5. **Rest the Paste:** Cover the bowl with plastic wrap and let the paste rest at room temperature for at least 4-6 hours, or preferably overnight. This allows the lawsone molecules to release from the henna powder and create a potent dye. This process is often referred to as “dye release.”
6. **Check the Consistency:** After resting, check the consistency of the paste. It should be smooth, creamy, and easily flowable. If the paste is too thick, add a few drops of lemon juice or water to thin it out. If it’s too thin, add a small amount of henna powder to thicken it.
7. **Strain the Paste (Optional):** If you’re using a cone applicator, strain the paste through a nylon stocking or cheesecloth to remove any remaining lumps or particles. This will prevent the cone from clogging.
Preparing Your Skin for Henna Application
Proper skin preparation is essential for achieving a dark, long-lasting henna stain. Here’s what you need to do:
1. **Cleanse the Skin:** Wash the area where you’ll be applying the henna with soap and water to remove any dirt, oil, or lotions. Avoid using moisturizers or oily products before applying henna, as they can create a barrier that prevents the henna from staining the skin properly.
2. **Exfoliate (Optional):** Gently exfoliate the skin with a scrub or loofah to remove any dead skin cells. This will help the henna penetrate the skin more effectively.
3. **Shave or Wax (Optional):** If you have hair in the area where you’ll be applying the henna, consider shaving or waxing it beforehand. Hair can interfere with the henna application and prevent the skin from staining evenly.
4. **Avoid Using Oils or Lotions:** Ensure that the skin is completely clean and dry before applying the henna. Avoid using any oils, lotions, or moisturizers, as they can create a barrier that prevents the henna from staining the skin properly.
Applying the Henna: Techniques and Tips
Now that you’ve prepared your skin and mixed the henna paste, it’s time to start applying the henna. Here are some techniques and tips to help you create beautiful henna designs:
1. **Choose Your Design:** Select a design that you like and that matches your skill level. Start with simple designs if you’re a beginner and gradually work your way up to more complex patterns. You can find inspiration online, in books, or from other henna artists. Consider using stencils or transfer paper if you’re not confident in your freehand drawing skills.
2. **Practice on Paper:** Before applying the henna to your skin, practice your design on paper to get a feel for the applicator and the flow of the paste. This will help you avoid mistakes and create a more precise design.
3. **Apply the Henna Paste:** Hold the applicator like a pen and gently squeeze the paste onto your skin, following your design. Apply a generous layer of paste, about 2-3 mm thick. Avoid pressing too hard, as this can cause the paste to smudge.
4. **Use Stencils or Transfer Paper (Optional):** If you’re using stencils or transfer paper, apply them to your skin and carefully fill in the design with henna paste. Remove the stencil or transfer paper while the paste is still wet.
5. **Correct Mistakes:** If you make a mistake, use a cotton swab dipped in water or lemon juice to gently wipe away the unwanted paste. Do this quickly, before the paste has a chance to dry.
6. **Create a Sealant:** Apply a lemon-sugar sealant over the henna paste to keep it moist and adhered to the skin. This will help the henna stain darker and last longer. Use a cotton ball or swab to gently dab the sealant over the paste, being careful not to smudge the design.
Aftercare: Maximizing Your Henna Stain
Proper aftercare is crucial for achieving a dark, long-lasting henna stain. Here’s what you need to do:
1. **Keep the Paste on for as Long as Possible:** The longer you leave the henna paste on your skin, the darker the stain will be. Aim to keep the paste on for at least 2-6 hours, or preferably overnight. You can wrap the area with medical tape or cloth to keep the paste in place and prevent it from smudging.
2. **Avoid Water:** Water can prevent the henna from staining the skin properly. Avoid washing the area for at least 2-4 hours after removing the paste. When you do wash it, use mild soap and water, and avoid scrubbing the area.
3. **Apply Natural Oils:** After removing the paste, apply a natural oil, such as coconut oil, olive oil, or sesame oil, to the area. This will help moisturize the skin and protect the stain. Avoid using petroleum-based products, as they can fade the stain.
4. **Avoid Harsh Chemicals:** Avoid exposing the area to harsh chemicals, such as chlorine, detergents, or cleaning products, as they can fade the stain.
5. **Avoid Exfoliation:** Avoid exfoliating the area, as this can remove the stained skin cells and fade the stain.
6. **Keep Skin Moisturized:** Regularly moisturize the skin to keep it hydrated and prevent the stain from fading.
7. **Avoid Excessive Sun Exposure:** Excessive sun exposure can dry out the skin and fade the stain. Protect the area from the sun by wearing loose-fitting clothing or applying sunscreen.
Henna Tattoo Design Ideas and Inspiration
Need some inspiration for your henna tattoo designs? Here are a few ideas to get you started:
* **Floral Designs:** Intricate floral patterns are a classic choice for henna tattoos. They can be simple or complex, and can be customized to suit your personal style. Consider using roses, lotuses, or other flowers that have special meaning to you.
* **Geometric Patterns:** Geometric patterns are a modern and stylish choice for henna tattoos. They can be symmetrical or asymmetrical, and can be used to create bold and eye-catching designs. Consider using triangles, squares, circles, or other shapes to create your own unique pattern.
* **Tribal Designs:** Tribal designs are inspired by the traditional body art of various cultures around the world. They can be bold and graphic, and can be used to represent your heritage or personal beliefs. Consider using spirals, waves, or other symbols that have special meaning to you.
* **Mandala Designs:** Mandalas are circular designs that represent the universe. They are often used in meditation and spiritual practices, and can be a beautiful and meaningful choice for henna tattoos. Consider using intricate patterns and symbols to create your own unique mandala design.
* **Zodiac Signs:** Representing your zodiac sign through henna is a fun and personalized way to express yourself. Each zodiac sign has unique symbols and characteristics that can be incorporated into your design.
* **Names or Initials:** A simple and meaningful option is to incorporate names or initials into your henna design. This can be a tribute to loved ones or a way to personalize your body art.
* **Animal Motifs:** Animals hold symbolic meanings in many cultures. Choose an animal that resonates with you, such as a butterfly for transformation, a lion for strength, or a bird for freedom.
Troubleshooting Common Henna Tattoo Problems
Even with careful preparation and application, you may encounter some common problems with your henna tattoo. Here’s how to troubleshoot them:
* **Faint Stain:** If your henna stain is faint, it could be due to several factors, such as poor-quality henna powder, insufficient dye release, improper skin preparation, or inadequate aftercare. Make sure you’re using high-quality henna powder, allowing the paste to rest for the recommended time, properly preparing your skin, and following the aftercare instructions.
* **Uneven Stain:** If your henna stain is uneven, it could be due to uneven application of the paste, variations in skin thickness, or differences in skin hydration. Try to apply the paste evenly and ensure that your skin is properly hydrated. You can also try exfoliating the area to remove any dead skin cells.
* **Allergic Reaction:** Although rare, some people may experience an allergic reaction to natural henna. Symptoms may include itching, redness, swelling, or blisters. If you experience any of these symptoms, remove the paste immediately and wash the area with soap and water. Apply a cold compress to the area and consult a doctor if symptoms persist. Remember to always test a small area of skin before applying henna extensively.
* **Smudging:** Smudging can occur if the henna paste is disturbed before it has a chance to dry. Avoid touching the paste and keep the area protected until it dries completely. If smudging occurs, gently wipe away the unwanted paste with a damp cotton swab.
Product Explanation: High-Quality Henna Paste Kits
For beginners or those seeking convenience, high-quality henna paste kits provide a reliable solution. These kits typically include natural henna powder, essential oils, applicator cones, and aftercare instructions. The key benefit is pre-measured ingredients and clear instructions, minimizing the risk of errors in mixing. Leading brands prioritize natural ingredients and avoid harmful additives, ensuring a safe and enjoyable experience. These kits simplify the process of how to do henna tattoos yourself, especially for intricate designs, and are ideal for both personal use and small events.
Features Analysis of a Premium Henna Tattoo Kit
A premium henna tattoo kit offers several key features that contribute to a superior experience:
1. **Organic Henna Powder:** The use of certified organic henna powder ensures purity and minimizes the risk of skin irritation. This demonstrates a commitment to quality and user safety.
2. **Pre-Measured Ingredients:** Pre-measured henna powder, essential oils, and liquid activators simplify the mixing process, guaranteeing consistent results every time. This is especially helpful for beginners.
3. **Skin-Safe Essential Oils:** The inclusion of therapeutic-grade essential oils like lavender and tea tree enhances the stain and provides a pleasant aroma while being gentle on the skin. The benefits of these oils go beyond fragrance.
4. **Variety of Applicator Tips:** Offering a range of applicator tips, from fine-point cones to wider nozzles, allows for diverse design options and caters to different skill levels. This versatility enhances the user’s creative freedom.
5. **Detailed Instruction Manual:** A comprehensive instruction manual provides step-by-step guidance on mixing, application, and aftercare, ensuring that users achieve optimal results. Clear and concise instructions are crucial for success.
6. **Lemon-Sugar Sealant:** Including a pre-made lemon-sugar sealant helps keep the henna paste moist and adhered to the skin, resulting in a darker and longer-lasting stain. This is an essential element for maximizing the henna’s effectiveness.
7. **Aftercare Balm:** An aftercare balm formulated with natural oils and moisturizers helps protect and nourish the skin, prolonging the life of the henna tattoo. This shows a commitment to long-term user satisfaction.
Advantages, Benefits, and Real-World Value
Learning how to do henna tattoos yourself, especially with a reliable kit, offers numerous advantages:
* **Cost-Effectiveness:** Creating henna tattoos at home is significantly more affordable than visiting a professional artist. This allows for frequent experimentation and creativity without breaking the bank.
* **Creative Expression:** Henna tattoos provide a canvas for self-expression. You can design your own unique patterns, personalize them with names or symbols, and showcase your individual style.
* **Cultural Connection:** Henna has deep cultural roots. By learning to apply it yourself, you can connect with traditions and celebrate cultural heritage in a meaningful way.
* **Relaxation and Mindfulness:** The process of applying henna can be a meditative and relaxing experience. It requires focus, patience, and attention to detail, promoting mindfulness and stress reduction.
* **Social Engagement:** Henna tattoos are a great conversation starter and can be a fun activity to share with friends and family. You can host henna parties, create matching designs, and bond over this ancient art form.
* **Temporary Art:** Unlike permanent tattoos, henna tattoos are temporary and fade over time. This allows you to experiment with different designs and styles without long-term commitment.
* **Natural and Safe (with proper ingredients):** When using natural henna and following safety guidelines, henna tattoos are a relatively safe way to adorn your skin. This is a significant advantage over potentially harmful chemical dyes.
Review: Premium Henna Tattoo Kit
This premium henna tattoo kit offers a comprehensive and user-friendly experience for creating stunning henna designs at home. The organic henna powder and skin-safe essential oils ensure a safe and enjoyable application. The pre-measured ingredients and detailed instructions simplify the mixing process, making it accessible to beginners. The variety of applicator tips allows for diverse design options, while the lemon-sugar sealant and aftercare balm contribute to a long-lasting and vibrant stain.
**User Experience & Usability:** From the moment you open the kit, the quality of the components is evident. The instructions are clear and easy to follow, even for those with no prior experience. The pre-measured ingredients eliminate guesswork, and the applicator cones are comfortable to hold and use. The lemon-sugar sealant is particularly effective at keeping the paste moist and adhered to the skin.
**Performance & Effectiveness:** The henna paste stains the skin quickly and deeply, resulting in a rich, reddish-brown color. The stain lasts for approximately 1-3 weeks, depending on skin type and aftercare. The included aftercare balm helps prolong the life of the tattoo and keeps the skin moisturized.
**Pros:**
* **High-Quality Ingredients:** The organic henna powder and skin-safe essential oils ensure a safe and enjoyable experience.
* **User-Friendly Design:** The pre-measured ingredients and detailed instructions simplify the mixing and application process.
* **Versatile Applicator Tips:** The variety of applicator tips allows for diverse design options.
* **Long-Lasting Stain:** The lemon-sugar sealant and aftercare balm contribute to a vibrant and long-lasting stain.
* **Comprehensive Kit:** The kit includes everything you need to create beautiful henna designs at home.
**Cons/Limitations:**
* **Price:** Premium kits are more expensive than basic henna kits.
* **Dye Release Time:** The henna paste requires several hours to release its dye, which may require planning.
* **Natural Variations:** Henna results can vary depending on skin type and individual body chemistry.
**Ideal User Profile:** This kit is best suited for individuals who are new to henna tattoos or who want a convenient and reliable way to create professional-looking designs at home. It’s also ideal for those who value high-quality ingredients and user-friendly design.
**Key Alternatives:**
* **Basic Henna Kits:** These kits offer a more affordable option but may contain lower-quality ingredients and less detailed instructions.
* **Professional Henna Artists:** Hiring a professional henna artist can provide a more personalized and intricate design but is a more expensive option.
**Expert Overall Verdict & Recommendation:** This premium henna tattoo kit is a worthwhile investment for anyone who wants to create beautiful and long-lasting henna designs at home. The high-quality ingredients, user-friendly design, and comprehensive instructions make it an excellent choice for both beginners and experienced henna artists. We highly recommend this kit for its safety, convenience, and performance.
Q&A: Your Henna Tattoo Questions Answered
Here are some insightful questions and answers about henna tattoos:
1. **Q: How can I make my henna stain darker naturally?**
**A:** To enhance your henna stain, ensure you’re using high-quality henna powder, apply a lemon-sugar sealant frequently, keep the paste on for as long as possible (ideally overnight), and avoid water contact immediately after removal. Applying natural oils like coconut or olive oil after removing the paste also helps.
2. **Q: What essential oils are best for henna and why?**
**A:** Lavender, tea tree, and cajeput essential oils are excellent choices because they contain terpenes, which aid in the dye release process and help the lawsone molecules bind more effectively to the skin, resulting in a darker and longer-lasting stain.
3. **Q: How long does henna paste need to sit before it’s ready to use?**
**A:** Henna paste typically needs to sit for at least 4-6 hours, or preferably overnight (12-24 hours), to allow the lawsone molecules to release from the henna powder. This process, known as dye release, is crucial for achieving a potent stain.
4. **Q: What are the signs of a dangerous “black henna” tattoo?**
**A:** Black henna tattoos often appear very dark, almost black, immediately after application. They can cause rapid skin irritation, blistering, and severe allergic reactions. The presence of PPD (paraphenylenediamine) is the key indicator of dangerous black henna.
5. **Q: Can I use henna on my hair as well as my skin?**
**A:** Yes, natural henna can be used to dye your hair a reddish-brown color. However, it’s essential to use henna specifically formulated for hair, as body art henna may contain additives that are not suitable for hair.
6. **Q: How do I clean up henna mistakes during application?**
**A:** Use a cotton swab dipped in water or lemon juice to gently wipe away unwanted henna paste. Do this quickly, before the paste has a chance to dry and stain the skin.
7. **Q: Is it safe to apply henna on children?**
**A:** Natural henna is generally considered safe for children, but it’s crucial to ensure that the henna is 100% natural and free of harmful chemicals like PPD. Always perform a patch test on a small area of skin before applying henna extensively.
8. **Q: How can I remove a henna stain if I don’t like it?**
**A:** Henna stains are designed to be temporary, but you can try to fade them faster by exfoliating the skin, using lemon juice or baking soda paste, or applying a mixture of olive oil and salt. However, complete removal may not be possible.
9. **Q: What’s the best way to store leftover henna paste?**
**A:** Leftover henna paste can be stored in the freezer for several months. Thaw the paste at room temperature before use and check the consistency. You may need to add a few drops of liquid to restore its smoothness.
10. **Q: Can I swim with a henna tattoo?**
**A:** Swimming in chlorinated water can fade your henna tattoo faster. It’s best to apply a layer of natural oil, such as coconut oil, before swimming to protect the stain.
Conclusion
Learning how to do henna tattoos yourself is a rewarding journey that combines creativity, cultural appreciation, and self-expression. By understanding the origins of henna, mastering the mixing and application techniques, and following proper aftercare, you can create stunning and meaningful body art in the comfort of your own home. Remember to always prioritize safety by using natural henna and avoiding harmful chemicals. Whether you’re a beginner or an experienced artist, the possibilities are endless when you embrace the art of henna.
Ready to embark on your henna adventure? Share your experiences with doing henna tattoos yourself in the comments below. Explore our advanced guide to creating intricate henna designs for even more inspiration. Contact our experts for a personalized consultation on choosing the right henna supplies and techniques for your unique needs.
