Henna Tattoo: The Ultimate Guide to Art, Safety, and Culture (2024)
Are you captivated by the intricate beauty of henna tattoos? Do you want to adorn your skin with stunning temporary art while ensuring your safety and understanding the cultural significance? You’ve come to the right place. This comprehensive guide provides everything you need to know about henna tattoos, from their rich history and application techniques to safety precautions and aftercare tips. We delve deep into the world of henna, providing expert advice and practical guidance to help you create or appreciate this beautiful art form safely and responsibly. Get ready to unlock the secrets of henna and embark on a journey of artistic expression and cultural appreciation.
What is Henna Tattoo? A Deep Dive into History, Art, and Culture
Henna, scientifically known as *Lawsonia inermis*, is a flowering plant that has been used for centuries to create temporary body art. The leaves of the henna plant contain a pigment called lawsone, which binds to the protein in skin, hair, and nails, leaving behind a reddish-brown stain. This natural dye has been used in various cultures for cosmetic, medicinal, and religious purposes.
### History and Origins
The use of henna dates back to ancient civilizations, with evidence suggesting its presence in Egypt as far back as 3400 BC. Mummies have been found with henna-stained hair and hands, indicating its significance in funerary rituals. Henna then spread to other parts of the world, including the Middle East, North Africa, and South Asia, where it became deeply ingrained in cultural traditions.
In ancient Egypt, henna was associated with fertility and rebirth, and it was used to adorn the bodies of pharaohs and other members of the elite. In the Middle East, henna was used for celebrations, such as weddings and religious festivals. In South Asia, henna became an integral part of bridal traditions, with intricate designs applied to the bride’s hands and feet as a symbol of good luck and prosperity.
### Cultural Significance
Today, henna continues to hold deep cultural significance in many parts of the world. In South Asia, bridal henna, also known as Mehndi, is a elaborate pre-wedding ceremony where the bride and her female relatives and friends gather to have henna applied. The intricate designs often tell stories, symbolize blessings, and represent the couple’s journey together. The darkness of the henna stain is believed to predict the strength of the marriage.
In many Islamic cultures, henna is used during Eid celebrations and other religious festivals. It is also used to mark rites of passage, such as births and circumcisions. The application of henna is often a communal activity, bringing people together and strengthening social bonds.
### The Art of Henna
The art of henna involves creating intricate designs on the skin using a paste made from dried henna leaves. The paste is typically applied using a cone or applicator bottle, allowing for precise and detailed patterns. The designs can range from simple geometric shapes to elaborate floral motifs and intricate storytelling scenes. The artistry lies not only in the design itself but also in the skill of applying the paste and achieving a consistent and beautiful stain.
The color of the henna stain can vary depending on several factors, including the quality of the henna powder, the acidity of the skin, and the aftercare techniques used. Generally, the stain starts as a light orange color and gradually darkens to a reddish-brown over the course of 24-48 hours.
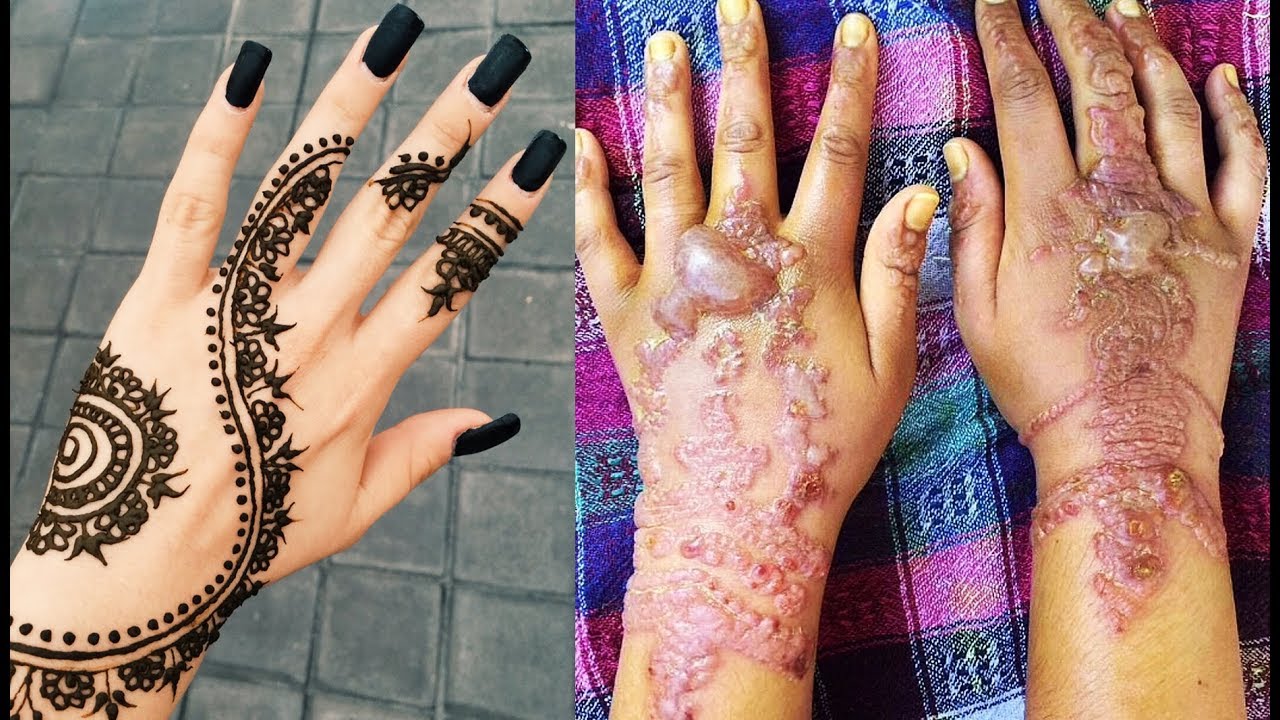
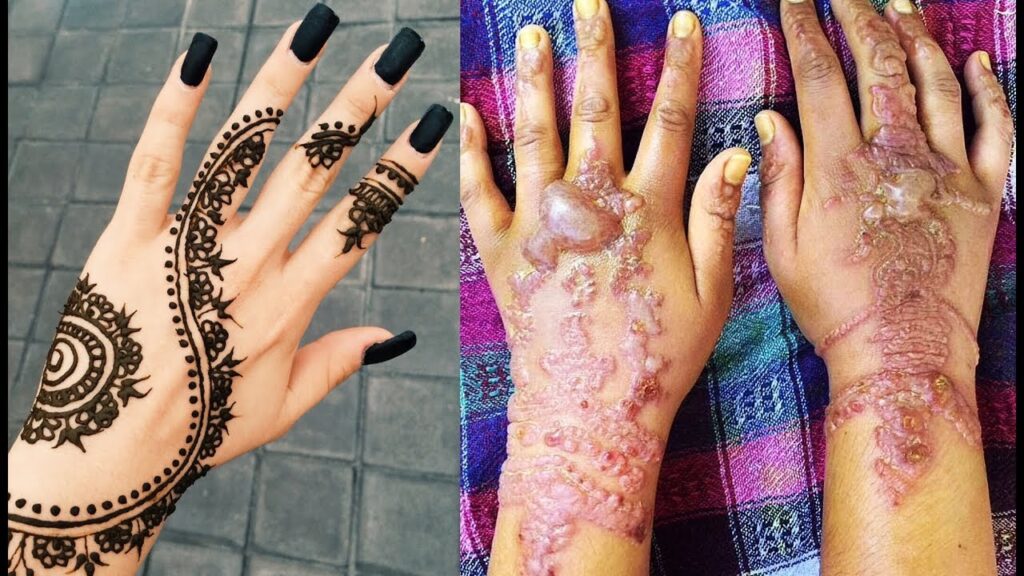
## Natural Henna vs. Black Henna: Understanding the Risks
It’s crucial to differentiate between natural henna and “black henna.” Natural henna, derived purely from the *Lawsonia inermis* plant, produces a safe, reddish-brown stain. “Black henna,” on the other hand, is often a misnomer and a dangerous concoction. It contains a chemical dye called paraphenylenediamine (PPD) in high concentrations. PPD is illegal to use on the skin in many countries, as it can cause severe allergic reactions, permanent scarring, and even long-term health problems.
### The Dangers of PPD
PPD is a potent allergen that can trigger a range of adverse reactions. Some people may experience immediate symptoms, such as itching, redness, and blistering. Others may develop delayed reactions, which can appear days or even weeks after the application of “black henna.” In severe cases, PPD can cause anaphylactic shock, a life-threatening allergic reaction.
Even if a person doesn’t experience an immediate reaction to “black henna,” they may become sensitized to PPD, meaning they will develop an allergy to it in the future. This can make it difficult or impossible to use hair dyes or other products that contain PPD.
### Identifying Natural Henna
To protect yourself from the dangers of “black henna,” it’s essential to be able to identify natural henna. Here are some key characteristics to look for:
* **Color:** Natural henna always produces a reddish-brown stain. If the henna artist claims to be able to create black or other colors, it is likely not natural henna.
* **Application:** Natural henna paste is typically greenish-brown in color and has a earthy scent. “Black henna” paste may be black or dark blue and may have a chemical odor.
* **Stain Development:** Natural henna stains develop slowly, taking 24-48 hours to reach their full color. “Black henna” stains develop much faster, often within a few hours.
* **Ingredients:** Always ask the henna artist about the ingredients in their paste. Natural henna should only contain henna powder, water, lemon juice, and essential oils.
### Choosing a Reputable Henna Artist
When getting a henna tattoo, it’s crucial to choose a reputable and experienced artist who uses only natural henna. Look for artists who are knowledgeable about the history and traditions of henna, and who are committed to using safe and ethical practices. Ask to see examples of their work and read reviews from other customers. If you have any concerns, don’t hesitate to ask questions or seek a second opinion.
## The Henna Cone: Your Tool for Artistic Expression
The henna cone is the primary tool used for applying henna paste to the skin. It’s typically made from a thin, flexible material, such as cellophane or plastic, and shaped into a cone with a small opening at the tip. The henna paste is filled into the cone, and the artist controls the flow of paste by applying pressure to the cone.
### Making Your Own Henna Cone
While pre-made henna cones are available for purchase, many artists prefer to make their own cones. This allows them to customize the size and shape of the cone to suit their individual preferences. Here’s a simple guide to making your own henna cone:
1. **Gather your materials:** You’ll need a sheet of cellophane or plastic, scissors, tape, and a pen or pencil.
2. **Cut the cellophane:** Cut a square or rectangular piece of cellophane, approximately 6-8 inches in size.
3. **Form the cone:** Roll the cellophane into a cone shape, making sure the tip is narrow and pointed. Secure the cone with tape.
4. **Adjust the opening:** Use scissors to trim the tip of the cone, creating a small opening. The size of the opening will determine the thickness of the lines you can create.
5. **Practice:** Before filling the cone with henna paste, practice using it with a dummy paste, such as toothpaste or yogurt. This will help you get a feel for the pressure required to control the flow of paste.
### Filling the Henna Cone
Once you’ve made your henna cone, it’s time to fill it with henna paste. Here’s how:
1. **Prepare the paste:** Make sure your henna paste is smooth and free of lumps. If necessary, strain the paste through a fine-mesh sieve.
2. **Spoon the paste:** Use a spoon or spatula to transfer the henna paste into the cone. Be careful not to overfill the cone, as this can make it difficult to control the flow of paste.
3. **Seal the cone:** Fold the top of the cone over and secure it with tape or a rubber band. This will prevent the paste from leaking out.
### Using the Henna Cone
To use the henna cone, hold it in your dominant hand and apply gentle pressure to the cone. The paste should flow smoothly and evenly. Practice on a piece of paper or your skin to get a feel for the pressure required to create different line thicknesses. Remember to keep the cone moving at a steady pace to avoid blotches or uneven lines.
## Designing Your Henna Tattoo: Inspiration and Techniques
Designing a henna tattoo is a creative process that allows you to express your individuality and cultural appreciation. Whether you’re a beginner or an experienced artist, there are many ways to find inspiration and develop your design skills.
### Sources of Inspiration
* **Traditional Designs:** Explore the rich history and traditions of henna art by studying traditional designs from different cultures. Look for patterns and motifs that resonate with you and adapt them to your own style.
* **Nature:** Nature is a constant source of inspiration for artists. Look for patterns in flowers, leaves, animals, and landscapes and incorporate them into your designs.
* **Geometric Shapes:** Geometric shapes can add a modern and contemporary touch to your henna designs. Experiment with different combinations of circles, squares, triangles, and lines to create unique and eye-catching patterns.
* **Personal Symbols:** Incorporate personal symbols and motifs into your designs to make them more meaningful and unique. Consider using symbols that represent your interests, beliefs, or values.
### Basic Techniques
* **Practice Line Work:** Before attempting complex designs, practice drawing straight lines, curves, and circles. This will help you develop your control and precision.
* **Start Simple:** Begin with simple designs and gradually work your way up to more complex patterns. Don’t be afraid to experiment and make mistakes.
* **Use a Template:** If you’re struggling to create a design freehand, use a template or stencil. You can find templates online or create your own.
* **Break Down Complex Designs:** When tackling a complex design, break it down into smaller, more manageable sections. This will make the process less daunting and help you stay organized.
### Popular Henna Design Elements
* **Floral Motifs:** Flowers are a classic element in henna designs. Roses, lotuses, and jasmine are popular choices.
* **Paisley Patterns:** Paisley patterns are intricate and elegant, adding a touch of sophistication to any henna design.
* **Geometric Shapes:** Geometric shapes can be used to create bold and modern designs.
* **Mandala Designs:** Mandala designs are intricate and symmetrical, representing wholeness and unity.
## Applying the Henna Tattoo: A Step-by-Step Guide
Applying a henna tattoo is a relatively simple process, but it requires patience and attention to detail. Here’s a step-by-step guide to help you achieve beautiful and long-lasting results:
1. **Prepare the Skin:** Before applying henna, make sure the skin is clean and dry. Exfoliate the area to remove any dead skin cells. Avoid applying lotions or oils, as these can interfere with the henna stain.
2. **Apply the Henna Paste:** Using a henna cone or applicator bottle, carefully apply the henna paste to the skin, following your chosen design. Apply the paste in a thick, even layer.
3. **Let it Dry:** Allow the henna paste to dry completely. This can take anywhere from 30 minutes to several hours, depending on the humidity and temperature. The drier the paste, the darker the stain will be.
4. **Seal the Design:** Once the paste is dry, seal the design with a mixture of lemon juice and sugar. This will help keep the paste moist and prevent it from cracking. You can also wrap the area with medical tape or plastic wrap.
5. **Leave it On:** Leave the henna paste on for as long as possible, ideally for 2-6 hours. The longer the paste stays on, the darker and longer-lasting the stain will be.
6. **Remove the Paste:** After the desired time, gently remove the henna paste. Avoid washing the area with soap and water for the first 24 hours. You can scrape off the dry paste or use a soft cloth to remove it.
7. **Moisturize:** After removing the paste, moisturize the area with a natural oil, such as coconut oil or olive oil. This will help keep the skin hydrated and prevent the stain from fading.
## Henna Tattoo Aftercare: Maximizing Your Stain’s Longevity
Proper aftercare is essential for maximizing the longevity and vibrancy of your henna tattoo. Here are some tips to keep your stain looking its best:
* **Avoid Water:** Avoid washing the area with soap and water for the first 24 hours after removing the paste. Water can cause the stain to fade prematurely.
* **Moisturize Regularly:** Moisturize the area with a natural oil, such as coconut oil or olive oil, several times a day. This will help keep the skin hydrated and prevent the stain from fading.
* **Avoid Harsh Chemicals:** Avoid using harsh chemicals, such as bleach or alcohol, on the area. These chemicals can strip the stain from the skin.
* **Protect from Sun Exposure:** Protect the area from excessive sun exposure. Sunlight can cause the stain to fade.
* **Avoid Exfoliation:** Avoid exfoliating the area, as this can remove the stained skin cells.
## Henna Tattoo: A Safe and Beautiful Art Form
Henna tattoos are a beautiful and culturally significant art form that can be enjoyed by people of all ages and backgrounds. By understanding the history, traditions, and safety precautions associated with henna, you can appreciate this art form responsibly and create stunning designs that express your individuality. Remember to always use natural henna, choose a reputable artist, and follow proper aftercare techniques to ensure a safe and enjoyable experience.
## FAQs About Henna Tattoos
Here are some frequently asked questions about henna tattoos:
**Q1: How long does a henna tattoo last?**
A1: A natural henna tattoo typically lasts for 1-3 weeks, depending on the location of the tattoo, the quality of the henna, and the aftercare techniques used. Tattoos on the hands and feet tend to last longer than those on other parts of the body.
**Q2: Is henna safe for children?**
A2: Natural henna is generally safe for children, but it’s essential to ensure that the henna being used is pure and free of harmful chemicals. Avoid “black henna,” as it can cause severe allergic reactions. Always do a patch test before applying henna to a child’s skin.
**Q3: Can I swim with a henna tattoo?**
A3: Swimming in chlorinated water can cause the henna stain to fade prematurely. It’s best to avoid swimming for the first 24 hours after removing the paste. If you do swim, apply a thick layer of petroleum jelly or coconut oil to protect the stain.
**Q4: How can I make my henna tattoo darker?**
A4: To achieve a darker henna stain, use high-quality henna powder, apply the paste in a thick layer, seal the design with lemon juice and sugar, and leave the paste on for as long as possible. Avoid washing the area with soap and water for the first 24 hours and moisturize regularly.
**Q5: Can I get a henna tattoo if I’m pregnant?**
A5: Natural henna is generally considered safe to use during pregnancy, but it’s always best to consult with your doctor before getting a henna tattoo. Avoid “black henna,” as the chemicals it contains can be harmful to both the mother and the baby.
**Q6: How much does a henna tattoo cost?**
A6: The cost of a henna tattoo can vary depending on the size and complexity of the design, the location of the tattoo, and the experience of the artist. Simple designs can cost as little as $10, while more elaborate designs can cost several hundred dollars.
**Q7: Can I use essential oils in my henna paste?**
A7: Yes, essential oils can be added to henna paste to enhance the color and scent. Lavender, tea tree, and eucalyptus oils are popular choices. However, it’s essential to use high-quality, pure essential oils and to avoid using oils that are known to be irritating to the skin.
**Q8: How do I store henna paste?**
A8: Henna paste can be stored in the freezer for up to 3 months. Thaw the paste at room temperature before using it. Do not microwave or heat the paste, as this can damage the dye molecules.
**Q9: Can I remove a henna tattoo?**
A9: Henna tattoos are temporary and will fade naturally over time. However, you can try to speed up the fading process by exfoliating the area, using lemon juice, or applying a mixture of baking soda and water.
**Q10: Where can I find a reputable henna artist?**
A10: You can find reputable henna artists online, through social media, or by asking for recommendations from friends and family. Look for artists who are knowledgeable about the history and traditions of henna, who use only natural henna, and who have a portfolio of their work.
Conclusion
Henna tattoos offer a beautiful and temporary way to express yourself, celebrate traditions, and adorn your skin with intricate art. By understanding the nuances of natural henna versus dangerous alternatives like “black henna,” you can ensure a safe and enjoyable experience. From mastering the art of cone application to designing your own unique patterns, the world of henna offers endless creative possibilities. We’ve explored the rich cultural significance, provided a step-by-step application guide, and shared essential aftercare tips to help you maximize the longevity of your stain. Now it’s your turn to explore the beauty of henna! Share your experiences with henna tattoos in the comments below, or connect with a reputable artist to create your own unique masterpiece. Let the journey into henna begin!
