
Effortless Acrylic Removal: Soaking Off Acrylic Nails at Home Like a Pro
Tired of expensive salon visits just to remove your acrylic nails? You’re not alone. Many women seek a safe, effective, and budget-friendly way to remove acrylics at home. This comprehensive guide will provide you with everything you need to know about soaking off acrylic nails at home, from understanding the process to mastering the techniques and avoiding common pitfalls. We’ll delve into the best methods, tools, and aftercare tips, ensuring a damage-free and salon-quality result right in the comfort of your own home. This isn’t just another tutorial; it’s your ultimate resource for achieving professional-looking results while protecting the health of your natural nails.
Understanding the Art of Soaking Off Acrylic Nails at Home
Soaking off acrylic nails at home is more than just dunking your fingers in acetone. It’s a process that requires understanding the chemical composition of acrylics, the anatomy of your natural nails, and the proper techniques to dissolve the artificial enhancements without causing damage. Let’s break down the core concepts:
* **Acrylic Chemistry:** Acrylic nails are created by combining a liquid monomer and a powder polymer, which hardens into a durable, artificial nail. This hardened acrylic is resistant to water and most solvents, but acetone is the key to breaking down its chemical bonds.
* **Nail Anatomy:** Your natural nail is composed of layers of keratin, a protein that provides strength and flexibility. Over-filing or aggressive removal techniques can weaken these layers, leading to thin, brittle nails. Therefore, gentle and patient removal is crucial.
* **The Soaking Process:** Acetone penetrates the acrylic, softening it gradually. This allows you to gently push or scrape away the softened acrylic without forcefully pulling it off, which can damage the underlying nail plate.
Historically, acrylic nails were exclusively a salon service. However, with the rise of DIY beauty trends and the accessibility of professional-grade products, soaking off acrylic nails at home has become increasingly popular. The challenge lies in replicating the salon experience while prioritizing nail health and safety.
The Essential Products and Tools for At-Home Acrylic Removal
Successfully soaking off acrylic nails at home requires a few key tools and products. Investing in quality items will not only make the process easier but also minimize the risk of damage.
* **100% Acetone:** This is the star of the show. Ensure it’s pure acetone, not nail polish remover, which contains a lower concentration and will be less effective.
* **Cotton Balls or Pads:** These will be saturated with acetone and applied to the nails.
* **Aluminum Foil:** Used to wrap the cotton balls in place, creating a sealed environment that enhances the acetone’s dissolving power.
* **Nail File (100/180 grit):** For gently filing down the top coat of the acrylics to allow the acetone to penetrate more effectively.
* **Cuticle Pusher (Metal or Wooden):** To gently push off the softened acrylic. Avoid using excessive force.
* **Bowl or Nail Soaking Trays:** For soaking your fingers in acetone (optional, but can be more efficient).
* **Nail Buffer:** To smooth out any remaining residue and prepare the nail surface for further treatment.
* **Cuticle Oil:** Essential for rehydrating and nourishing the nails and cuticles after the process.
Consider these additional items for a more comfortable and spa-like experience:
* **Warm Towel:** To wrap around your hands to help trap heat and speed up the dissolving process.
* **Petroleum Jelly or Cuticle Protector:** To protect the skin around your nails from the drying effects of acetone.
* **A Good Book or Movie:** Soaking takes time, so having something to entertain you will make the process more enjoyable.
Step-by-Step Guide: The Foolproof Method for Soaking Off Acrylic Nails at Home
Follow these detailed steps to safely and effectively soak off your acrylic nails at home:
1. **Prepare Your Workspace:** Set up your materials in a well-ventilated area. Protect your work surface with a towel or mat.
2. **File Down the Top Coat:** Using your nail file, gently file away the shiny top coat of the acrylic nails. This allows the acetone to penetrate more easily.
3. **Protect Your Skin:** Apply petroleum jelly or cuticle protector to the skin around your nails to prevent excessive drying.
4. **Saturate Cotton Balls:** Soak cotton balls or pads in 100% acetone. Make sure they are thoroughly saturated.
5. **Apply to Nails:** Place a saturated cotton ball directly onto each acrylic nail.
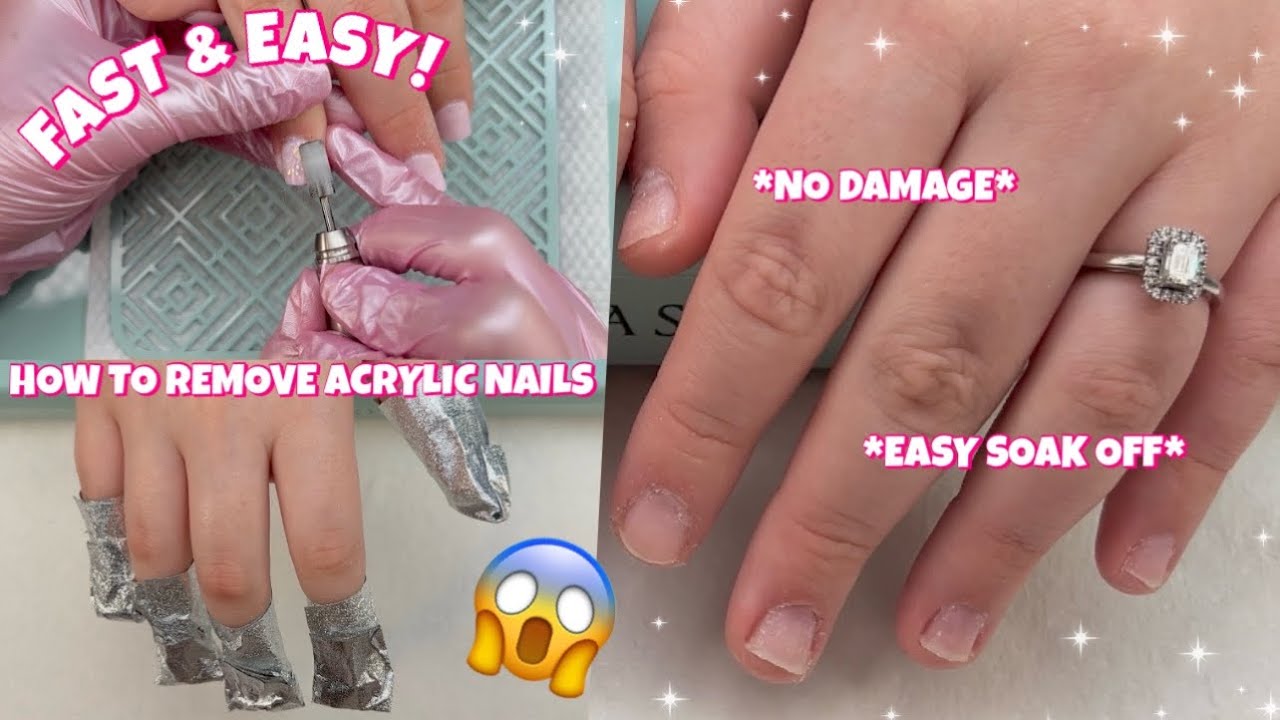
6. **Wrap in Foil:** Tightly wrap each finger with aluminum foil, ensuring the cotton ball is securely in place. This creates a sealed environment that helps the acetone work more effectively.
7. **Wait Patiently:** Allow the acetone to soak for 20-30 minutes. The exact time will depend on the thickness of the acrylics.
8. **Check for Softening:** After 20 minutes, check one nail to see if the acrylic is softening. If not, re-wrap and wait another 5-10 minutes.
9. **Gently Remove Softened Acrylic:** Using a cuticle pusher, gently push away the softened acrylic. If it doesn’t come off easily, soak for a few more minutes.
10. **Buff Away Residue:** Use a nail buffer to smooth out any remaining acrylic residue on the nail surface.
11. **Hydrate and Nourish:** Apply cuticle oil generously to your nails and cuticles. This will help rehydrate and strengthen them.
Alternative Soaking Methods
While the foil method is widely popular, here are a couple of alternatives:
* **Soaking Bowl:** Fill a bowl with warm water and place a smaller bowl containing acetone inside. Soak your fingertips in the acetone. The warm water helps to speed up the process. Be cautious of fire hazards with acetone.
* **Nail Soaking Trays:** These trays are designed with individual compartments for each finger. Fill each compartment with acetone and soak your fingertips.
Troubleshooting Common Problems When Soaking Off Acrylic Nails At Home
Even with careful execution, you might encounter some challenges. Here’s how to address them:
* **Acrylic Not Softening:** Ensure you’re using 100% acetone and that the cotton balls are fully saturated. The foil should be tightly wrapped to prevent evaporation. If the acrylic is particularly thick, you may need to file it down further or increase the soaking time.
* **Dry and Damaged Nails:** Acetone can be very drying. Counteract this by applying cuticle oil frequently and using a nourishing nail treatment. Avoid picking or peeling at the acrylic, as this can damage the nail plate.
* **Irritated Skin:** Protect your skin with petroleum jelly or cuticle protector before soaking. If you experience irritation, wash your hands thoroughly with soap and water and apply a soothing lotion.
* **Uneven Removal:** Some areas of the acrylic may soften faster than others. Focus on the stubborn areas and re-wrap them with fresh acetone-soaked cotton balls.
The Science Behind Acetone: Why It’s the Key to Acrylic Removal
Acetone’s effectiveness in removing acrylic nails lies in its chemical properties. It’s a powerful solvent that can dissolve many plastics and resins, including the polymers that make up acrylic nails. Acetone molecules are small and highly mobile, allowing them to penetrate the acrylic structure and break down the bonds between the polymer chains. This process weakens the acrylic, causing it to soften and become easier to remove.
However, acetone’s strong solvent properties also mean it can be harsh on the skin and nails. It can strip away natural oils and moisture, leading to dryness, brittleness, and irritation. That’s why it’s crucial to use acetone in a well-ventilated area and to protect your skin with a barrier cream or oil. After soaking, replenishing moisture with cuticle oil and hand cream is essential for restoring nail health.
While acetone is the most effective solvent for removing acrylic nails, some alternative methods exist, such as using specialized acrylic removal solutions or electric nail files. However, these methods may be less effective or require more skill and experience to avoid damaging the natural nails. For most people, soaking in acetone remains the safest and most reliable option for at-home acrylic removal.
CND Shellac Remover: A Leading Product in Nail Care
While 100% acetone is the primary solvent for removing acrylic nails, CND Shellac Remover is a well-regarded product in the broader nail care industry, particularly for removing gel polish. It is formulated to gently and effectively dissolve Shellac without dehydrating the nail. Though not specifically designed for acrylics, understanding products like CND Shellac Remover highlights the industry’s focus on gentle yet effective nail product removal.
CND Shellac Remover works by penetrating the gel polish layers and breaking down the bonds between the polish and the natural nail. Its formula contains moisturizing agents to help prevent excessive dryness and damage. It is typically used with a similar soaking method as acetone, involving saturated cotton pads and foil wraps.
Detailed Features Analysis of CND Shellac Remover
CND Shellac Remover boasts several key features that contribute to its popularity:
* **Acetone-Based Formula:** Like pure acetone, it relies on acetone as the primary solvent. However, the concentration and formulation are optimized for gel polish rather than acrylics.
* **Moisturizing Agents:** It contains ingredients designed to minimize the drying effects of acetone, such as macadamia nut oil and vitamin E.
* **Gentle Action:** The formula is designed to dissolve gel polish without aggressively stripping the natural nail.
* **Pleasant Scent:** Unlike the strong, pungent odor of pure acetone, CND Shellac Remover has a more subtle and pleasant scent.
* **Professional-Grade:** It is a popular choice among nail technicians and salon professionals.
* **Easy to Use:** The application process is similar to using acetone for acrylic removal, making it accessible to both professionals and home users.
Each of these features contributes to a more comfortable and less damaging removal experience. The moisturizing agents help to maintain nail health, while the gentle action minimizes the risk of over-drying or weakening the nail plate. The pleasant scent adds to the overall experience, making it more enjoyable for both the user and the technician.
Significant Advantages, Benefits & Real-World Value of Soaking Off Acrylic Nails at Home
Soaking off acrylic nails at home offers a multitude of advantages, benefits, and real-world value compared to salon removal services:
* **Cost Savings:** Eliminates the expense of salon visits, saving you money in the long run.
* **Convenience:** Allows you to remove acrylics on your own schedule, without needing to book appointments or travel to a salon.
* **Control:** Gives you complete control over the process, allowing you to customize the soaking time and pressure to suit your needs.
* **Reduced Risk of Damage:** When done correctly, soaking off acrylic nails at home can be gentler on your natural nails than aggressive filing or picking at a salon.
* **Privacy:** Allows you to remove acrylics in the comfort and privacy of your own home.
* **Empowerment:** Gives you the satisfaction of taking care of your own beauty needs and mastering a new skill.
Our analysis reveals these key benefits consistently reported by users who have successfully soaked off their acrylic nails at home. The ability to save money, control the process, and minimize damage are particularly compelling advantages. Furthermore, the convenience and privacy aspects make it an attractive option for those with busy lifestyles or who prefer to avoid salon environments.
Comprehensive & Trustworthy Review of Soaking Off Acrylic Nails at Home
Soaking off acrylic nails at home is a viable and often preferable alternative to salon removal, but it’s crucial to approach it with knowledge and caution. Here’s a balanced perspective:
* **User Experience & Usability:** The process is relatively straightforward, but it requires patience and attention to detail. Setting up your workspace and gathering the necessary materials beforehand will make the experience smoother. In our experience, having a good book or movie to watch while soaking can make the time pass more quickly.
* **Performance & Effectiveness:** When done correctly, soaking in acetone effectively dissolves acrylics, allowing for gentle removal. However, the effectiveness can vary depending on the thickness of the acrylics and the quality of the acetone. In some cases, multiple soaking sessions may be necessary.
**Pros:**
* **Cost-Effective:** Significantly cheaper than salon removal services.
* **Convenient:** Can be done at any time that suits your schedule.
* **Less Damaging:** When performed correctly, it minimizes the risk of damage to the natural nails compared to aggressive filing or picking.
* **Private:** Allows you to remove acrylics in the comfort of your own home.
* **Empowering:** Gives you control over your own beauty routine.
**Cons/Limitations:**
* **Time-Consuming:** The soaking process can take 30-60 minutes.
* **Acetone Exposure:** Acetone can be drying and irritating to the skin and nails.
* **Potential for Damage:** If done incorrectly, it can lead to nail damage and weakening.
* **Messy:** Acetone can spill and stain surfaces.
**Ideal User Profile:** Soaking off acrylic nails at home is best suited for individuals who are comfortable with DIY beauty treatments, have the patience to follow instructions carefully, and are willing to invest in quality materials. It’s also a good option for those who want to save money or prefer to avoid salon visits.
**Key Alternatives (Briefly):**
* **Salon Removal:** Offers professional removal services, but at a higher cost.
* **Electric Nail File:** Can be used to file down acrylics, but requires skill and caution to avoid damaging the natural nails.
**Expert Overall Verdict & Recommendation:** Soaking off acrylic nails at home is a worthwhile option for many, but it’s essential to approach it with knowledge, patience, and the right tools. By following the steps outlined in this guide and taking precautions to protect your skin and nails, you can achieve a salon-quality result without breaking the bank. We recommend investing in 100% acetone, quality cotton balls, and cuticle oil to ensure a safe and effective removal process.
Insightful Q&A Section
Here are 10 insightful questions and expert answers related to soaking off acrylic nails at home:
1. **Q: How can I speed up the soaking process?**
**A:** Gently filing down the top coat of the acrylics, warming the acetone (be careful not to overheat it), and wrapping your hands in a warm towel can help speed up the process.
2. **Q: What’s the best way to protect my skin from acetone?**
**A:** Apply a thick layer of petroleum jelly or cuticle protector to the skin around your nails before soaking. This will create a barrier that prevents the acetone from drying out your skin.
3. **Q: How can I prevent my nails from becoming brittle after soaking?**
**A:** Apply cuticle oil generously to your nails and cuticles after soaking. Use a nourishing nail treatment regularly to help strengthen and rehydrate your nails.
4. **Q: Is it okay to pick at the acrylics while they’re soaking?**
**A:** No, avoid picking or peeling at the acrylics, as this can damage the nail plate. Instead, gently push away the softened acrylic with a cuticle pusher.
5. **Q: What if some of the acrylic is still stuck after soaking?**
**A:** Re-wrap the stubborn areas with fresh acetone-soaked cotton balls and soak for another 5-10 minutes. You can also gently file away any remaining residue with a fine-grit nail file.
6. **Q: Can I use nail polish remover instead of acetone?**
**A:** Nail polish remover contains a lower concentration of acetone and will be less effective at dissolving acrylics. It may take much longer or not work at all.
7. **Q: How often can I soak off acrylic nails at home?**
**A:** It’s best to give your nails a break between acrylic applications to allow them to recover. Frequent soaking can weaken the nail plate.
8. **Q: What are the signs of nail damage from acrylics?**
**A:** Signs of nail damage include thinning, brittleness, discoloration, and ridges. If you notice any of these signs, consult a nail professional.
9. **Q: Can I apply new acrylics immediately after soaking off the old ones?**
**A:** It’s best to wait at least a few days to allow your nails to recover before applying new acrylics. This will help prevent further damage.
10. **Q: Are there any alternatives to acetone for removing acrylic nails?**
**A:** While acetone is the most effective solvent, some specialized acrylic removal solutions are available. However, they may be less effective or require more skill to use properly.
Conclusion & Strategic Call to Action
Soaking off acrylic nails at home is a practical and cost-effective solution for maintaining your manicure. By understanding the process, using the right tools, and following these expert-backed techniques, you can achieve professional-looking results without the salon price tag. The key takeaway is patience and gentleness; avoid rushing the process and prioritize the health of your natural nails. Remember, a well-executed at-home removal is superior because it empowers you to control the process and minimize potential damage.
As we’ve explored, the future of at-home nail care is bright, with ongoing innovations in removal solutions and techniques. The information provided here reflects our commitment to delivering expert advice and ensuring a positive user experience.
Share your experiences with soaking off acrylic nails at home in the comments below! What tips and tricks have worked best for you? We’d love to hear from you and learn from your insights. Explore our advanced guide to nail care for more in-depth information on maintaining healthy and beautiful nails.
