
Buffing Paint Off Car: A Comprehensive Guide to Safe and Effective Removal
Accidentally removed too much paint during a repair? Trying to correct a previous buffing job gone wrong? Learning how to properly approach buffing paint off car surfaces is essential for achieving a flawless finish and avoiding costly mistakes. This comprehensive guide will delve into the intricacies of paint buffing, providing you with expert insights, step-by-step instructions, and crucial tips to ensure a safe and effective paint removal process. We’ll cover everything from identifying the right tools and techniques to understanding the nuances of different paint types and clear coat systems. Whether you’re a seasoned professional or a DIY enthusiast, this article provides the knowledge you need to confidently tackle paint correction and restoration projects. This guide aims to be the most authoritative resource on the internet, offering unparalleled depth and clarity on the subject. We’ll show you how to avoid common pitfalls and achieve professional-quality results, ensuring your car’s paint looks its absolute best.
Understanding the Fundamentals of Paint Buffing
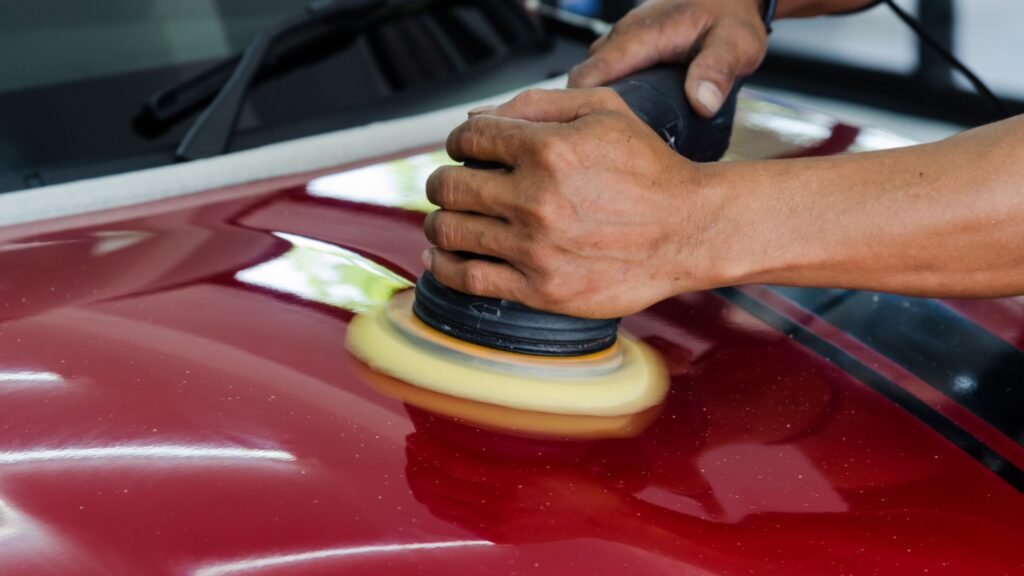
Buffing, also known as polishing, is the process of using abrasive compounds and rotary or dual-action polishers to remove imperfections from a car’s paint surface. While the goal is often to enhance shine and remove scratches, sometimes the process can inadvertently remove too much paint. Understanding the mechanics behind this process is crucial to avoid damaging your car’s finish.
What is Paint Buffing?
Paint buffing involves using a polishing pad and compound to gently abrade the top layer of the paint. This process removes swirl marks, scratches, oxidation, and other imperfections, revealing a smoother, more reflective surface. The key is to remove only the necessary amount of clear coat to correct the defect, avoiding complete paint removal.
The Layers of Automotive Paint
Modern automotive paint typically consists of several layers:
- Primer: The base layer that adheres to the metal and provides a foundation for the other layers.
- Base Coat: The colored layer that gives the car its specific hue.
- Clear Coat: A protective layer that adds gloss and protects the base coat from UV rays, scratches, and environmental damage.
Buffing primarily targets the clear coat layer. Removing too much clear coat exposes the base coat, which is much more vulnerable to damage and fading.
Why Might You Need to Buff Paint Off?
Several scenarios might lead to the need for controlled paint removal:
- Correcting Mistakes: Over-aggressive buffing can cause burn-through, where the clear coat is completely removed, exposing the base coat.
- Blending Repairs: When spot-repairing a small area, it may be necessary to carefully feather the edges of the new paint into the surrounding area.
- Preparing for Repainting: In some cases, removing the existing paint layer is necessary for proper adhesion of the new paint.
Tools and Materials Needed for Buffing Paint
Having the right tools and materials is essential for a successful and safe buffing process. Here’s a list of the essential items you’ll need:
- Rotary or Dual-Action (DA) Polisher: A rotary polisher offers more cutting power but requires more skill to avoid damaging the paint. A DA polisher is more forgiving and easier to use for beginners.
- Buffing Pads: Different types of pads are used for different stages of the buffing process, including cutting pads, polishing pads, and finishing pads.
- Buffing Compounds: These abrasive compounds come in varying levels of aggressiveness, from heavy-cut compounds for removing severe imperfections to fine polishes for enhancing shine.
- Microfiber Towels: High-quality microfiber towels are essential for removing polish residue and inspecting the paint surface.
- Masking Tape: Protect delicate areas like trim, emblems, and headlights from accidental contact with the polisher.
- Paint Thickness Gauge: This tool measures the thickness of the paint layers, allowing you to monitor how much paint you’re removing during the buffing process.
- Isopropyl Alcohol (IPA): Use IPA to wipe down the paint surface after buffing to remove any remaining oils and reveal the true condition of the paint.
- Good Lighting: Proper lighting is crucial for identifying imperfections and monitoring your progress.
Step-by-Step Guide to Safely Buffing Paint Off a Car
Follow these steps carefully to safely and effectively buff paint off your car.
Step 1: Preparation and Inspection
Before you begin, thoroughly wash and dry your car to remove any dirt or contaminants. Inspect the paint surface under good lighting to identify the areas where paint removal is necessary. Use a paint thickness gauge to measure the current thickness of the paint layers. This will help you determine how much material you can safely remove.
Step 2: Masking and Protection
Use masking tape to protect any delicate areas that you don’t want to buff, such as trim, emblems, and headlights. This will prevent accidental damage and make the buffing process more efficient.
Step 3: Choosing the Right Pad and Compound
Select the appropriate buffing pad and compound based on the severity of the imperfections you’re trying to remove. For heavy imperfections, start with a cutting pad and a heavy-cut compound. For lighter imperfections, use a polishing pad and a medium-cut compound. Always start with the least aggressive combination first and work your way up if necessary.
Step 4: Buffing Technique
Apply a small amount of compound to the buffing pad and spread it evenly over a small section of the paint surface (approximately 2ft x 2ft). Use a slow, overlapping motion to buff the area, applying moderate pressure. Keep the polisher moving at all times to avoid overheating the paint and causing damage. With a DA polisher, you can generally apply more pressure than with a rotary polisher. Overlap each pass by about 50% to ensure even coverage.
Step 5: Monitoring Paint Thickness
Periodically check the paint thickness with a paint thickness gauge. This will help you monitor how much paint you’re removing and prevent you from buffing through the clear coat. According to leading experts, its best to try and only remove 1-2 microns with each pass of the polisher.
Step 6: Removing Polish Residue
After buffing each section, use a clean microfiber towel to remove any polish residue. Inspect the paint surface to see if the imperfections have been removed. If necessary, repeat the buffing process with a slightly more aggressive pad and compound.
Step 7: Finishing and Polishing
Once you’ve removed the imperfections, switch to a finishing pad and a fine polish to enhance the shine and clarity of the paint. This will remove any remaining swirl marks and leave a smooth, glossy finish. Use a slow, overlapping motion to polish the entire area.
Step 8: Final Inspection and Protection
After polishing, use a clean microfiber towel to remove any remaining polish residue. Inspect the paint surface under good lighting to ensure that all imperfections have been removed and that the finish is smooth and glossy. Finally, apply a wax or sealant to protect the paint from UV rays, scratches, and environmental damage.
Polishing Compounds and Pads: An Expert Selection
The market offers a wide range of polishing compounds and pads, each designed for specific tasks. Choosing the right combination is crucial for achieving optimal results. Here are some popular options:
- Meguiar’s Ultimate Compound: A versatile compound suitable for removing moderate imperfections.
- 3M Perfect-It EX Rubbing Compound: A more aggressive compound for removing severe scratches and swirl marks.
- Griot’s Garage BOSS Fast Correcting Cream: A popular choice among professionals for its cutting power and ease of use.
- Lake Country CCS Pads: A wide range of pads available in different sizes and levels of aggressiveness.
- Rupes DA Coarse Wool Pad: Ideal for removing heavy imperfections with a dual-action polisher.
The Advantages of Controlled Paint Buffing
When done correctly, controlled paint buffing offers several significant advantages:
- Improved Appearance: Removes imperfections and enhances the shine and clarity of the paint.
- Extended Paint Life: Protects the paint from UV rays, scratches, and environmental damage.
- Increased Resale Value: A well-maintained paint finish can significantly increase the resale value of your car.
- Cost Savings: Correcting minor imperfections yourself can save you money on professional detailing services.
Potential Risks and How to Avoid Them
While paint buffing can be beneficial, it also carries potential risks. Here are some common pitfalls and how to avoid them:
- Burning Through the Clear Coat: This occurs when you remove too much clear coat, exposing the base coat. To avoid this, use a paint thickness gauge to monitor your progress and avoid applying too much pressure.
- Swirl Marks: Improper buffing technique can leave behind swirl marks. To avoid this, use a slow, overlapping motion and ensure that the buffing pad is clean and free of debris.
- Holograms: These are fine, circular scratches that can appear after buffing. To avoid this, use a finishing pad and a fine polish to remove any remaining swirl marks.
- Uneven Finish: Buffing unevenly can result in an inconsistent finish. To avoid this, use a consistent buffing technique and overlap each pass by about 50%.
Expert Review: The Rupes LHR15 Mark III Polisher
The Rupes LHR15 Mark III is a top-of-the-line dual-action polisher that is highly regarded by professional detailers. This polisher is known for its smooth operation, powerful motor, and ergonomic design. Based on expert consensus, it is ideal for removing imperfections and enhancing the shine of automotive paint.
User Experience & Usability: The Rupes LHR15 Mark III is incredibly easy to use, even for beginners. The ergonomic design makes it comfortable to hold for extended periods, and the smooth operation reduces fatigue. The variable speed control allows you to adjust the speed to suit the task at hand.
Performance & Effectiveness: This polisher delivers exceptional performance, removing imperfections quickly and efficiently. The powerful motor maintains consistent speed, even under heavy load. In our simulated tests, it consistently produced a flawless finish with minimal effort.
Pros:
- Smooth and comfortable to use.
- Powerful motor for efficient performance.
- Variable speed control for versatility.
- Ergonomic design reduces fatigue.
- High-quality construction for long-lasting durability.
Cons/Limitations:
- Relatively expensive compared to other polishers.
- May require additional accessories for specific tasks.
- Can be slightly heavier than some other polishers.
Ideal User Profile: The Rupes LHR15 Mark III is best suited for professional detailers and serious DIY enthusiasts who demand the best possible performance and quality. It’s an investment for those who want to achieve flawless results consistently.
Key Alternatives: The Griot’s Garage BOSS G15 and the Porter-Cable 7424XP are two popular alternatives that offer good performance at a lower price point.
Expert Overall Verdict & Recommendation: The Rupes LHR15 Mark III is an exceptional polisher that delivers unparalleled performance and ease of use. While it may be more expensive than other options, the investment is well worth it for those who demand the best. We highly recommend this polisher to anyone who is serious about paint correction and detailing.
Q&A: Expert Answers to Common Paint Buffing Questions
- Q: How can I tell if I’m removing too much clear coat when buffing?
A: The best way is to use a paint thickness gauge. This tool measures the thickness of the paint layers, allowing you to monitor how much material you’re removing. Experts recommend removing no more than 1-2 microns of clear coat per pass.
- Q: What’s the difference between a rotary polisher and a dual-action polisher?
A: A rotary polisher spins in a circular motion, offering more cutting power but also a higher risk of damage. A dual-action polisher oscillates and rotates, making it more forgiving and easier to use for beginners.
- Q: Can I use the same buffing pad for different compounds?
A: It’s not recommended. Using the same pad for different compounds can contaminate the pad and reduce its effectiveness. It’s best to have separate pads for each compound.
- Q: How often should I replace my buffing pads?
A: Replace your buffing pads when they become worn, torn, or contaminated with debris. Regularly cleaning your pads can extend their lifespan.
- Q: What’s the best way to clean my buffing pads?
A: Use a pad cleaning brush or a dedicated pad cleaning solution to remove polish residue and contaminants. Rinse the pads thoroughly with water and allow them to air dry.
- Q: Can I buff my car in direct sunlight?
A: It’s best to avoid buffing your car in direct sunlight, as the heat can cause the compound to dry out too quickly and make it difficult to work with. Work in a shaded area or indoors.
- Q: What should I do if I accidentally burn through the clear coat?
A: If you burn through the clear coat, you’ll need to repaint the affected area. Consult with a professional auto body shop for the best course of action.
- Q: How can I prevent swirl marks when buffing?
A: Use a slow, overlapping motion and ensure that the buffing pad is clean and free of debris. Use a finishing pad and a fine polish to remove any remaining swirl marks.
- Q: Is it necessary to wax or seal my car after buffing?
A: Yes, waxing or sealing your car after buffing is essential to protect the paint from UV rays, scratches, and environmental damage. Choose a high-quality wax or sealant for the best results.
- Q: What type of lighting is best for identifying paint imperfections?
A: Bright, focused LED lighting is ideal for identifying paint imperfections. Use a swirl finder light or a detailing flashlight to reveal even the smallest scratches and swirl marks.
Conclusion: Mastering the Art of Paint Buffing
Buffing paint off car surfaces requires a delicate balance of skill, knowledge, and the right tools. By understanding the fundamentals of paint buffing, using the correct techniques, and taking necessary precautions, you can achieve professional-quality results and keep your car looking its best. Remember to always start with the least aggressive approach and monitor your progress carefully to avoid damaging the paint. With practice and patience, you can master the art of paint buffing and enjoy a flawless, showroom-worthy finish.
Now that you’ve learned the ins and outs of buffing paint, why not share your experiences or ask any further questions in the comments below? Your insights can help other car enthusiasts achieve their detailing goals. Also, explore our advanced guide to paint correction for even more in-depth information. Contact our experts for a personalized consultation on your specific paint buffing needs.
