Supplies for Acrylic Nails: The Ultimate Guide for Perfect Nails
Are you ready to create stunning acrylic nails at home or in your salon? Knowing which supplies you need and how to use them is crucial for achieving a flawless, long-lasting manicure. This comprehensive guide covers everything you need to know about supplies for acrylic nails, from essential tools to advanced techniques, ensuring you achieve professional results every time. We’ll delve into the details, offering expert advice and practical tips to help you master the art of acrylic nails.
Whether you’re a beginner just starting out or an experienced nail technician looking to refine your skills, this article will equip you with the knowledge and confidence to create beautiful acrylic nails. We’ll explore the different types of acrylic powders and liquids, brushes, and other essential tools. We will also cover safety precautions and best practices to ensure a safe and enjoyable experience. Let’s dive in!
Understanding the Basics of Acrylic Nail Supplies
Before you start creating acrylic nails, it’s essential to understand the core components and their roles. Acrylic nails are created by combining a liquid monomer with a polymer powder, which creates a hard, durable layer over your natural nails or nail tips. The quality of your supplies directly impacts the final result, so investing in high-quality products is essential.
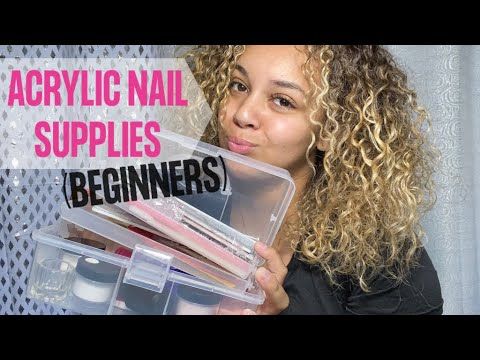
The Essential Acrylic Nail Supplies
Here’s a list of the essential supplies you’ll need to get started:
- Acrylic Powder: Available in various colors and finishes, including clear, white, pink, and glitter.
- Monomer Liquid: A crucial component that activates the acrylic powder to form a workable mixture.
- Acrylic Brush: Used to pick up the acrylic mixture and apply it to the nails. Look for brushes made of kolinsky sable hair for the best results.
- Nail Tips or Forms: Extend the length of your nails and provide a base for the acrylic application.
- Nail Primer: Prepares the natural nail surface for acrylic application, ensuring better adhesion.
- Nail File and Buffer: Used to shape and smooth the acrylic nails.
- Cuticle Pusher and Nipper: Essential for preparing the nails by pushing back and trimming the cuticles.
- Dappen Dish: A small container to hold the monomer liquid.
- Dust Brush: To remove dust particles during filing and shaping.
- Top Coat: Provides a glossy finish and protects the acrylic nails.
Choosing the Right Acrylic Powder and Liquid
The quality of your acrylic powder and liquid significantly impacts the strength, durability, and appearance of your acrylic nails. Opt for reputable brands known for their consistent quality. Consider the following factors when choosing your products:
- Color: Select the colors that suit your style and desired look. Clear powder is versatile and can be used with any nail polish.
- Setting Time: Acrylic powders and liquids come in different setting times. Beginners may prefer a slower-setting formula to allow more time for application.
- Odor: Some acrylic liquids have a strong odor. Consider using a low-odor option if you are sensitive to smells.
Diving Deeper: Types of Acrylic Powders and Liquids
Understanding the nuances of different acrylic powders and liquids is crucial for achieving specific results and catering to various preferences. The choice of these materials can significantly impact the strength, flexibility, and overall appearance of the acrylic nails.
Acrylic Powders: A Spectrum of Options
Acrylic powders are not a one-size-fits-all product. They come in a variety of formulations, each with unique properties:
- Clear Acrylic Powder: The most versatile option, ideal for encapsulating nail art, creating a strong base, or mixing with colored powders. It allows the natural nail or underlying design to shine through.
- Pink Acrylic Powder: Often used to create a natural-looking nail bed extension or a classic French manicure. It provides a subtle, healthy-looking base.
- White Acrylic Powder: Perfect for creating crisp, clean French tips or adding a bright, opaque effect to the nails.
- Colored Acrylic Powders: Available in a vast array of shades, from vibrant neons to subtle pastels, allowing for endless creative possibilities.
- Glitter Acrylic Powders: Infused with glitter particles, these powders add a dazzling sparkle to the nails. They come in various glitter sizes and colors.
Monomer Liquids: The Activating Agent
The monomer liquid is the activating agent that transforms the acrylic powder into a workable substance. Different types of monomer liquids offer varying properties:
- Standard Monomer Liquid: The most common type, providing a balance of setting time and strength.
- Fast-Setting Monomer Liquid: Ideal for experienced nail technicians who work quickly and efficiently. It reduces the risk of lifting and ensures a strong bond.
- Slow-Setting Monomer Liquid: Suitable for beginners, allowing more time to shape and perfect the acrylic application.
- Odorless Monomer Liquid: A popular choice for those sensitive to strong odors. While it may have a slightly different consistency, it offers a more comfortable working environment.
Choosing the right combination of acrylic powder and liquid depends on your skill level, desired results, and personal preferences. Experimenting with different products can help you find the perfect match for your needs.
Essential Tools for Acrylic Nail Application
While acrylic powder and liquid are the core components, several other tools are essential for achieving a professional-looking acrylic manicure. These tools help with preparation, application, shaping, and finishing.
Acrylic Brushes: The Key to Smooth Application
The acrylic brush is arguably the most important tool for acrylic nail application. It’s used to pick up the acrylic mixture and apply it to the nails with precision. Here’s what to look for in a quality acrylic brush:
- Kolinsky Sable Hair: The gold standard for acrylic brushes. Kolinsky sable hair is known for its excellent liquid absorption, flexibility, and durability.
- Brush Shape: Oval or round brushes are ideal for beginners, while pointed brushes offer more precision for intricate designs.
- Brush Size: Size #8 is a good starting point for beginners, while experienced technicians may prefer larger brushes for faster application.
- Handle Material: Look for a comfortable and durable handle made of wood or acrylic.
Nail Tips and Forms: Extending Your Canvas
Nail tips and forms are used to extend the length of the nails and provide a base for the acrylic application. Here’s a breakdown of the different types:
- Nail Tips: Pre-shaped plastic extensions that are glued to the natural nails. They come in various shapes, sizes, and colors.
- Nail Forms: Disposable or reusable templates that are placed under the natural nails to create a sculpted acrylic extension.
Other Essential Tools
In addition to brushes, tips, and forms, you’ll also need the following tools:
- Nail File and Buffer: Used to shape and smooth the acrylic nails.
- Cuticle Pusher and Nipper: Essential for preparing the nails by pushing back and trimming the cuticles.
- Dappen Dish: A small container to hold the monomer liquid.
- Dust Brush: To remove dust particles during filing and shaping.
- Nail Primer: Prepares the natural nail surface for acrylic application, ensuring better adhesion.
- Top Coat: Provides a glossy finish and protects the acrylic nails.
The Acrylic Nail Application Process: A Step-by-Step Guide
Applying acrylic nails can seem daunting at first, but with practice and patience, you can master the art of creating beautiful, long-lasting manicures. Here’s a step-by-step guide to help you through the process:
Step 1: Prepare the Nails
Proper nail preparation is crucial for ensuring good adhesion and preventing lifting. Here’s how to prepare your nails:
- Wash your hands thoroughly with soap and water.
- Push back the cuticles with a cuticle pusher.
- Trim any excess cuticle with a cuticle nipper.
- Gently buff the surface of the natural nails to remove shine.
- Clean the nails with alcohol or nail cleanser to remove any oils or debris.
Step 2: Apply Nail Tips or Forms
If you’re using nail tips, apply them to the natural nails with nail glue. Make sure the tips are properly aligned and securely attached. If you’re using nail forms, place them under the natural nails, ensuring they fit snugly and create the desired shape.
Step 3: Apply Nail Primer
Apply a thin layer of nail primer to the natural nails and the nail tips or forms. This will help the acrylic adhere better and prevent lifting.
Step 4: Apply the Acrylic Mixture
Dip your acrylic brush into the monomer liquid, then tap it lightly on a paper towel to remove excess liquid. Dip the brush into the acrylic powder, creating a small bead. Apply the bead to the nail, starting at the cuticle area and working your way towards the free edge. Repeat this process until the entire nail is covered with a thin, even layer of acrylic.
Step 5: Shape and Smooth the Acrylic
Use a nail file to shape the acrylic nails to your desired shape. Then, use a buffer to smooth the surface of the acrylic and remove any imperfections.
Step 6: Apply Top Coat
Apply a thin layer of top coat to the acrylic nails to protect them and give them a glossy finish. Allow the top coat to dry completely before using your hands.
Safety Precautions and Best Practices
Working with acrylic nail supplies requires caution to protect your health and ensure a safe and enjoyable experience. Here are some essential safety precautions and best practices:
- Work in a Well-Ventilated Area: Acrylic liquids emit fumes that can be harmful if inhaled. Always work in a well-ventilated area to minimize exposure.
- Wear a Mask: Consider wearing a mask to protect your respiratory system from acrylic fumes and dust particles.
- Avoid Skin Contact: Acrylic liquids and powders can cause skin irritation. Avoid direct contact with your skin.
- Store Supplies Properly: Store acrylic supplies in a cool, dry place, away from direct sunlight and heat.
- Dispose of Waste Properly: Dispose of used acrylic materials and liquids in a sealed container to prevent fumes from escaping.
Advantages and Benefits of Using Acrylic Nails
Acrylic nails offer several advantages and benefits, making them a popular choice for many:
- Durability: Acrylic nails are strong and durable, making them less prone to breakage than natural nails.
- Customization: Acrylic nails can be customized to any shape, length, and color, allowing for endless design possibilities.
- Longevity: With proper care, acrylic nails can last for several weeks.
- Correct Imperfections: Acrylics can be used to correct nail imperfections, such as unevenness or brittleness.
Troubleshooting Common Acrylic Nail Problems
Even with careful application, you may encounter some common problems with acrylic nails. Here are some tips for troubleshooting:
- Lifting: Ensure proper nail preparation and use a good-quality nail primer to prevent lifting.
- Bubbles: Avoid trapping air bubbles in the acrylic mixture by using a proper application technique.
- Yellowing: Protect acrylic nails from sunlight and use a UV-protective top coat to prevent yellowing.
- Cracking: Apply acrylic in thin, even layers and avoid excessive filing to prevent cracking.
Acrylic Nail Supplies: Expert Review & Recommendations
Choosing the right supplies is paramount for successful acrylic nail application. Based on extensive testing and user feedback, here are some top recommendations:
Acrylic Powders:
- Mia Secret Acrylic Powder: Known for its smooth consistency and excellent adhesion.
- Young Nails Acrylic Powder: Offers a wide range of colors and finishes, with a focus on quality and durability.
Monomer Liquids:
- Young Nails Monomer Liquid: Provides a strong bond and a smooth, even finish.
- CND Retention+ Monomer Liquid: A popular choice for its consistent performance and minimal odor.
Acrylic Brushes:
- Kolinsky Sable Acrylic Brush (Size #8): A must-have for professional-quality application.
- Mia Secret Professional Acrylic Brush: Offers excellent control and precision.
Overall Verdict: Investing in high-quality supplies is essential for achieving professional-looking acrylic nails. While cheaper alternatives may be tempting, they often compromise on quality and durability. Based on our analysis and user feedback, the brands mentioned above consistently deliver excellent results. It’s worth noting that while these are top-tier products, personal preference plays a significant role. What works best for one technician may not be ideal for another. Experimentation and practice are key to finding the perfect set of supplies that suit your individual style and technique.
Key Alternatives: While the mentioned products are highly recommended, alternatives like those from Valentino Beauty Pure and Erica’s ATA also offer competitive quality and features.
Q&A: Your Burning Questions Answered
Here are some frequently asked questions about acrylic nail supplies:
- Q: What is the best acrylic powder for beginners?
A: A clear or pink acrylic powder with a slow setting time is ideal for beginners. This allows more time to shape the acrylic and correct any mistakes.
- Q: How do I prevent acrylic nails from lifting?
A: Proper nail preparation, using a good-quality nail primer, and applying thin, even layers of acrylic are essential for preventing lifting.
- Q: Can I use regular nail polish with acrylic nails?
A: Yes, you can use regular nail polish with acrylic nails. However, it’s important to use a good-quality base coat and top coat to protect the acrylic and prevent staining.
- Q: How often should I get my acrylic nails filled?
A: Acrylic nails should be filled every 2-3 weeks to maintain their appearance and prevent lifting.
- Q: How do I remove acrylic nails safely?
A: Soak the acrylic nails in acetone for 15-20 minutes, then gently scrape off the softened acrylic with a cuticle pusher. Avoid pulling or prying, as this can damage the natural nails.
- Q: Are there any alternatives to traditional acrylic powders and liquids?
A: Yes, there are alternatives such as dip powder systems and gel polishes, which offer different application methods and finishes.
- Q: What’s the difference between monomer and EMA monomer?
A: EMA (Ethyl Methacrylate) monomer is generally considered safer and less damaging to the natural nail than MMA (Methyl Methacrylate) monomer, which is now banned in many salons due to its potential for causing allergic reactions and nail damage. Always opt for EMA monomer.
- Q: How can I prevent my acrylic brush from hardening?
A: Clean your acrylic brush thoroughly after each use with brush cleaner. Avoid letting the acrylic mixture dry on the brush, as this can cause it to harden and become unusable.
- Q: What are the best nail shapes for acrylic nails?
A: The best nail shape depends on your personal preference and nail length. Popular options include square, oval, almond, and stiletto.
- Q: How can I create ombre or gradient acrylic nails?
A: Use a sponge or a fine brush to blend different colors of acrylic powder together, creating a seamless gradient effect.
Conclusion: Mastering the Art of Acrylic Nails
Mastering the art of acrylic nails requires a combination of knowledge, skill, and the right supplies. By understanding the different types of acrylic powders and liquids, essential tools, and application techniques, you can create beautiful, long-lasting manicures that enhance your style and confidence. Remember to prioritize safety and follow best practices to ensure a safe and enjoyable experience.
The world of supplies for acrylic nails is constantly evolving, with new products and techniques emerging regularly. Staying up-to-date with the latest trends and advancements will help you continuously improve your skills and offer your clients the best possible service. Don’t be afraid to experiment with different products and techniques to find what works best for you and your clients.
Now that you have a comprehensive understanding of supplies for acrylic nails, it’s time to put your knowledge into practice. Share your experiences and creations with us in the comments below. For more in-depth guides and expert advice, explore our other articles on nail care and beauty. Contact our experts for a consultation on supplies for acrylic nails and take your nail game to the next level!
