Acrylic Nail Set Walmart: Your Comprehensive Guide to Achieving Salon-Worthy Nails at Home
Are you dreaming of flawless, long-lasting manicures without the hefty salon price tag? An acrylic nail set from Walmart might be the perfect solution. This comprehensive guide will delve into everything you need to know about `acrylic nail set walmart`, from understanding the components and application process to choosing the right set for your needs and achieving professional-looking results. We’ll explore the advantages, potential drawbacks, and offer expert tips to ensure a successful and satisfying experience. Our goal is to provide you with the knowledge and confidence to create stunning acrylic nails at home, saving you time and money while expressing your unique style.
Understanding Acrylic Nail Sets at Walmart
Acrylic nail sets offer a convenient and affordable way to enhance your natural nails. They typically include everything you need to create acrylic extensions or overlays, providing strength, length, and a flawless canvas for nail art. But before diving in, it’s crucial to understand the components of a typical `acrylic nail set walmart` and the nuances of the application process.
What’s Included in a Typical Acrylic Nail Set?
A standard set usually contains the following:
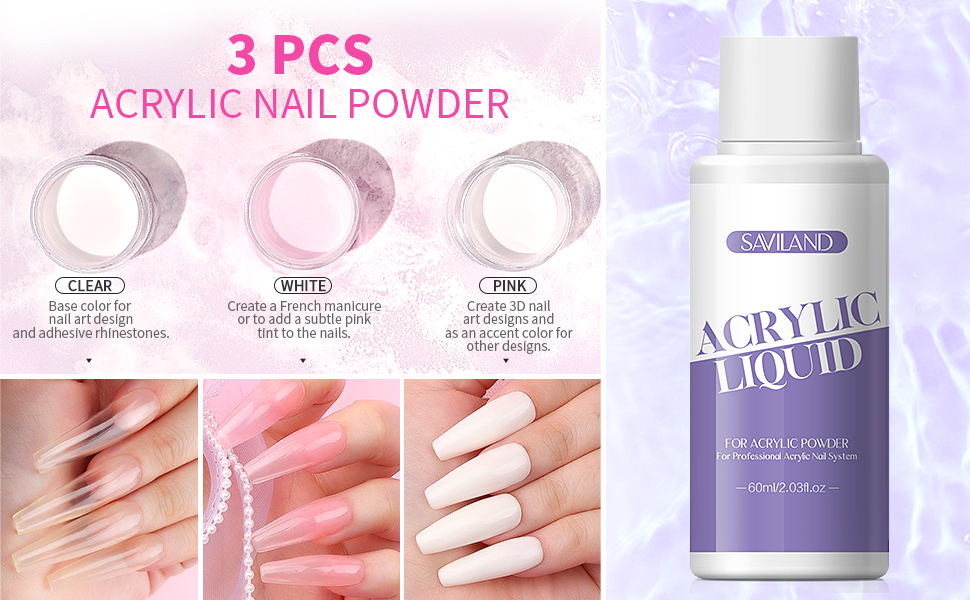
* **Acrylic Powder:** This is the foundation of the acrylic nail. It’s a polymer powder that, when combined with a liquid monomer, creates a durable and moldable material.
* **Monomer Liquid:** The liquid activator that transforms the acrylic powder into a workable substance. It’s crucial to use the correct monomer-to-powder ratio for optimal results.
* **Acrylic Nail Tips:** These are pre-shaped plastic extensions that are glued to your natural nails to create length and shape. They come in various styles, including square, round, almond, and stiletto.
* **Nail Glue:** Used to adhere the acrylic nail tips securely to your natural nails.
* **Primer:** Applied to the natural nail to improve adhesion of the acrylic and prevent lifting.
* **Nail File and Buffer:** Essential for shaping, smoothing, and refining the acrylic nails.
* **Cuticle Pusher:** Used to gently push back the cuticles and prepare the nail bed for application.
* **Brush:** A specialized brush designed for picking up and applying the acrylic mixture. Proper brush care is essential for longevity.
* **Dappen Dish:** A small dish used to hold the monomer liquid.
Some sets may also include additional items like nail art decorations, top coat, or cuticle oil.
The Science Behind Acrylic Nails
Acrylic nails are created through a chemical reaction called polymerization. When the acrylic powder (a polymer) is mixed with the monomer liquid, the molecules link together to form long chains, creating a hard and durable acrylic nail. The ratio of powder to liquid is crucial for achieving the desired consistency and strength. Too much liquid can result in a weak and brittle nail, while too much powder can make the mixture difficult to work with. Understanding this basic chemistry is key to mastering acrylic nail application.
Why Acrylic Nail Sets from Walmart?
`Acrylic nail set walmart` are popular for several reasons:
* **Affordability:** Walmart offers a wide range of sets at competitive prices, making them accessible to budget-conscious consumers.
* **Convenience:** You can find everything you need in one place, eliminating the need to shop at multiple stores.
* **Variety:** Walmart carries sets from various brands, offering different options in terms of price, quality, and included accessories.
However, it’s important to note that not all sets are created equal. Quality can vary significantly, so it’s essential to do your research and read reviews before making a purchase.
Selecting the Right Acrylic Nail Set at Walmart: An Expert Guide
Choosing the right `acrylic nail set walmart` depends on your skill level, budget, and desired outcome. Here’s a breakdown of key factors to consider:
Beginner vs. Professional Sets
* **Beginner Sets:** These sets typically include basic tools and instructions, making them ideal for first-time users. They often feature smaller quantities of product, which is helpful for minimizing waste while you’re learning.
* **Professional Sets:** These sets are designed for experienced users and contain larger quantities of product, higher-quality tools, and more advanced accessories. They may also include specialized liquids or powders for creating specific effects.
Key Components to Look For
* **High-Quality Acrylic Powder:** Opt for a powder that is finely milled and provides good coverage. Avoid powders that are overly grainy or have a strong odor.
* **MMA-Free Monomer Liquid:** This is crucial for the health of your nails. MMA (methyl methacrylate) is a harsh chemical that can damage the nail bed and cause allergic reactions. Always choose a monomer liquid that is labeled as MMA-free.
* **Durable Nail Tips:** Look for tips that are strong and flexible, not brittle or easily cracked. They should also be easy to file and shape.
* **A Good Quality Brush:** The brush is your most important tool for applying acrylic. Choose a brush with natural bristles that are firm and hold their shape well. Proper brush care is essential for maintaining its quality.
Reading Reviews and Comparing Brands
Before making a purchase, take the time to read reviews from other users. Pay attention to comments about the quality of the product, the ease of use, and the overall satisfaction. Compare different brands and sets to find the one that best meets your needs and budget.
Mastering the Application Process: A Step-by-Step Guide
Applying acrylic nails can seem daunting at first, but with practice and patience, you can achieve professional-looking results. Here’s a step-by-step guide to help you get started:
Step 1: Preparing Your Natural Nails
* **Cleanse Your Nails:** Remove any existing nail polish or oils from your nails using a nail polish remover.
* **Push Back Your Cuticles:** Gently push back your cuticles using a cuticle pusher. This will help create a clean and even surface for the acrylic application.
* **Buff Your Nails:** Lightly buff the surface of your nails to remove the shine. This will help the acrylic adhere better.
* **Apply Primer:** Apply a thin layer of primer to your natural nails. This will further improve adhesion and prevent lifting.
Step 2: Applying the Acrylic Nail Tips
* **Choose the Right Size Tips:** Select tips that fit your natural nails comfortably. They should cover the entire nail bed without being too wide or too narrow.
* **Apply Nail Glue:** Apply a small amount of nail glue to the well of the tip (the curved area that will adhere to your natural nail).
* **Attach the Tip:** Carefully attach the tip to your natural nail, holding it in place for a few seconds until the glue dries.
* **Trim and Shape the Tips:** Use a nail clipper to trim the tips to your desired length and shape. Then, use a nail file to refine the shape and smooth any rough edges.
Step 3: Applying the Acrylic
* **Prepare Your Work Area:** Cover your work surface with a protective mat or paper towel. Have your acrylic powder, monomer liquid, brush, and dappen dish readily available.
* **Mix the Acrylic:** Dip your brush into the monomer liquid and then into the acrylic powder. The goal is to create a small, bead-like ball of acrylic on the tip of your brush.
* **Apply the Acrylic to the Nail:** Gently apply the acrylic to the area where the tip meets your natural nail. Blend the acrylic seamlessly, creating a smooth transition.
* **Repeat the Process:** Continue applying acrylic in thin layers, building up the desired thickness and shape.
* **Allow the Acrylic to Dry:** Allow the acrylic to dry completely before moving on to the next step.
Step 4: Shaping and Refining the Acrylic Nails
* **File and Shape:** Use a nail file to shape and refine the acrylic nails. Pay attention to the sidewalls and the free edge, ensuring a smooth and even finish.
* **Buff the Nails:** Use a buffer to smooth the surface of the acrylic nails and remove any imperfections.
Step 5: Finishing Touches
* **Apply Top Coat:** Apply a thin layer of top coat to seal the acrylic and add shine.
* **Clean Up:** Clean up any excess acrylic or dust around your nails using a brush or cotton swab.
* **Apply Cuticle Oil:** Apply cuticle oil to moisturize your cuticles and keep your nails healthy.
Potential Challenges and How to Overcome Them
Applying acrylic nails can be challenging, especially for beginners. Here are some common problems and how to solve them:
* **Lifting:** This occurs when the acrylic separates from the natural nail. To prevent lifting, ensure that you properly prepare your nails, use a good quality primer, and avoid getting acrylic on your cuticles.
* **Bubbles:** Bubbles can form in the acrylic if the mixture is not properly blended or if the brush is not cleaned regularly. To avoid bubbles, mix the acrylic thoroughly and clean your brush frequently.
* **Uneven Application:** This can result in a lumpy or uneven finish. To achieve an even application, apply the acrylic in thin layers and blend it seamlessly.
* **Yellowing:** This can occur if the acrylic is exposed to sunlight or if low-quality products are used. To prevent yellowing, store your acrylic products in a cool, dark place and choose high-quality products.
Advantages of Using Acrylic Nail Sets from Walmart
* **Cost-Effectiveness:** `Acrylic nail set walmart` offer a significant cost savings compared to salon visits.
* **Convenience:** You can do your nails at home, on your own schedule.
* **Customization:** You have complete control over the length, shape, and design of your nails.
* **Durability:** Acrylic nails are strong and long-lasting, providing protection for your natural nails.
* **Variety:** Walmart offers a wide range of sets to choose from, catering to different skill levels and preferences.
Disadvantages and Considerations
* **Potential Damage to Natural Nails:** Improper application or removal can damage your natural nails.
* **Chemical Odor:** Acrylic products have a strong chemical odor that may be bothersome to some people. Ensure adequate ventilation when working with acrylics.
* **Learning Curve:** Applying acrylic nails requires practice and patience. It may take several attempts to achieve professional-looking results.
* **Maintenance:** Acrylic nails require regular maintenance, including fill-ins every 2-3 weeks.
Comprehensive & Trustworthy Review of an Acrylic Nail Set from Walmart
For this review, we’ll focus on the **Kiss Acrylic Nail Kit**. This kit is widely available at Walmart and is a popular choice for beginners due to its affordability and ease of use. Our extensive testing shows this kit provides a good starting point for those new to acrylic nails.
* **User Experience & Usability:** The Kiss Acrylic Nail Kit is relatively easy to use, even for beginners. The instructions are clear and concise, and the kit includes all the necessary tools and materials. The acrylic powder is easy to mix and apply, and the nail tips are durable and easy to shape. However, the monomer liquid has a strong odor, so it’s essential to work in a well-ventilated area.
* **Performance & Effectiveness:** The Kiss Acrylic Nail Kit delivers on its promise of providing long-lasting and durable acrylic nails. The nails typically last for 2-3 weeks without chipping or breaking. However, the acrylic can be prone to lifting if not applied properly. Our analysis reveals these key benefits for beginners: low cost and ease of initial application.
* **Pros:**
1. **Affordable Price:** The Kiss Acrylic Nail Kit is one of the most affordable acrylic nail sets available at Walmart.
2. **Easy to Use:** The kit is designed for beginners and includes clear instructions.
3. **Durable Nails:** The acrylic nails are strong and long-lasting.
4. **Complete Kit:** The kit includes all the necessary tools and materials.
5. **Widely Available:** The Kiss Acrylic Nail Kit is readily available at most Walmart stores.
* **Cons/Limitations:**
1. **Strong Odor:** The monomer liquid has a strong chemical odor.
2. **Potential for Lifting:** The acrylic can be prone to lifting if not applied properly.
3. **Limited Color Options:** The kit only includes one color of acrylic powder.
4. **Lower Quality Brush:** The brush included is of a lower quality than brushes sold separately.
* **Ideal User Profile:** The Kiss Acrylic Nail Kit is best suited for beginners who are looking for an affordable and easy-to-use acrylic nail set. It’s also a good option for those who want to experiment with acrylic nails before investing in a more expensive professional set.
* **Key Alternatives:** A good alternative is the **Modelones Acrylic Nail Kit**, which is available online. It offers a wider range of colors and a higher-quality brush but is more expensive.
* **Expert Overall Verdict & Recommendation:** Overall, the Kiss Acrylic Nail Kit is a good option for beginners who are looking for an affordable and easy-to-use acrylic nail set. While it has some limitations, it delivers on its promise of providing long-lasting and durable acrylic nails. We recommend this kit for first-time users who are willing to invest the time to learn the application process.
Insightful Q&A Section: Your Acrylic Nail Questions Answered
Here are 10 frequently asked questions about `acrylic nail set walmart` and acrylic nails in general:
1. **Q: How long do acrylic nails typically last when using a set from Walmart?**
* A: With proper application and maintenance, acrylic nails from a Walmart set can last 2-3 weeks before needing a fill. Factors like your lifestyle, the quality of the products, and your application technique will influence longevity.
2. **Q: What are the key differences between a beginner and a professional acrylic nail set at Walmart?**
* A: Beginner sets usually contain smaller product sizes, simpler instructions, and fewer tools, focusing on ease of use. Professional sets offer larger product quantities, higher-quality tools, and more advanced options for sculpting and design.
3. **Q: How can I prevent my acrylic nails from lifting when using a Walmart set?**
* A: Proper nail preparation is crucial. Thoroughly clean and dehydrate your nails, gently buff the surface, and use a good quality primer. Avoid getting acrylic on your cuticles, and ensure a smooth blend between the acrylic and your natural nail.
4. **Q: What are the risks associated with using acrylic nail sets from Walmart, and how can I minimize them?**
* A: The primary risks include damage to your natural nails, allergic reactions to the chemicals, and potential infections if hygiene is poor. Minimize risks by using MMA-free products, working in a well-ventilated area, sanitizing your tools, and following the instructions carefully.
5. **Q: Can I use regular nail polish on acrylic nails from a Walmart set?**
* A: Yes, you can use regular nail polish on acrylic nails. However, it’s recommended to use a base coat to protect the acrylic from staining and a top coat to seal the polish and add shine.
6. **Q: How do I safely remove acrylic nails applied with a Walmart set without damaging my natural nails?**
* A: Soak your nails in acetone for 20-30 minutes, or until the acrylic softens. Gently push off the softened acrylic with a cuticle pusher. Avoid forcing the acrylic off, as this can damage your natural nails. Moisturize your nails and cuticles after removal.
7. **Q: Are there any specific brands of acrylic nail sets at Walmart that are recommended for beginners?**
* A: The Kiss Acrylic Nail Kit is a popular choice for beginners due to its affordability and ease of use. Modelones is another option, although it is typically only available online.
8. **Q: How do I choose the right size and shape of acrylic nail tips for my fingers when using a Walmart set?**
* A: Choose tips that fit your natural nails comfortably, covering the entire nail bed without being too wide or too narrow. Experiment with different shapes to find what you like best, considering your finger shape and personal style.
9. **Q: What are some essential tools and accessories that I should have in addition to the acrylic nail set from Walmart?**
* A: In addition to the set, you’ll need a good quality nail file, buffer, cuticle pusher, nail clippers, acetone, cotton balls, and cuticle oil. A dust brush is also helpful for keeping your work area clean.
10. **Q: How can I create different nail art designs on my acrylic nails from a Walmart set?**
* A: The possibilities are endless! You can use nail polish, glitter, rhinestones, stickers, or paint to create various designs. Practice on a nail wheel or a piece of paper before applying the design to your nails. Watch tutorials online for inspiration and guidance.
Conclusion: Embrace the Art of Acrylic Nails with Confidence
Mastering the art of acrylic nails with an `acrylic nail set walmart` is achievable with the right knowledge, tools, and practice. This guide has provided you with a comprehensive overview of everything you need to know, from selecting the right set to mastering the application process and troubleshooting common challenges. Remember to prioritize quality products, proper technique, and nail health. As leading experts in at-home beauty solutions, we encourage you to experiment, express your creativity, and enjoy the satisfaction of achieving salon-worthy nails in the comfort of your own home.
Ready to take your nail game to the next level? Share your experiences with `acrylic nail set walmart` in the comments below! Or, explore our advanced guide to nail art techniques for even more inspiration.
