Can You Put Gel Polish on Acrylic Nails? The Definitive Guide
So, you’ve got a fresh set of acrylic nails and a dazzling array of gel polishes. The burning question: can you put gel polish on acrylic nails? The short answer is yes, absolutely! But like any nail art endeavor, there’s a right way and a wrong way to go about it. This comprehensive guide will walk you through everything you need to know, from the science behind the combination to the step-by-step application process, ensuring a long-lasting, chip-free manicure. We’ll delve into the best practices, potential pitfalls, and expert tips to achieve salon-quality results at home. This isn’t just a ‘yes’ or ‘no’ answer; it’s a deep dive into mastering this popular nail technique.
Understanding the Compatibility of Gel Polish and Acrylic Nails
Before diving into the how-to, let’s understand why gel polish and acrylic nails are a match made in manicure heaven. Acrylic nails provide a strong, durable base, while gel polish offers vibrant color, shine, and long-lasting wear. The chemical composition of both allows them to bond together effectively when applied correctly.
The Science Behind the Bond
Acrylic nails are typically created using a liquid monomer and a powder polymer that create a hard, artificial nail enhancement. Gel polish, on the other hand, is a type of polish that requires curing under a UV or LED lamp to harden. The porous nature of acrylic allows the gel polish to adhere properly, creating a strong and durable bond. Without this porous surface, the gel polish would simply peel off.
Addressing Common Concerns
One common concern is whether the UV/LED curing process for gel polish will damage the acrylic nails. When done correctly, the curing process is perfectly safe for acrylics. However, excessive heat from the lamp can cause the acrylic to become brittle or lift, so it’s crucial to use a low-heat setting or cure in short intervals.
Step-by-Step Guide: Applying Gel Polish on Acrylic Nails Like a Pro
Now for the fun part! Follow these steps carefully to achieve a flawless gel manicure on your acrylic nails.
Step 1: Prep Your Acrylic Nails
Proper preparation is key to a long-lasting manicure. Start by gently buffing the surface of your acrylic nails to create a slightly rough texture. This will help the gel polish adhere better. Use a fine-grit buffing block to avoid damaging the acrylic.
Next, cleanse the nails with a lint-free wipe and a nail cleanser or isopropyl alcohol to remove any dust or oils. This step is crucial for preventing lifting and ensuring a smooth application.
Step 2: Apply a Gel Base Coat
Apply a thin, even layer of gel base coat to each nail, being careful not to flood the cuticles. A good base coat provides a sticky surface for the color to adhere to and protects the acrylic from staining. Cure the base coat under a UV or LED lamp according to the manufacturer’s instructions (usually 30-60 seconds for LED and 2 minutes for UV).
Step 3: Apply Your Gel Polish Color
Apply a thin, even layer of your chosen gel polish color. Avoid applying the polish too thickly, as this can cause it to wrinkle or not cure properly. Cure the first coat under the lamp. Repeat with a second coat for full opacity, curing after each coat.
Step 4: Apply a Gel Top Coat
Seal in your color with a gel top coat. This will add shine and protect your manicure from chipping and scratching. Apply a thin, even layer and cure under the lamp. Some top coats require wiping with a cleanser after curing to remove the sticky residue, while others are no-wipe formulas.
Step 5: Hydrate Your Cuticles
Finish off your manicure by applying cuticle oil to hydrate and nourish your cuticles. This will keep your nails looking healthy and prevent them from drying out.
Essential Tools and Products for Gel Polish on Acrylic Nails
Having the right tools and products can make all the difference in achieving a professional-looking manicure.
- Fine-grit buffing block: For gently prepping the acrylic surface.
- Lint-free wipes: For cleansing the nails without leaving behind any fibers.
- Nail cleanser or isopropyl alcohol: For removing oils and residue.
- Gel base coat: For providing a sticky base and protecting the acrylic.
- Gel polish colors: Choose high-quality gel polishes for best results.
- Gel top coat: For sealing in the color and adding shine.
- UV or LED lamp: For curing the gel polish.
- Cuticle oil: For hydrating and nourishing the cuticles.
- Nail file: For shaping and refining the acrylic nails.
- Cuticle pusher: For gently pushing back the cuticles.
Troubleshooting Common Issues When Using Gel Polish on Acrylic Nails
Even with the best preparation, you might encounter some issues. Here’s how to troubleshoot them:
Lifting
Lifting occurs when the gel polish separates from the acrylic nail. This can be caused by improper preparation, applying the polish too thickly, or using incompatible products. To prevent lifting, make sure to properly buff and cleanse the nails before applying the gel polish. Apply thin, even layers of polish and use a high-quality base coat.
Chipping
Chipping is another common issue. This can be caused by not capping the free edge of the nail with polish, using a low-quality top coat, or exposing the nails to harsh chemicals. To prevent chipping, make sure to cap the free edge of the nail with each layer of polish. Use a high-quality top coat and wear gloves when handling harsh chemicals.
Wrinkling
Wrinkling occurs when the gel polish doesn’t cure properly. This can be caused by applying the polish too thickly or using a weak UV or LED lamp. To prevent wrinkling, apply thin, even layers of polish and make sure your lamp is strong enough to cure the polish properly. Consider using a low-heat mode on your lamp.
The Benefits of Using Gel Polish on Acrylic Nails
Using gel polish on acrylic nails offers several advantages over traditional nail polish.
- Long-lasting wear: Gel polish can last for up to two weeks without chipping or peeling.
- High shine: Gel polish provides a glossy, high-shine finish that lasts.
- Durability: Gel polish is more durable than traditional nail polish, making it less prone to scratching and damage.
- Versatility: Gel polish comes in a wide range of colors and finishes, allowing you to create endless nail art designs.
- Quick drying: Gel polish cures quickly under a UV or LED lamp, eliminating the need to wait for your nails to dry.
Understanding Gel Polish Brands and Quality
Not all gel polishes are created equal. The quality of the gel polish can significantly impact the longevity and appearance of your manicure. Investing in high-quality gel polishes from reputable brands is crucial for achieving the best results.
Factors to Consider When Choosing Gel Polish
- Pigmentation: Look for gel polishes with high pigmentation for full coverage in just a few coats.
- Consistency: Choose gel polishes with a smooth, self-leveling consistency for easy application.
- Durability: Opt for gel polishes that are known for their long-lasting wear and resistance to chipping and peeling.
- Safety: Select gel polishes that are free from harmful chemicals like formaldehyde, toluene, and DBP.
- Curing time: Check the manufacturer’s instructions for the recommended curing time and make sure it’s compatible with your UV or LED lamp.
Exploring Different Gel Polish Finishes and Effects
Gel polish offers a wide range of finishes and effects to suit any style and occasion.
- Creme: A classic, opaque finish with a smooth, glossy appearance.
- Shimmer: A finish with fine, reflective particles that add a subtle sparkle.
- Glitter: A finish with larger, more noticeable glitter particles for a bold, glamorous look.
- Metallic: A finish with a reflective, mirror-like appearance.
- Holographic: A finish that creates a rainbow-like effect under light.
- Matte: A finish with a non-glossy, velvety appearance.
- Cat eye: A finish that creates a mesmerizing, three-dimensional effect with a magnetic tool.
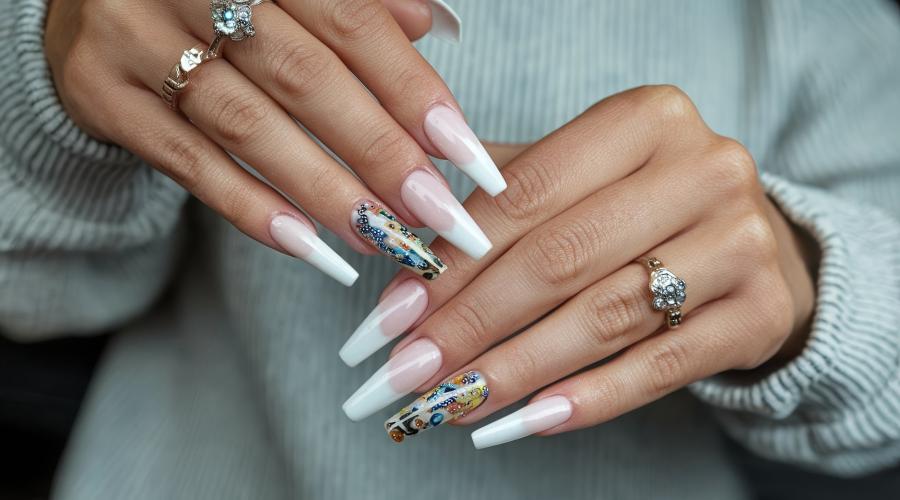
Advanced Techniques: Nail Art with Gel Polish on Acrylics
Once you’ve mastered the basics, you can explore more advanced nail art techniques using gel polish on acrylics. The possibilities are endless, from simple designs to intricate masterpieces.
Popular Nail Art Techniques
- Ombre: Create a gradient effect by blending two or more gel polish colors together.
- Marbling: Create a swirled, marble-like effect by dropping different gel polish colors into water and then dipping your nails into the mixture.
- Stamping: Use nail stamps and special stamping polish to create intricate designs.
- Freehand painting: Use a fine-tipped brush to paint detailed designs directly onto the nails.
- Adding embellishments: Add rhinestones, glitter, or other embellishments to create a unique and eye-catching look.
The Longevity and Maintenance of Gel Polish on Acrylic Nails
With proper care, your gel polish manicure on acrylic nails can last for up to two weeks without chipping or peeling. Here are some tips for maintaining your manicure and extending its lifespan:
- Wear gloves when doing household chores: Protect your nails from harsh chemicals and water by wearing gloves when washing dishes, cleaning, or gardening.
- Avoid using your nails as tools: Refrain from using your nails to open packages, scrape off stickers, or perform other tasks that can put stress on them.
- Apply cuticle oil daily: Keep your cuticles hydrated and prevent them from drying out by applying cuticle oil at least once a day.
- Avoid picking or peeling at the polish: Picking or peeling at the polish can damage the acrylic nails and cause them to lift.
- Schedule regular fill appointments: As your natural nails grow, you’ll need to schedule fill appointments to maintain the appearance and integrity of your acrylic nails.
Cost Analysis: Gel Polish vs. Regular Polish on Acrylics
Let’s break down the cost comparison between using gel polish and regular polish on acrylic nails.
Gel Polish Costs
- Initial investment: UV/LED lamp, gel base coat, gel polish colors, gel top coat, cleanser, lint-free wipes, etc. (approx. $50-$200)
- Per-manicure cost: Relatively low, as the polishes last for many applications.
- Longevity: Up to 2 weeks without chipping.
Regular Polish Costs
- Initial investment: Nail polish colors, base coat, top coat, nail polish remover (approx. $20-$50)
- Per-manicure cost: Lower than gel polish.
- Longevity: Typically chips within a few days.
While the initial investment for gel polish is higher, the longevity and durability make it a cost-effective choice in the long run. Plus, the convenience of quick drying and long-lasting shine is a major advantage.
Expert Q&A: Addressing Your Burning Questions About Gel Polish on Acrylic Nails
Here are some frequently asked questions about using gel polish on acrylic nails:
-
Question: Can I use any gel polish brand on my acrylic nails?
Answer: While most gel polishes are compatible with acrylics, it’s best to stick with reputable brands known for their quality and durability. Also, ensure all your products (base coat, color, top coat) are from the same brand for optimal adhesion and longevity.
-
Question: How do I remove gel polish from acrylic nails without damaging them?
Answer: Gently file the top coat to break the seal, then soak cotton balls in acetone, place them on your nails, and wrap with foil. After 10-15 minutes, the gel polish should be softened enough to gently scrape off with a cuticle pusher. Avoid excessive filing or scraping, as this can damage the acrylic.
-
Question: Can I use regular nail polish remover on gel polish?
Answer: No, regular nail polish remover will not effectively remove gel polish. You need acetone-based remover to break down the gel formula.
-
Question: My gel polish is bubbling when I cure it. What am I doing wrong?
Answer: Bubbling is usually caused by applying the gel polish too thickly or shaking the bottle vigorously before application. Apply thin, even layers and gently roll the bottle between your hands to mix the polish.
-
Question: My acrylic nails are turning yellow under the gel polish. Why?
Answer: Yellowing can be caused by exposure to UV light or staining from certain gel polish colors. Use a high-quality base coat to protect the acrylic and avoid prolonged exposure to direct sunlight. If using a highly pigmented color, consider applying an extra layer of base coat.
-
Question: Can I mix gel polish with regular nail polish on acrylics to create a custom color?
Answer: It’s not recommended to mix gel polish with regular nail polish. The formulas are different and may not adhere properly, leading to lifting or chipping. Stick to using gel polishes designed to work together.
-
Question: How often should I get my acrylic nails filled when using gel polish?
Answer: Typically, you should get your acrylic nails filled every 2-3 weeks, depending on the rate of your natural nail growth. Regular fills help maintain the appearance and structural integrity of your acrylics.
-
Question: Can I do a fill on my acrylic nails at home if I have gel polish on them?
Answer: While it’s possible to do a fill at home, it requires skill and precision. You’ll need to carefully file down the existing gel polish and acrylic, apply new acrylic, and then reapply the gel polish. If you’re not comfortable with the process, it’s best to see a professional.
-
Question: Are there any gel polish colors that are more likely to stain acrylic nails?
Answer: Yes, highly pigmented colors like reds, blues, and purples are more likely to stain acrylic nails. Always use a good base coat to create a barrier and prevent staining.
-
Question: Can I use builder gel on top of my acrylic nails before applying gel polish for added strength?
Answer: Yes, applying a thin layer of builder gel over acrylics before gel polish is a great way to add extra strength and durability. Cure the builder gel according to the manufacturer’s instructions before proceeding with your gel polish application.
Exploring Alternatives to Gel Polish on Acrylic Nails
While gel polish is a popular choice, there are alternatives to consider for your acrylic nails.
- Regular Nail Polish: A classic option that’s easy to apply and remove. However, it’s not as durable as gel polish and is prone to chipping.
- Dip Powder: A long-lasting alternative that involves dipping your nails into colored powder. It’s known for its strength and durability but can be more difficult to remove than gel polish.
Conclusion: Enhancing Your Acrylic Nails with Gel Polish – A Perfect Match
So, can you put gel polish on acrylic nails? Absolutely! As we’ve explored, combining gel polish with acrylic nails is a fantastic way to achieve a long-lasting, beautiful manicure. By following the steps outlined in this guide, using the right tools and products, and troubleshooting common issues, you can achieve salon-quality results at home. Remember that preparation is key, and investing in high-quality products will make all the difference. Whether you’re a seasoned nail art enthusiast or just starting out, mastering this technique will open up a world of possibilities for creating stunning nail designs. From classic creme finishes to dazzling glitter effects, gel polish offers endless versatility to express your personal style. Share your experiences with using gel polish on acrylic nails in the comments below. Or explore our advanced guide to nail art techniques for more inspiration!
