
## Ruger American Ranch Gen 2 Disassembly: A Complete Expert Guide
Are you looking for a comprehensive guide on how to disassemble your Ruger American Ranch Gen 2 rifle? Whether you’re cleaning it, performing maintenance, or upgrading parts, proper disassembly is crucial. This article provides a detailed, step-by-step walkthrough, ensuring you can safely and effectively take apart your rifle while maintaining its performance and longevity. We’ll cover everything from essential tools to common pitfalls, empowering you with the knowledge and confidence to handle this task like a pro. This guide aims to be the definitive resource for Ruger American Ranch Gen 2 disassembly.
### Why Disassemble Your Ruger American Ranch Gen 2?
Regular disassembly and cleaning are vital for maintaining the accuracy, reliability, and overall lifespan of your Ruger American Ranch Gen 2. Residue buildup, fouling, and environmental factors can negatively impact its performance. Disassembly allows for thorough cleaning, inspection of parts, and lubrication, preventing potential issues and ensuring smooth operation. Furthermore, understanding the disassembly process is essential for installing aftermarket parts and performing upgrades. This guide will walk you through the process.
## Understanding the Ruger American Ranch Gen 2
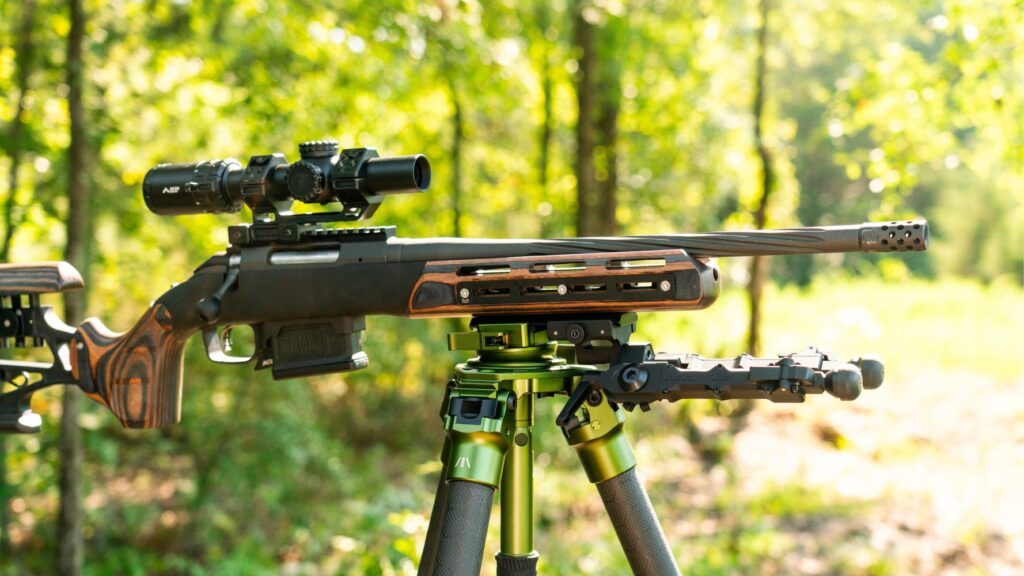
The Ruger American Ranch rifle has gained popularity for its accuracy, affordability, and versatility. The Gen 2 model builds upon this success with enhanced features and improved ergonomics. Understanding the rifle’s design and components is crucial before attempting any disassembly.
### Key Features of the Ruger American Ranch Gen 2
The Ruger American Ranch Gen 2 boasts several notable features:
* **Improved Stock Design:** The Gen 2 features a redesigned stock for enhanced ergonomics and a more comfortable shooting experience.
* **Adjustable Length of Pull:** Allows users to customize the stock length for optimal fit and comfort.
* **Threaded Barrel:** Enables the use of muzzle devices such as suppressors and brakes.
* **One-Piece, Three-Lug Bolt:** Provides smooth and reliable operation.
* **Power Bedding:** Ensures consistent accuracy by bedding the action securely to the stock.
### The Importance of Safe Disassembly
Before beginning any disassembly, ensure the rifle is unloaded and safe. Always follow the manufacturer’s instructions and use appropriate tools to prevent damage to the rifle or injury to yourself. Work in a clean, well-lit area and take your time to avoid mistakes.
## Tools Needed for Ruger American Ranch Gen 2 Disassembly
Having the right tools is essential for a smooth and safe disassembly process. Here’s a list of tools you’ll need:
* **Gunsmithing Screwdriver Set:** A set of high-quality screwdrivers with various sizes and types of bits is crucial for removing screws without damaging them.
* **Punch Set:** Used for driving out pins without causing damage. A roll pin punch set is particularly useful.
* **Hammer:** A small, lightweight hammer for tapping punches.
* **Bench Mat:** Provides a non-slip surface to protect your rifle and workbench.
* **Cleaning Supplies:** Gun cleaning solvent, brushes, patches, and lubricant.
* **Small Containers:** To organize and store small parts.
* **Owner’s Manual:** Refer to your rifle’s owner’s manual for specific instructions and diagrams.
## Step-by-Step Ruger American Ranch Gen 2 Disassembly Guide
This section provides a detailed, step-by-step guide to disassembling your Ruger American Ranch Gen 2 rifle. Follow these instructions carefully to ensure a safe and successful disassembly.
### Step 1: Ensure the Rifle is Unloaded
* **Remove the Magazine:** Press the magazine release button and remove the magazine.
* **Check the Chamber:** Cycle the bolt to ensure the chamber is empty. Visually inspect the chamber to confirm it is clear.
### Step 2: Remove the Bolt
* **Position the Bolt:** Ensure the bolt is in the rearmost position.
* **Depress the Bolt Release:** Locate the bolt release lever (usually on the left side of the receiver) and depress it.
* **Remove the Bolt:** While holding the bolt release, pull the bolt out of the receiver.
### Step 3: Separate the Stock from the Action
* **Locate the Action Screws:** Typically, there are two action screws located on the underside of the stock, near the trigger guard and forward of the magazine well.
* **Remove the Action Screws:** Use a properly sized screwdriver to carefully remove the action screws. Store them in a safe place.
* **Separate the Stock:** Gently lift the barreled action out of the stock. If it’s tight, apply gentle pressure and wiggle it until it comes free. Be careful not to force it, as this could damage the stock or action.
### Step 4: Disassemble the Bolt (Advanced)
*Note: Bolt disassembly is generally not necessary for routine cleaning. Only proceed if you need to access internal bolt components for maintenance or repair.*
* **Gather Tools:** You’ll need a small punch, hammer, and possibly a specialized bolt disassembly tool (depending on the model).
* **Remove the Firing Pin Retaining Pin:** Locate the firing pin retaining pin at the rear of the bolt. Use a punch and hammer to carefully drive out the pin. Support the bolt on a solid surface.
* **Remove the Firing Pin Assembly:** Once the retaining pin is removed, the firing pin assembly (including the firing pin, spring, and possibly other small parts) can be carefully removed from the rear of the bolt. Be mindful of spring tension and ensure the parts don’t launch unexpectedly.
* **Disassemble the Extractor (If Necessary):** The extractor is typically located on the bolt face. Depending on the design, it may be held in place by a pin or spring. Use appropriate tools to carefully remove the extractor and its associated components.
### Step 5: Disassemble the Trigger Group (Advanced)
*Warning: Trigger group disassembly is complex and should only be attempted by experienced individuals. Improper disassembly can lead to malfunctions or safety issues. If you are not comfortable with this process, consult a qualified gunsmith.*
* **Locate the Trigger Group Pins:** Identify the pins that hold the trigger group components in place. These pins may be press-fit or secured with retaining clips.
* **Remove the Trigger Group Pins:** Use a punch and hammer to carefully drive out the trigger group pins. Support the trigger group on a solid surface.
* **Disassemble the Trigger Components:** As you remove each pin, carefully disassemble the trigger components, noting their positions and relationships. It’s helpful to take pictures or make diagrams to aid in reassembly.
## Cleaning and Maintenance After Disassembly
After disassembling your Ruger American Ranch Gen 2, it’s time to clean and maintain the components. This is crucial for ensuring its continued performance and reliability.
### Cleaning the Barrel
* **Use a Bore Brush:** Attach a bore brush to a cleaning rod and run it through the barrel several times to loosen fouling.
* **Apply Cleaning Solvent:** Apply a gun cleaning solvent to a patch and run it through the barrel until it comes out clean.
* **Dry the Barrel:** Run dry patches through the barrel until they come out clean and dry.
### Cleaning the Action and Bolt
* **Use Cleaning Solvent:** Apply cleaning solvent to a brush and scrub the action and bolt to remove dirt and residue.
* **Wipe Clean:** Wipe the action and bolt clean with a cloth or patches.
* **Lubricate:** Apply a light coat of gun oil to the action and bolt to prevent rust and ensure smooth operation.
### Cleaning the Trigger Group
* **Use Compressed Air:** Use compressed air to blow out any dirt or debris from the trigger group.
* **Lubricate:** Apply a small amount of gun oil to the moving parts of the trigger group to ensure smooth operation.
## Reassembly of the Ruger American Ranch Gen 2
Reassembly is essentially the reverse of disassembly. Follow these steps carefully, referring to your notes or diagrams if needed.
### Step 1: Reassemble the Trigger Group (If Disassembled)
* **Reinstall Trigger Components:** Carefully reinstall the trigger components in their correct positions, referring to your notes or diagrams.
* **Reinstall Trigger Group Pins:** Use a hammer and punch to carefully drive the trigger group pins back into place.
### Step 2: Reassemble the Bolt (If Disassembled)
* **Reinstall Extractor (If Removed):** Reinstall the extractor and its associated components onto the bolt face.
* **Reinstall Firing Pin Assembly:** Carefully reinstall the firing pin assembly into the rear of the bolt. Be mindful of spring tension.
* **Reinstall Firing Pin Retaining Pin:** Use a punch and hammer to carefully drive the firing pin retaining pin back into place.
### Step 3: Reattach the Stock to the Action
* **Position the Action in the Stock:** Carefully place the barreled action back into the stock.
* **Reinstall Action Screws:** Reinstall the action screws and tighten them to the manufacturer’s recommended torque specifications. Use a torque wrench to ensure proper tightness.
### Step 4: Reinstall the Bolt
* **Position the Bolt Release:** Depress the bolt release lever.
* **Slide the Bolt In:** Slide the bolt back into the receiver until it clicks into place.
### Final Checks
* **Function Test:** Cycle the bolt and dry-fire the rifle to ensure it is functioning properly.
* **Safety Check:** Ensure the safety mechanism is functioning correctly.
## Common Issues and Troubleshooting
Even with careful disassembly and reassembly, you may encounter some common issues. Here are a few troubleshooting tips:
* **Bolt is Difficult to Remove or Reinstall:** Ensure the bolt release lever is fully depressed and that the bolt is aligned correctly with the receiver.
* **Trigger Group Malfunctions:** Double-check the trigger group assembly and ensure all components are in their correct positions. If the issue persists, consult a qualified gunsmith.
* **Action Screws are Difficult to Tighten:** Ensure the action is properly seated in the stock and that the action screws are not cross-threaded.
## Advanced Tips for Ruger American Ranch Gen 2 Disassembly
* **Use a Parts Tray:** Keep all disassembled parts organized in a parts tray to prevent loss or confusion during reassembly.
* **Take Pictures:** Take pictures of each step of the disassembly process to help you remember how to reassemble the rifle.
* **Consult a Gunsmith:** If you are unsure about any part of the disassembly process, consult a qualified gunsmith.
## Advantages of Understanding Disassembly
Understanding the disassembly process for your Ruger American Ranch Gen 2 provides several key advantages. It allows for more thorough cleaning and maintenance, enabling you to keep your rifle in optimal condition. This, in turn, contributes to improved accuracy and reliability. It also empowers you to install aftermarket parts and customize your rifle to your specific needs. Regular disassembly and cleaning can also help identify potential issues before they become major problems, saving you time and money in the long run.
## Real-World Value and User Benefits
The ability to disassemble and maintain your Ruger American Ranch Gen 2 translates to tangible benefits in the field. A clean and well-maintained rifle is more accurate and reliable, increasing your confidence and success during hunting or target shooting. Understanding the rifle’s mechanics also allows you to diagnose and fix minor issues in the field, preventing a potentially ruined hunt or range session. Furthermore, the knowledge gained from disassembly can enhance your overall understanding of firearms and their operation.
## Expert Q&A: Ruger American Ranch Gen 2 Disassembly
Here are some insightful questions and expert answers related to the Ruger American Ranch Gen 2 disassembly:
1. **Q: How often should I disassemble my Ruger American Ranch Gen 2 for cleaning?**
**A:** The frequency depends on your usage. For casual shooters, cleaning after every 200-300 rounds is sufficient. For more frequent use, cleaning after each range session is recommended. If exposed to harsh conditions, clean it immediately.
2. **Q: What type of lubricant is best for the Ruger American Ranch Gen 2?**
**A:** A high-quality gun oil specifically designed for firearms is recommended. Avoid using general-purpose lubricants, as they may not provide adequate protection or may attract dirt and debris.
3. **Q: Can I use a bore snake instead of a cleaning rod and patches?**
**A:** Bore snakes can be convenient for quick cleaning, but they are not as effective as a cleaning rod and patches for removing heavy fouling. It’s best to use a combination of both.
4. **Q: What is the best way to remove stubborn carbon buildup from the bolt face?**
**A:** Use a dedicated carbon cleaner and a nylon brush to scrub the bolt face. Avoid using abrasive materials that could damage the finish.
5. **Q: How do I properly torque the action screws?**
**A:** Consult your rifle’s owner’s manual for the recommended torque specifications. Use a torque wrench to ensure accurate tightening.
6. **Q: What should I do if I lose a small part during disassembly?**
**A:** Contact Ruger or a reputable gun parts supplier to obtain a replacement part. Do not attempt to use a substitute part, as this could compromise the rifle’s safety and reliability.
7. **Q: How can I prevent rust from forming on my Ruger American Ranch Gen 2?**
**A:** Keep the rifle clean and lubricated. Store it in a dry environment and use a rust-inhibiting spray or cloth.
8. **Q: Is it necessary to disassemble the trigger group for routine cleaning?**
**A:** No, trigger group disassembly is not necessary for routine cleaning. However, if you notice any issues with the trigger, such as excessive creep or a heavy pull, it may be necessary to disassemble it for inspection and cleaning.
9. **Q: What are the signs that my Ruger American Ranch Gen 2 needs professional gunsmithing?**
**A:** If you experience any malfunctions, such as failures to feed, extract, or fire, or if you notice any damage to the rifle, consult a qualified gunsmith.
10. **Q: Are there any online resources for Ruger American Ranch Gen 2 disassembly?**
**A:** Yes, there are many online resources, including videos and forums, that can provide additional information and guidance on Ruger American Ranch Gen 2 disassembly. However, always verify the information with your owner’s manual and exercise caution.
## Conclusion: Mastering Ruger American Ranch Gen 2 Disassembly
Mastering the disassembly process for your Ruger American Ranch Gen 2 is an invaluable skill for any responsible firearm owner. By following this comprehensive guide, you can confidently and safely disassemble, clean, and maintain your rifle, ensuring its continued accuracy, reliability, and longevity. Remember to always prioritize safety, use appropriate tools, and consult a qualified gunsmith if you have any doubts or concerns. By understanding the inner workings of your rifle, you’ll gain a deeper appreciation for its design and function, enhancing your overall shooting experience. Now that you are armed with this knowledge, share your experiences with disassembly ruger american ranch gen2 in the comments below, or explore our advanced guides to firearm maintenance for even greater insights.
