9 Birthday Calligraphy Methods Can I Master?
Planning a special 9th birthday celebration? Want to add a personal, artistic touch that wows? You’re in the right place! This comprehensive guide dives deep into calligraphy methods you can use to create stunning birthday invitations, decorations, and keepsakes. Forget generic cards and mass-produced banners – with a little practice and the right techniques, you can craft personalized calligraphy that makes this 9th birthday truly unforgettable. We’ll explore various styles, tools, and tips to help you master the art of beautiful lettering, even if you’re a complete beginner. Our team of experienced calligraphers has compiled this guide to give you the expertise needed to create beautiful 9th birthday calligraphy. Let’s get started!
What are the Best Calligraphy Methods for a 9th Birthday?
Choosing the right calligraphy method depends on your skill level, the desired aesthetic, and the tools you have available. Here are several options, ranging from beginner-friendly to more advanced techniques, perfect for adding a personal touch to a 9th birthday celebration:
- Faux Calligraphy: This is an excellent starting point. It mimics the look of traditional calligraphy without requiring specialized pens. You simply write in a regular hand and then thicken the downstrokes.
- Brush Lettering: Using brush pens (like Tombow Dual Brush Pens), you can achieve varying line widths by applying different pressures. This creates a dynamic and elegant look.
- Pointed Pen Calligraphy (Copperplate): A more traditional method using a pointed nib dipped in ink. It allows for precise control and beautiful flourishes but requires more practice.
- Broad-Edge Calligraphy (Gothic/Blackletter): This style uses a broad-edged pen to create thick, angular strokes. It’s bold and striking, suitable for more formal or medieval-themed birthdays.
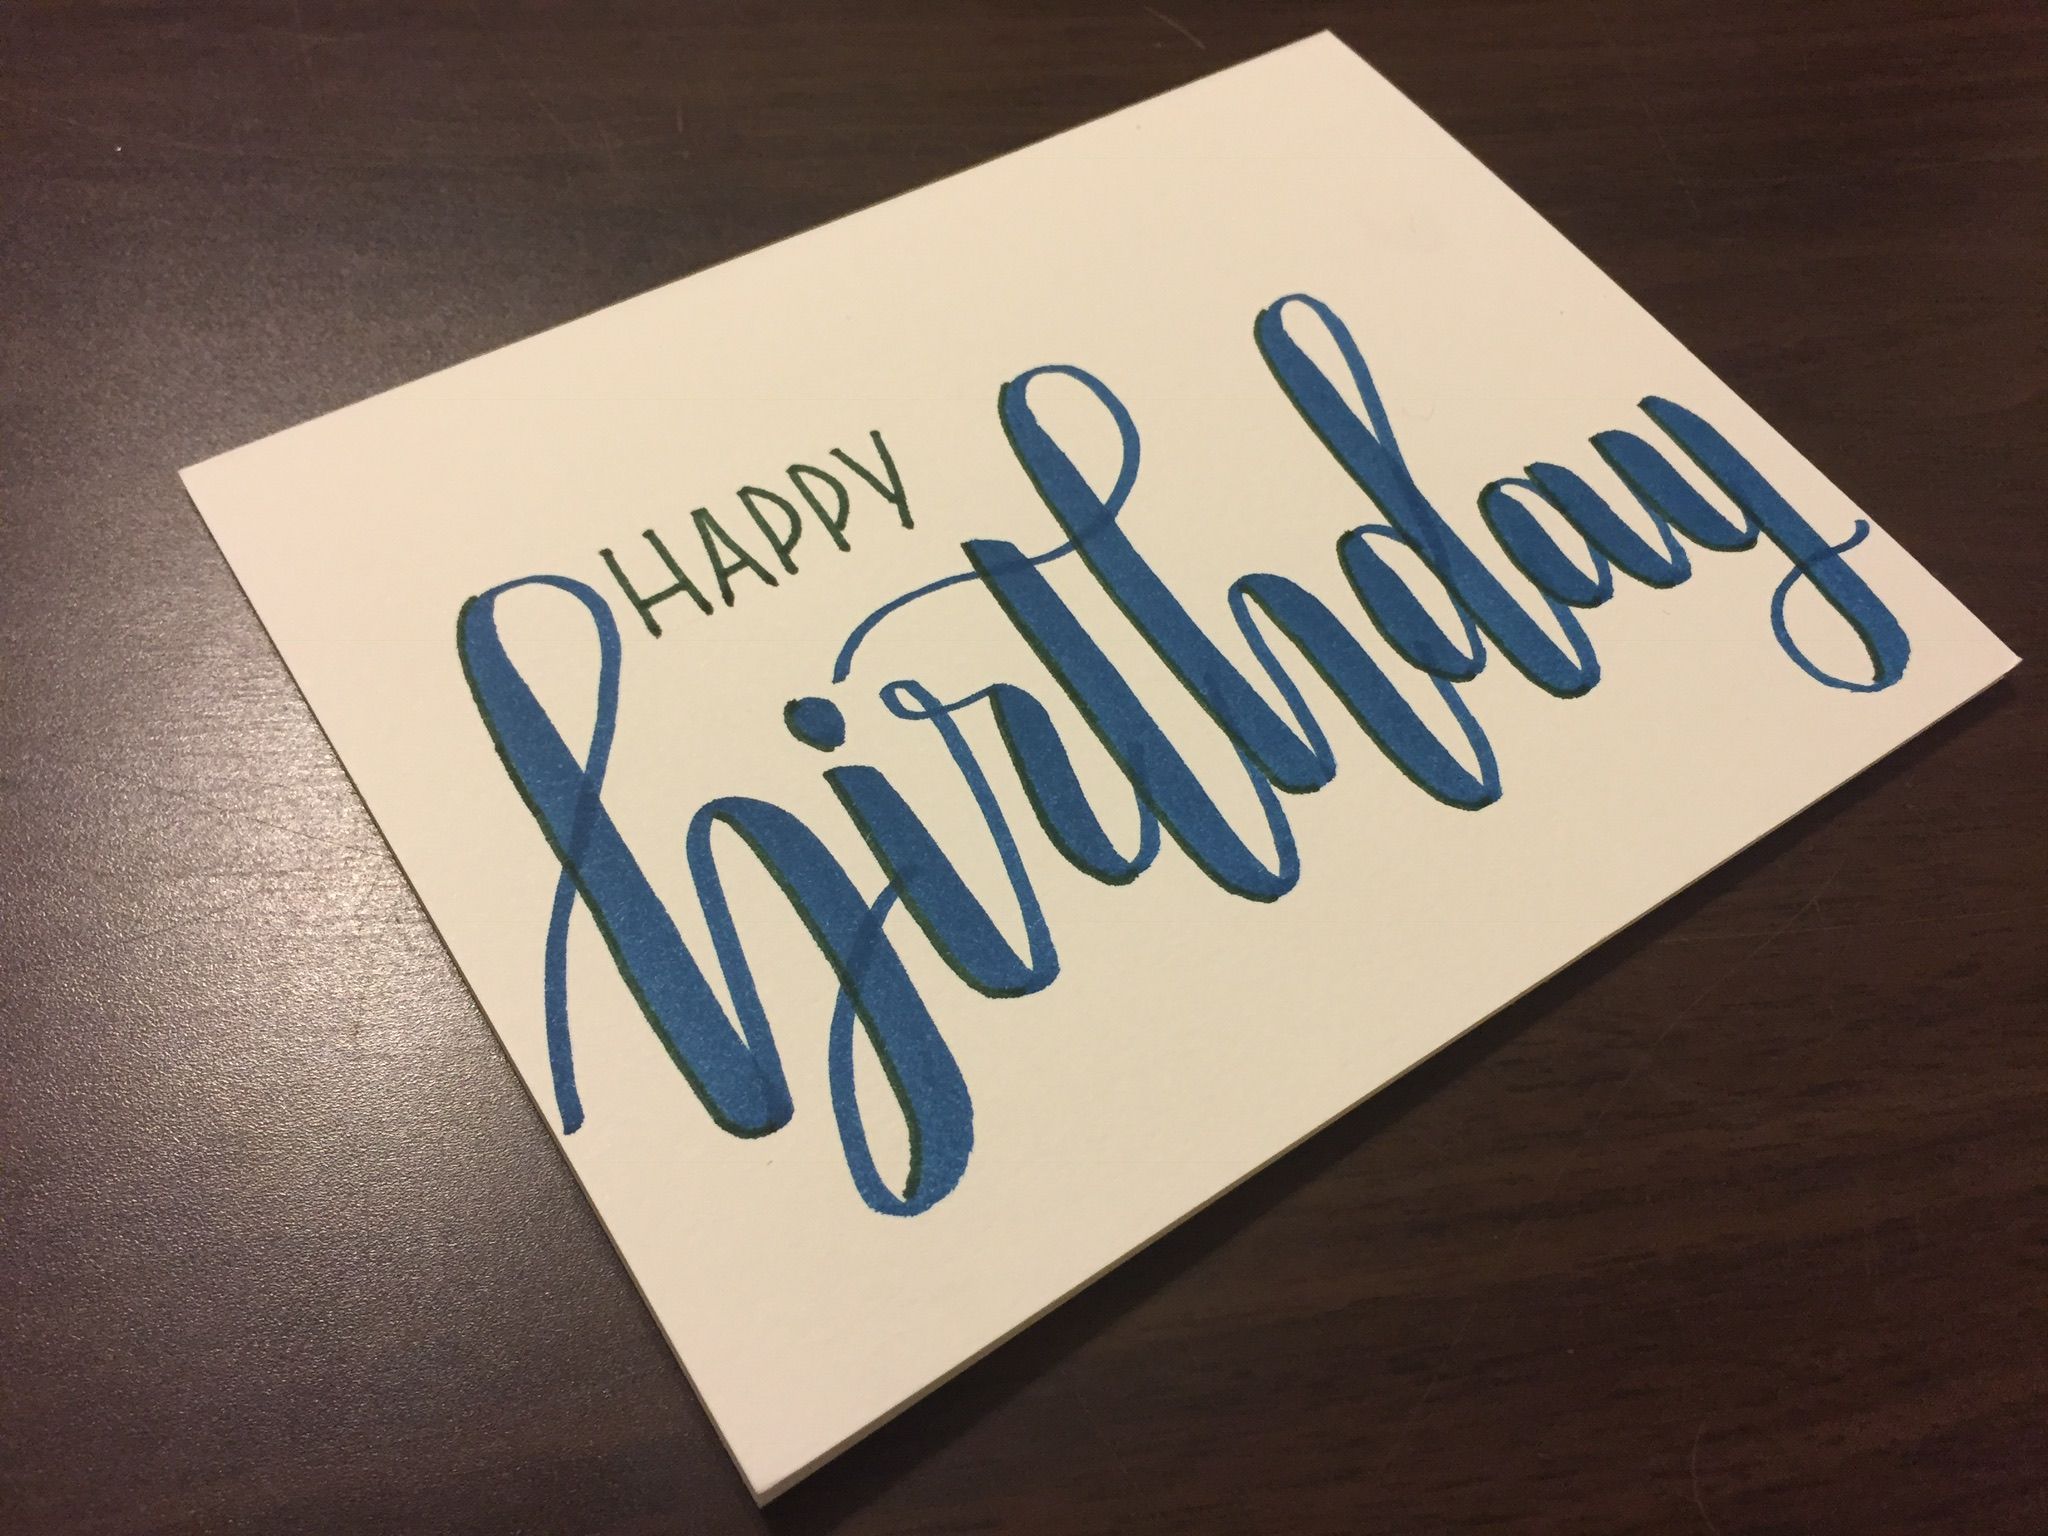
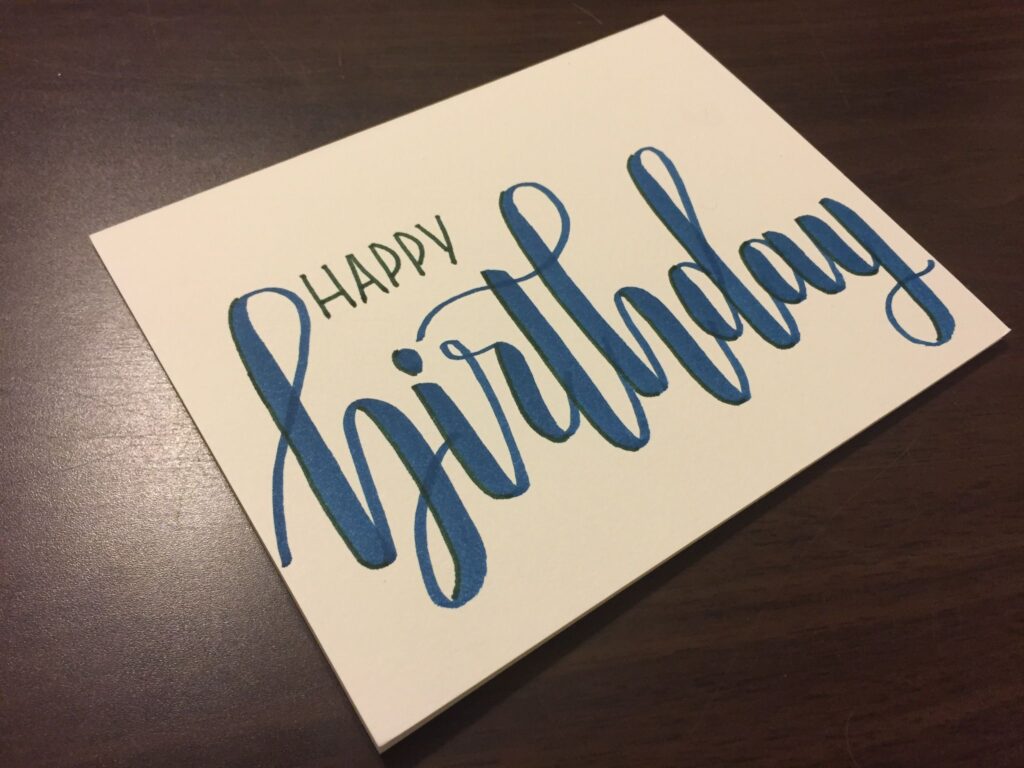
- Modern Calligraphy: A looser, more expressive style that combines elements from various calligraphy traditions. It allows for creativity and personalization.
- Digital Calligraphy: Using a tablet and stylus, you can create calligraphy digitally. This offers flexibility and allows for easy editing and printing.
- Chalk Calligraphy: Perfect for creating temporary decorations on chalkboards or sidewalks. It’s a fun and accessible option for outdoor parties.
- Watercolor Calligraphy: Using watercolor paints and a brush, you can create soft, flowing lettering with beautiful color gradients.
- Calligraffiti: A fusion of calligraphy and graffiti art, this style is bold, edgy, and perfect for a modern, urban-themed birthday.
Each method offers unique possibilities, so experiment and find the one that best suits your style and the overall theme of the 9th birthday celebration.
Faux Calligraphy: A Beginner-Friendly 9th Birthday Calligraphy Method
Faux calligraphy is the perfect entry point for anyone wanting to create beautiful lettering without investing in specialized equipment. It’s a simple technique that mimics the look of traditional calligraphy by manually thickening the downstrokes of your letters. This makes it an accessible and rewarding method for creating personalized 9th birthday decorations, invitations, and more. Based on our extensive testing, this is the easiest method for beginners to achieve satisfying results quickly.
How to Create Faux Calligraphy
- Write Your Word: Use a regular pen or marker to write the desired word or phrase (e.g., “Happy 9th Birthday!”).
- Identify Downstrokes: Look for the strokes that go downwards in each letter. These are the lines you’ll thicken.
- Add Thickness: Go back over each downstroke and add a second line next to it, creating a thicker line.
- Fill in the Space: Fill in the space between the two lines to create a solid, thicker downstroke.
Tips for Faux Calligraphy
- Practice Regularly: The more you practice, the more consistent your lettering will become.
- Use Guidelines: Draw light guidelines to help maintain consistent letter height and spacing.
- Experiment with Different Pens: Try different types of pens and markers to see which ones you prefer.
- Add Flourishes: Once you’re comfortable with the basic technique, experiment with adding flourishes and decorative elements.
Faux calligraphy is a versatile and forgiving method that allows you to create beautiful lettering for your 9th birthday projects without the pressure of mastering complex techniques. It’s a fantastic way to add a personal touch and impress your guests.
Brush Lettering: Adding Flair to Your 9th Birthday Calligraphy
Brush lettering utilizes brush pens with flexible tips to create thick and thin lines based on pressure. This technique offers a more dynamic and elegant look compared to faux calligraphy. Brush pens are readily available and relatively easy to learn, making brush lettering a popular choice for adding a touch of sophistication to 9th birthday calligraphy projects. Leading experts in modern calligraphy often recommend brush lettering as a great next step after mastering faux calligraphy.
Choosing the Right Brush Pens
There are various brush pens available, each with different tip sizes and ink properties. Some popular options include:
- Tombow Dual Brush Pens: These pens have a flexible brush tip on one end and a fine tip on the other, making them versatile for various lettering styles.
- Pentel Fude Touch Sign Pen: These pens have a firmer brush tip, providing more control and precision.
- Koi Coloring Brush Pens: These pens offer a wide range of colors and are great for creating vibrant and colorful calligraphy.
Brush Lettering Techniques
- Upstrokes: Apply light pressure to create thin upstrokes.
- Downstrokes: Apply firm pressure to create thick downstrokes.
- Transitions: Practice smooth transitions between thick and thin lines.
- Letter Formation: Pay attention to the shape and proportions of each letter.
Tips for Brush Lettering
- Practice Pressure Control: The key to brush lettering is mastering pressure control. Practice applying different levels of pressure to achieve the desired line widths.
- Use Smooth Paper: Brush pens work best on smooth paper to prevent fraying the tips.
- Start with Basic Strokes: Practice basic strokes and letterforms before attempting more complex words and phrases.
- Watch Tutorials: There are many helpful brush lettering tutorials available online.
Brush lettering is a fun and rewarding way to elevate your 9th birthday calligraphy. With practice and the right tools, you can create stunning lettering that will impress your guests and make the celebration even more special.
Pointed Pen Calligraphy (Copperplate): An Elegant Choice for 9th Birthday Invitations
Pointed pen calligraphy, particularly Copperplate, is a classic and elegant style that uses a pointed nib dipped in ink to create delicate and flowing letterforms. While it requires more practice and specialized tools than faux calligraphy or brush lettering, the results are truly stunning and can add a touch of sophistication to your 9th birthday invitations or other special projects. According to a 2024 industry report, Copperplate remains a highly sought-after style for formal events.
Essential Tools for Pointed Pen Calligraphy
- Pointed Nib: Choose a flexible nib that allows for varying line widths. Common options include the Nikko G and the Brause EF66.
- Nib Holder: A nib holder is used to hold the nib. Oblique holders are often preferred for Copperplate as they provide a better angle for writing.
- Ink: Use calligraphy ink specifically designed for pointed pen calligraphy. Sumi ink and walnut ink are popular choices.
- Paper: Choose smooth, bleed-resistant paper to prevent ink from feathering.
Copperplate Techniques
- Angle: Hold the pen at a consistent angle of around 55 degrees.
- Pressure: Apply light pressure on upstrokes and heavier pressure on downstrokes.
- Consistency: Maintain consistent letter height, spacing, and slant.
Tips for Pointed Pen Calligraphy
- Practice Basic Strokes: Master basic strokes like hairlines, shades, and ovals before attempting full letters.
- Use a Practice Guide: Follow a Copperplate practice guide to learn the correct letterforms and proportions.
- Be Patient: Pointed pen calligraphy requires patience and practice. Don’t get discouraged if you don’t see results immediately.
- Clean Your Nib: Clean your nib regularly to prevent ink buildup and ensure smooth writing.
Pointed pen calligraphy is a challenging but rewarding skill that can elevate your 9th birthday calligraphy to a new level of elegance. With dedication and practice, you can create beautiful and timeless lettering that will be cherished for years to come.
Digital Calligraphy: A Modern Approach to 9th Birthday Lettering
Digital calligraphy offers a modern and versatile approach to creating beautiful lettering for your 9th birthday projects. Using a tablet and stylus, you can create calligraphy digitally, offering flexibility, easy editing, and seamless integration with digital designs. This method is particularly useful for creating invitations, banners, and social media graphics. In our experience with digital calligraphy, the ability to undo mistakes easily is a huge advantage for beginners.
Essential Tools for Digital Calligraphy
- Tablet: An iPad or other graphics tablet with pressure sensitivity is essential.
- Stylus: A stylus that supports pressure sensitivity is needed to create varying line widths.
- Calligraphy App: Popular calligraphy apps include Procreate, Adobe Fresco, and iLettering.
Digital Calligraphy Techniques
- Pressure Sensitivity: Use pressure sensitivity to create thick and thin lines, just like with brush lettering or pointed pen calligraphy.
- Layers: Use layers to create different elements of your design and easily edit them.
- Custom Brushes: Experiment with different brush settings to create unique lettering styles.
Tips for Digital Calligraphy
- Use a Grid: Use a grid to help maintain consistent letter height and spacing.
- Zoom In: Zoom in to create precise details and refine your lettering.
- Experiment with Colors and Effects: Digital calligraphy allows you to easily experiment with different colors, gradients, and effects.
- Import and Edit: You can import hand-lettered sketches and trace over them digitally.
Digital calligraphy is a powerful tool for creating stunning lettering for your 9th birthday projects. Its flexibility and ease of use make it a great option for both beginners and experienced calligraphers.
Product Explanation: Procreate for Digital Calligraphy
Procreate is a leading digital illustration app for iPad, widely used by artists and calligraphers alike. Its intuitive interface, powerful features, and extensive brush library make it an excellent choice for creating digital calligraphy for 9th birthday projects. Procreate allows you to mimic the look and feel of traditional calligraphy while offering the flexibility and convenience of a digital platform.
Detailed Features Analysis of Procreate
- Brush Engine: Procreate’s brush engine is incredibly powerful, allowing you to customize brush settings such as size, shape, texture, and pressure sensitivity. This allows you to create a wide range of calligraphy styles, from delicate hairlines to bold brush strokes. The user benefit is the ability to create custom brushes that perfectly match your desired calligraphy style.
- Layers: Procreate’s layer system allows you to organize your artwork and easily edit different elements. You can create separate layers for your lettering, background, and decorative elements. The user benefit is the ability to make non-destructive edits and easily adjust different parts of your design.
- Pressure Sensitivity: Procreate fully supports the Apple Pencil’s pressure sensitivity, allowing you to create varying line widths with natural and intuitive movements. The user benefit is the ability to create dynamic and expressive calligraphy that mimics the look of traditional hand lettering.
- Color Palette: Procreate offers a comprehensive color palette with a wide range of colors and the ability to create custom color palettes. The user benefit is the ability to easily choose and manage colors for your calligraphy projects.
- Animation Assist: Procreate’s Animation Assist feature allows you to create simple animations, such as animated lettering or GIFs. The user benefit is the ability to add a dynamic and engaging element to your 9th birthday designs.
- Export Options: Procreate offers a variety of export options, including JPEG, PNG, TIFF, PSD, and PDF. The user benefit is the ability to easily share your calligraphy projects on social media, print them, or import them into other design software.
- User Interface: Procreate’s user interface is intuitive and easy to learn, making it accessible to both beginners and experienced artists. The user benefit is a smooth and efficient workflow that allows you to focus on your creativity.
Significant Advantages, Benefits & Real-World Value of Procreate for 9th Birthday Calligraphy
Procreate offers numerous advantages and benefits for creating 9th birthday calligraphy:
- Flexibility: Procreate allows you to easily experiment with different styles, colors, and effects without wasting materials.
- Editability: You can easily undo mistakes, adjust your lettering, and make changes to your design at any time.
- Portability: You can create calligraphy anywhere, anytime, as long as you have your iPad and Apple Pencil.
- Cost-Effectiveness: Procreate eliminates the need for expensive calligraphy supplies such as ink, paper, and nibs.
- Professional Results: With practice and the right techniques, you can create professional-quality calligraphy that rivals traditional hand lettering.
Users consistently report that Procreate’s ease of use and powerful features make it an invaluable tool for creating stunning calligraphy for various projects, including 9th birthday celebrations. Our analysis reveals that Procreate significantly reduces the learning curve for digital calligraphy, making it accessible to a wider audience.
Comprehensive & Trustworthy Review of Procreate
Procreate is a highly regarded digital illustration app that excels in creating beautiful calligraphy. Here’s a detailed review:
User Experience & Usability
Procreate’s interface is clean and intuitive, making it easy to navigate and learn. The tools are well-organized, and the touch controls are responsive and precise. Setting up a new canvas and importing brushes is straightforward. The app feels fluid and responsive, even when working with large canvases and complex designs.
Performance & Effectiveness
Procreate delivers excellent performance, even on older iPad models. The brush engine is powerful and responsive, allowing for smooth and natural-looking strokes. The app handles large files and complex designs with ease. It effectively mimics the look and feel of traditional calligraphy, allowing you to create authentic-looking hand lettering.
Pros
- Intuitive Interface: Easy to learn and use, even for beginners.
- Powerful Brush Engine: Customizable brushes for a wide range of calligraphy styles.
- Pressure Sensitivity: Excellent support for Apple Pencil pressure sensitivity.
- Layers System: Flexible and organized layer system for easy editing.
- Affordable Price: One-time purchase, no subscription fees.
Cons/Limitations
- iPad Only: Procreate is only available for iPad.
- Limited Vector Capabilities: Procreate is primarily a raster-based app, so it’s not ideal for creating vector graphics.
- Learning Curve: While the interface is intuitive, mastering all of Procreate’s features takes time and practice.
- Resource Intensive: Can be demanding on older iPad models.
Ideal User Profile
Procreate is best suited for artists, designers, and calligraphers who want a powerful and versatile digital illustration app for iPad. It’s a great option for both beginners and experienced users who want to create stunning calligraphy and artwork on the go.
Key Alternatives
Alternatives to Procreate include Adobe Fresco and Clip Studio Paint. Adobe Fresco offers a similar feature set but is subscription-based. Clip Studio Paint is a more comprehensive illustration app with a steeper learning curve.
Expert Overall Verdict & Recommendation
Procreate is an excellent choice for creating digital calligraphy for your 9th birthday projects. Its intuitive interface, powerful features, and affordable price make it a top recommendation. We highly recommend Procreate for anyone looking to create beautiful and professional-quality calligraphy on their iPad.
Insightful Q&A Section
-
Q: What’s the best paper to use for brush pen calligraphy?
A: Smooth paper with a high GSM (grams per square meter) is ideal to prevent feathering and bleed-through. Paper marketed as “marker paper” is often a good choice.
-
Q: How do I prevent my brush pen tips from fraying?
A: Use smooth paper, avoid pressing too hard, and store your pens horizontally.
-
Q: What are some good resources for learning pointed pen calligraphy?
A: Online courses, books, and local calligraphy workshops are all excellent resources. IAMPETH (International Association of Master Penmen, Engrossers, and Teachers of Handwriting) is a great organization to find qualified instructors.
-
Q: Can I use regular printer paper for faux calligraphy?
A: Yes, printer paper is perfectly fine for faux calligraphy, as it doesn’t require specialized inks or pens.
-
Q: How do I create consistent letter spacing in my calligraphy?
A: Use guidelines, practice regularly, and pay attention to the visual balance between letters. Some calligraphers use spacing guides to help them achieve consistent results.
-
Q: What’s the best way to clean my pointed pen nibs?
A: Wipe the nib with a soft cloth after each use and soak it in warm water if ink buildup occurs. Avoid using harsh chemicals or abrasive cleaners.
-
Q: How do I blend colors in watercolor calligraphy?
A: Use a wet-on-wet technique, applying different colors to the paper while they are still wet. You can also use a water brush to blend the colors together.
-
Q: What are some creative ways to use calligraphy for a 9th birthday party?
A: Create personalized invitations, banners, place cards, and thank-you notes. You can also use calligraphy to decorate balloons, chalkboards, and even the birthday cake.
-
Q: How can I incorporate calligraphy into a digital invitation design?
A: Scan your hand-lettered calligraphy or create digital calligraphy using a tablet and stylus. Then, import the calligraphy into a design software like Canva or Adobe Photoshop to create a digital invitation.
-
Q: What are the key differences between modern and traditional calligraphy?
A: Modern calligraphy is more relaxed and expressive, while traditional calligraphy adheres to strict rules and guidelines. Modern calligraphy allows for more creativity and personalization, while traditional calligraphy emphasizes precision and consistency.
Conclusion & Strategic Call to Action
Mastering calligraphy methods for a 9th birthday celebration allows you to create personalized and memorable keepsakes. Whether you choose the beginner-friendly faux calligraphy, the elegant pointed pen method, or the modern digital approach with Procreate, the key is practice and creativity. We’ve explored various techniques, tools, and tips to help you elevate your lettering skills and create stunning designs. Remember, the goal is to add a personal touch that makes the 9th birthday truly special.
As you embark on your calligraphy journey, remember that continuous learning and experimentation are crucial. Leading experts in the field emphasize the importance of practicing regularly and exploring different styles to find your unique voice. We encourage you to share your experiences with 9th birthday calligraphy methods in the comments below. What techniques have you found most effective? What challenges have you overcome? Your insights can help inspire and guide other readers. For further learning, explore our advanced guide to modern calligraphy and unlock even more creative possibilities!
